How To Deep Clean Your Bathroom And Keep It Clean
We may receive a commission on purchases made from links.
Bathrooms see a lot of dirt throughout the week. Give your bathroom a deep cleaning and set up a plan to keep it clean. A clean bathroom is a good feeling in the morning when you're getting ready for the day. For one thing, you immediately see one less chore you have to do. The bathroom is clean so scratch that off your list.
There are other benefits as well. A clean bathroom is a fresh-feeling bathroom. Your toilets, sinks, and floors can start to smell when not clean. Bacteria and mold love to grow in dirty bathrooms, but a clean one scares all that away. What if guests suddenly visit? If they need to use the restroom, you won't be in a panic. It's clean and free of bacteria, so you can comfortably point them to it.
A deep clean now and then is important because it makes regular bathroom cleaning easier. If you clean your bathroom once a week, you probably aren't getting into the corners and washing light fixtures each time. The deep clean takes care of those unnoticed issues that can get pretty gross when left for too long. Here is everything you need to know about how to deep clean your bathroom and keep it clean. Roll up your sleeves, and let's get started.
Cleaning tools you'll need
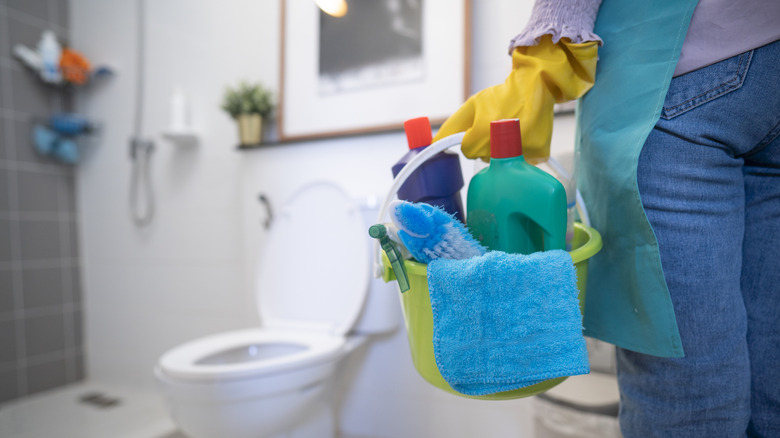
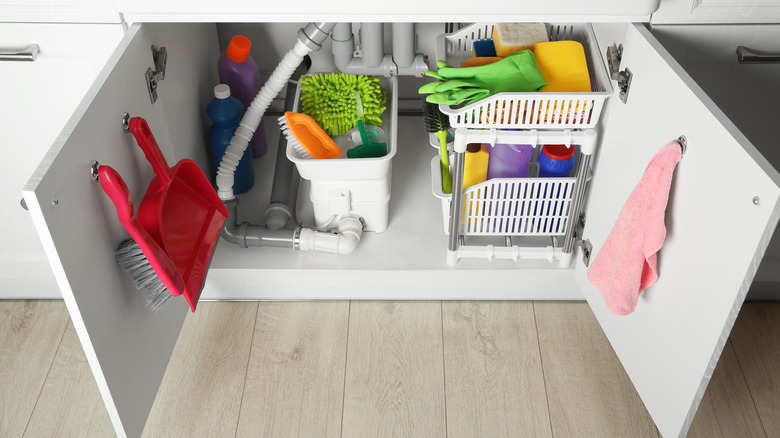
A thorough bathroom cleaning requires specific tools that shouldn't be used in kitchens and other rooms for sanitary reasons. To stay organized, keep most of them together in a bucket and stash them in the bathroom or hallway cabinet. That way, no one has to run up and down steps or from room to room to get everything.
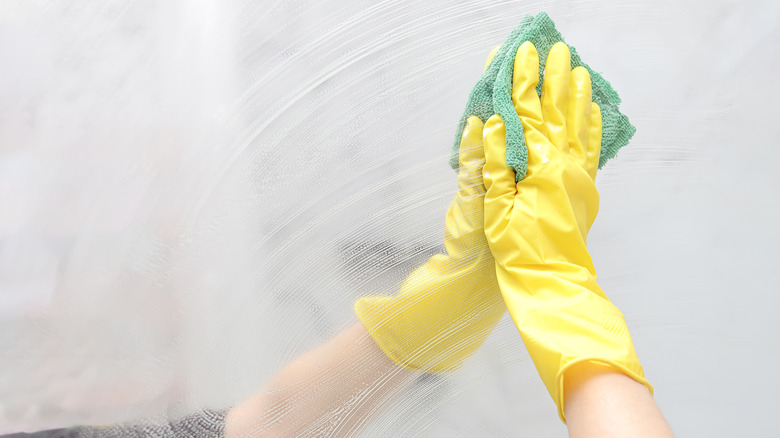
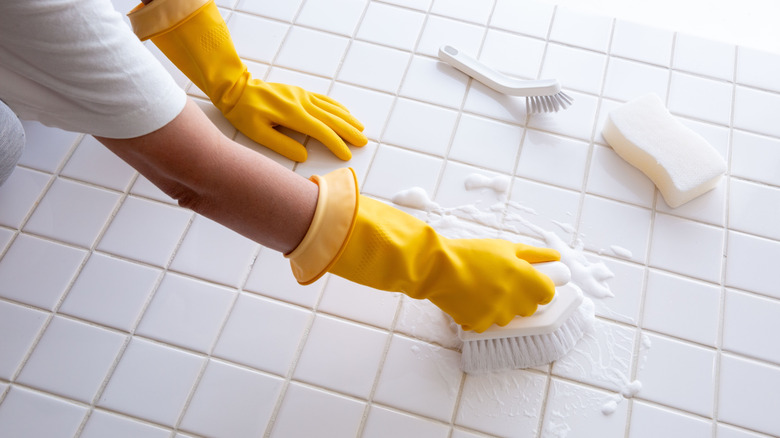
The first tool is obvious: a sturdy toilet brush. Choose a tapered cleaning tool like Hamitor's Toilet Brush that can get up under the rim, and clean it with disinfectant after each use. A tool like SXhyf's Hard Bristle Crevice Cleaning Brush can work mold and mildew remover into the tile joints and is also great for getting behind faucets. Use a wider scrub brush to remove hard water stains and soap scum from other surfaces. You'll also want to have an old toothbrush, a broom, a floor vacuum, and a mop handy. Remember to keep a pair of rubber gloves in there, too, to protect your hands and nails when cleaning. And stash some extra paper towels and microfiber cloths in the bathroom to dry and polish things up after each task is completed.
Bathroom deep-cleaning products
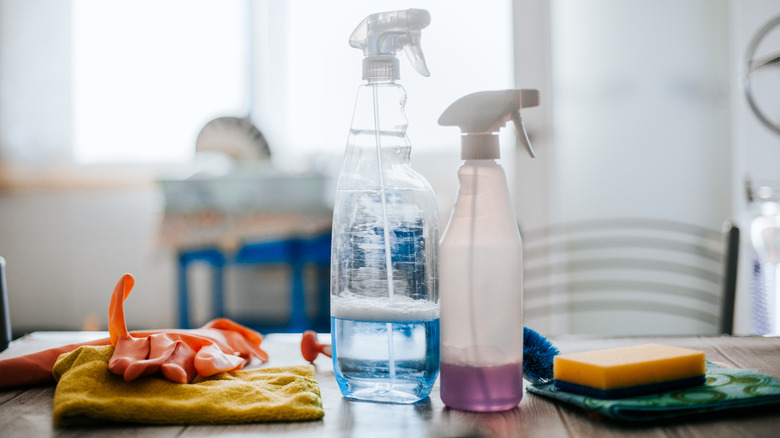
When it comes to bathroom deep cleaning products, people have different preferences. Some like a strong scouring powder for sinks, while others go for foaming cleaners or homemade concoctions. Having a reliable toilet bowl cleaner with a narrow end that can also be directed up under the rim is important for thorough cleanings, too. You should also have a bathroom cleaning and sanitizing spray, a glass cleaner, and a mold and mildew remover like CLR's Bleach-Free Foaming Spray.
An all-purpose bathroom cleaner can deep clean most everything else, and it's also easy to make your own in an empty 16-ounce spray bottle. Add in 2 tablespoons of gentle dish soap, 1 tablespoon of baking soda, and your favorite essential oil. Fill the bottle with warm water and spritz away, but let the mixture sit on the surface longer for deep cleaning. Anyone who prefers eco-friendly solutions can keep extra vinegar, bleach, and baking soda in the cleaning supplies bucket. Those can be used in different combinations in spray bottles or worked into effective cleaning pastes.
Start at the top
It's best to start at the top and work your way down to bring the dirt down. Grab a duster and start hunting in the corners of the bathroom ceiling. Cobwebs, dust, and other mysteries lurk in those areas. Using a step stool or ladder, climb up and use a rag or whatever you like to dust (a broom works well in corners) and knock down anything hiding up high. While you're up there, look for any dust floating across the ceiling. You'd be surprised what you might find. We don't look up a lot. After the ceilings, it's time to focus on the walls.
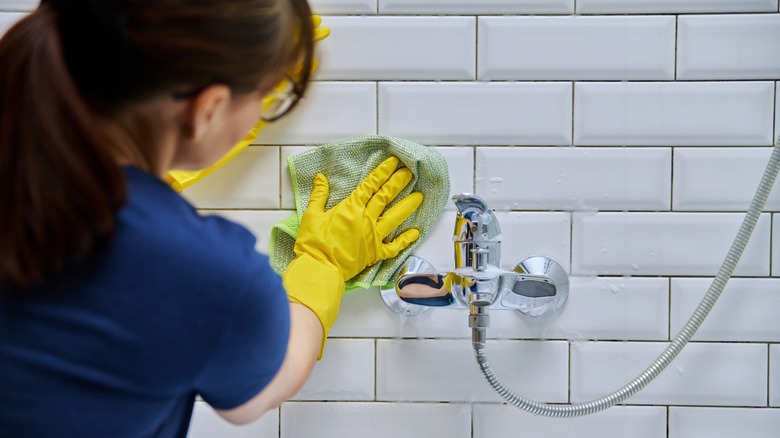
Bathroom walls are a magnet for spray and dirt. A mild dish soap with warm water and a soft sponge can clean most walls. If your bathrooms have flat paint, you need to be more careful. Flat, satin, and eggshell finishes rub off more easily than others. With a soft, damp sponge, scrub very gently. Semi-gloss and gloss are more durable, and you can scrub more.
Shine the light fixtures and unclog the bathroom fan

What is coating the bathroom light fixtures? Dust mixed with hairspray, dry shampoo, and other yummy bath and body products to make you smell good leaves stickiness behind. When left to create layer after layer, it can seem like you need a chisel to get the stuff off. Your bathroom might get a lot brighter after you clean the light fixtures. In fact, built-up dust and grime on our lights can make them appear up to 30 percent less bright. That's quite a difference. Keeping them clean is essential so you can see your beautiful face in the mirror. Gather your supplies, including a soft rag, a bucket of warm water mixed with a drop of a mild cleaner like Dawn Dish Soap, and a dry towel. Turn off the lights if you can still see. The brightness from the bulbs can hurt your eyes, and the bulbs get hot. Carefully and gently remove any light covers and wash them with warm water. You can also soak them in the kitchen sink. Gently wipe off light bulbs with a dry towel to remove dust. Replace the fixture covers once they're dry.
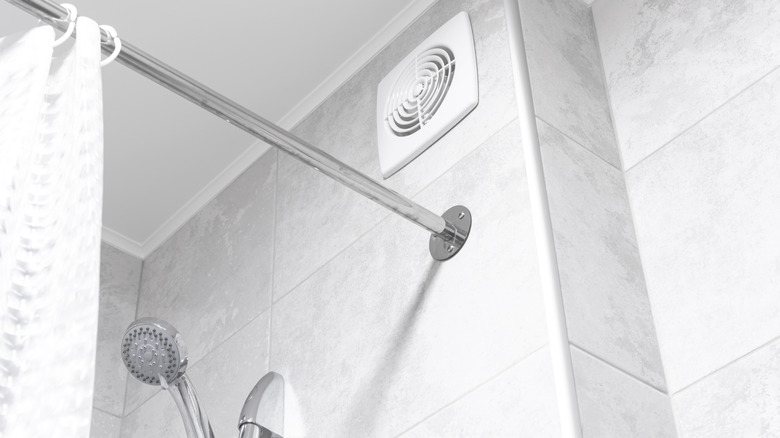
Some lights, such as crystal chandeliers or beaded lampshades, require more care. Vacuum shades to remove dust and give yourself enough time to wipe off things like dangling crystals with a damp rag. Once the lights are clean, locate the vent for your bathroom fan. If you aren't sure where it's at, turn on the fan and follow your ear. The cover might screw off, and you can take it down to wash it in your kitchen sink. If not, you can vacuum it with a hose attachment to remove the globs of dust.
See yourself better in the mirror
Is your bathroom mirror looking a little foggy? If it's beyond what glass cleaner can save, you may need to wash your mirror with something stronger. Mix half a cup of distilled water with half a cup of white vinegar and one tablespoon of corn starch in a spray bottle. Shake it up to mix well. Use a clean rag dipped in a small amount of rubbing alcohol to remove things like sticky hairspray spots.
After that, spray your mixed solution all over the mirror and wipe it with a dry microfiber cloth or crumpled-up newspaper until dry and streak free. This tip should do the trick. Clean your mirror regularly to avoid getting that foggy look again. You can make your own daily glass cleaner in a spray bottle, using one cup of rubbing alcohol, three drops of liquid dish soap, and one cup of distilled white vinegar. Shake it up and use it daily or weekly on your bathroom mirror.
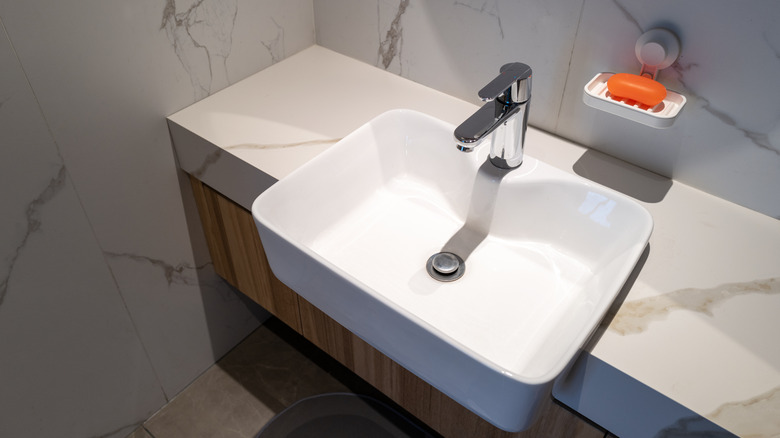
Clean the sinks, faucets, and counters
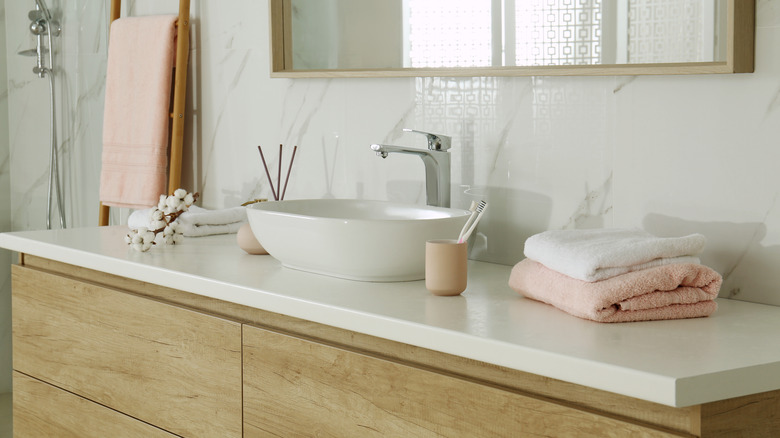
This part is the area where everything falls. Toothpaste, make-up, and plenty of splashed water can cover a sink and counter. Cleaning it all is quite fulfilling when you get good results.
Clear off your counter and spray the whole area with an all-purpose spray like Method Bathroom Cleaner. If you have granite counters, use warm, soapy water and a soft rag to clean them. Never use cleaners with vinegar, lemon, ammonia, or bleach. The acid isn't good for your granite. The same goes for marble. Also, avoid anything abrasive, such as steel wool, on your countertops since it can scratch them. If you have stubborn stains, apply a baking soda paste and let it sit for a few minutes before wiping it away. Sinks are similar. Clean them with a soft rag and gentle cleanser, nothing abrasive, so there is no scratching. You can do the same with your faucets. Wipe everything dry with a soft towel and buff to get a shiny surface.
Scrub the vanity and hardware
This project is a deep cleaning, so no area gets left behind. The vanity needs to be washed, as does all the hardware. You'll be surprised at what's dripped onto the vanity when you get on the floor to see it closely. You also may question your family, wondering, does anyone get toothpaste in the sink?
Many vanities are wood, so let's talk about how to clean wood cabinets. For unpainted cabinets, gather one bucket of clear, warm water, one bucket with wood cleaner (like Murphy's Oil Soap) mixed with water, an old toothbrush, and a couple of soft rags. Using the cleaning solution and a rag, wash your cabinets. Use the toothbrush to get in tight corners and crevices. Use another rag dipped in the clear water to rinse. Dry the cabinets thoroughly.
Use warm water and dish soap for normal build-up if you have painted cabinets. If they are beyond normal, use a mixture of one cup of vinegar, two cups of warm water, and one tablespoon of baking soda. You can also add a drop of dish soap for extra cleaning power. Wipe down the hardware with a wet rag, or you can remove it and wash it in the sink.
Rid the shower of soap scum and the tub of dust
You would think a shower is always clean since you use it daily, running water and soap through it. However, the soap leaves a trail of scum behind. It takes some elbow grease and determination to get rid of it. Use any of your favorite shower cleaners to get the job done. You can also grab a 32-ounce spray bottle and mix one cup of Dawn dish detergent with white vinegar (fill the spray bottle the rest of the way with the vinegar). Whichever you choose, coat your shower, including any glass doors and tub, with the spray. Let it sit for at least 30 minutes, then wipe away with a sponge. You may need to scrub a bit first before wiping it all away, depending on how severe your soap scum issue is.
Now, let's talk jet tubs. The bane of your existence? They were a hot item in the nineties, but today most people are simply trying to figure out how to keep them clean. You can clean your jetted tub as you would any other. However, there are some serious dust bunnies living in the jets. It's time to make them come out, along with any dirt and grime hiding there. Fill your jetted tub with hot water and add some bathroom cleaner. Turn your jets on high and let them run for 15 minutes. You'll likely see your water turn a color you hope to never see again. The hot water mixed with the cleanser and circulation from the jets will pull out a lot of dirt. Drain the tub and then give it a cleaning.
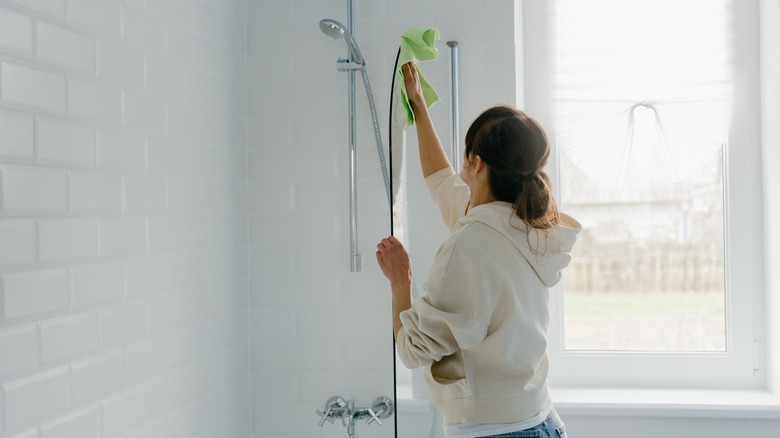
Descale the showerhead
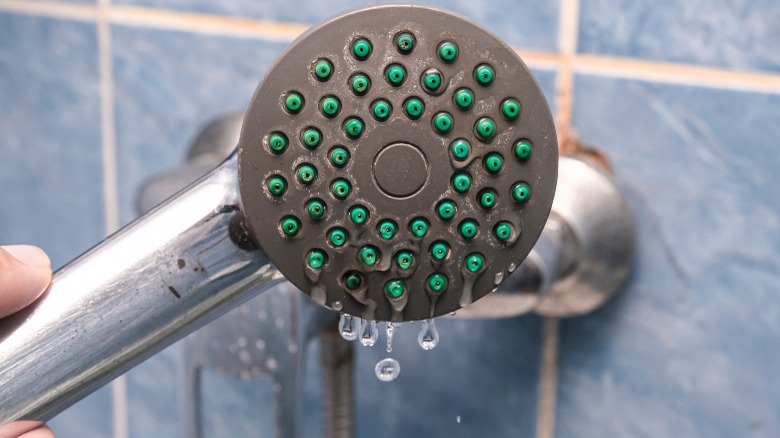
An often-used showerhead might not be the dirtiest thing in a bathroom, but it can get clogged up, especially when the home has hard water. That leaves behind mineral deposits known as limescale, which can lead to mold, bacteria, and poor water flow. Once it is descaled, the difference will be noticeable. Vinegar is great for getting rid of hard water build-up on faucets and showerheads because it's acidic — making it limescale's worst enemy.
If the showerhead is removable, detach it from the arm and dunk it into a bucket filled with white vinegar. Set a timer for 30 minutes, and attend to the other bathroom cleaning duties. After the beep, use an old toothbrush to scrub away the loosened limescale and rinse the showerhead with clean water. For attached, unremovable showerheads, get a strong plastic bag and a rubber band. Fill the bag with enough vinegar to cover the showerhead, secure it to the arm with the rubber band, and wait 30 minutes. It's also a good idea to flush the showerhead with water when finished to wash away any remaining limescale.
Wash all the curtains and window treatments
Now is the time to take down a shower curtain and window curtains if you have them. Shower curtains collect mildew and mold after some time, and window curtains collect dust. There's no need to throw away the shower curtain and buy a new one. You can let your washing machine take care of it and the plastic liner. If the label says it's washable, throw the curtain into the washing machine, removing any hooks and rings. Use your regular detergent as you normally would, plus half a cup of baking soda. Add a couple of towels to the machine for extra scrubbing power. Wash with warm water on a gentle cycle.
During the rinse cycle, add half a cup of white vinegar. After it's all done, hang the curtain to dry. For window curtains, wash on the gentle cycle with cold water, using your regular detergent, then hang to dry. You don't want to risk any shrinkage since many curtains are 100 percent cotton. Hang everything back up for a dust-free, mildew-free, and mold-free bathroom.
Make the toilet look like new
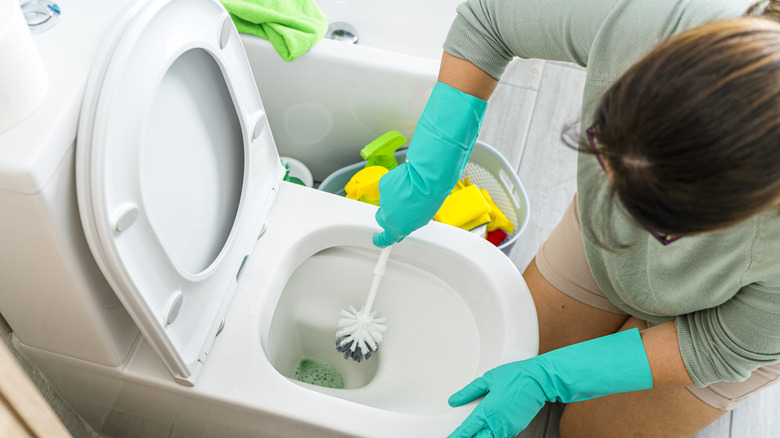
It's time to get rid of that mysterious pink stain in the toilet, once and for all. Use your trusty toilet bowl scrubber and a simple cleaning solution to sanitize the toilet bowl. If you prefer natural methods, mix half a cup of baking soda, one cup of distilled white vinegar, and half a teaspoon of your favorite essential oil into a spray bottle. Cliganic's Organic Set of Essential Oils contains options like lemongrass or lavender to create your own custom fresh, clean smell.
Spray the toilet bowl and water and let it sit for a few minutes. Then go back with your toilet bowl scrub brush and clean under the rim and all around the toilet. If that pink ring isn't going away, you'll need to get tougher. Chlorine bleach has a strong odor, but it gets the job done. Put some chlorine bleach in a spray bottle and spray the ring around the toilet bowl. Let it sit as you did before, then scrub again. Wear gloves when using chlorine bleach, make sure the room is ventilated, and protect your eyes.
Clean the toilet tank

This might not be the most pleasant task to tackle, but it's an important one that only needs to be done twice a year. Most people avoid looking inside toilet tanks and think it's unnecessary, but hidden mold, crud, and rust can accumulate over time. This growth can damage the toilet, not to mention smell up the bathroom: Yes, that unpleasant odor could be coming from inside there.
Wearing protection like CoolJob's Cleaning Gloves, lift off the tank cover and carefully place it on an old towel. Pour up to 3 gallons of white vinegar in, leaving at least one inch on the top. That should sit for 12 hours. When the time is up, flush the toilet a few times and turn off the valve. Flush once more to drain any remaining water, and clean the inside with the toilet scrub brush. Use an all-purpose cleaner if you're having difficulty lifting stains or grime. Once done, the valve can be turned back on, and if the water is clear, the toilet is back in business.
Don't ignore the bathroom closet and shelves
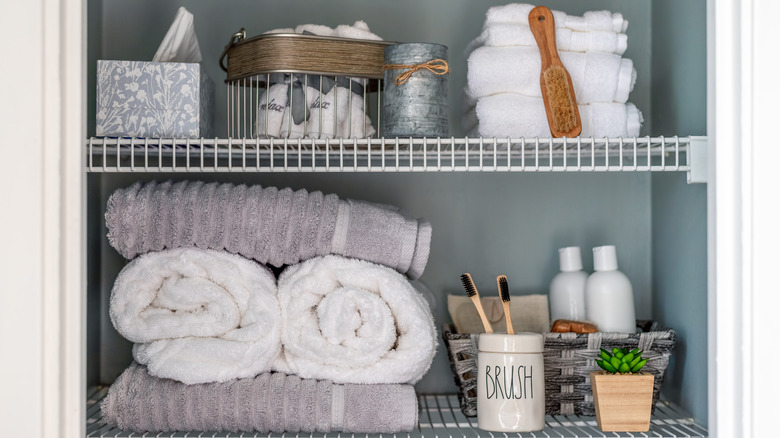
Deep cleaning time is the right time to organize and declutter. If you are fortunate enough to have a closet in your bathroom, empty everything out on a deep cleaning day. Just as you would clean out any closet, have a bag for trash and a pile for things you're keeping. Areas like linen and bathroom closets tend to collect all kinds of little things. Now is your chance to toss stray Q-tips, cotton balls, and bobby pins.
Once everything is empty, you have the perfect opportunity to clean the shelves. Use a disposable option like Seventh Generation Multi-Surface Wipes or a wet rag and wipe everything down. Then while it's empty, take measurements for storage containers. Collect any baskets and bins around the house and take note of the ones you need to purchase. Putting everything in a container helps keep everything contained. Organize by product types, such as towels and washrags, cosmetics, and hair products. Don't forget to sweep or vacuum the closet floor as well.
Wash the floors and clean the grout
If you usually mop the floors, today is the day to get on your hands and knees and into the corners with a rag. For starters, sweep up all the dirt, hair, and crumbs. Make a bucket of warm, soapy water, or use the correct floor cleaner for your type of flooring. Wash the floor as usual but ensure to get into the corners and under the vanity. You may want to have your cleaning toothbrush on hand to reach tough spots.
At some point, either before or after washing the floor, you should clean the grout if you have a tile floor. Use a grout cleaner or a mixture of half a cup of baking soda, a fourth cup of hydrogen peroxide, and one teaspoon of dish soap. Spray the cleaner onto the grout and let it sit for a few minutes, then scrub it with a toothbrush. You'll need to scrub if the grout hasn't been cleaned in a while. Use a wet rag to rinse away the excess dirt. You can add a layer of protection like Fila's Grout Sealer Spray after everything is dry to help protect the grout from getting too dirty.
Regularly clean bath and hand towels, washcloths, and bath mats/rugs
When was the last time you washed the hand towel hanging near your sink or the plush mat that you step on as you exit the shower? While tackling the obvious carriers of germs in your bathroom, you might overlook the items staring you in the face (literally!). To ensure damp hand towels don't harbor bacteria and attract mold and mildew, wash them every other day. Launder your bath towels after three or four uses and washcloths after each use to keep them fresh. Regarding your bath mat, wash it every week to dislodge the accumulated dirt and debris and maintain a hygienic environment.
To clean your bath mat at home, don a pair of rubber gloves, take the rug outside, and give it a good shake. Or, you can vacuum its top to remove surface-level grime and tangled hair. Then, spot-treat all mysterious stains and check the care label before running it through the washer. Air dry the mat or rug or put it in the dryer (if the care instructions allow) prior to using it again.
Now, sort your towels and washcloths by color to avoid color transfer. Check the manufacturer's instructions and put them in the washer with the recommended amount of detergent. Steer clear of fabric softeners or dryer sheets to soften your stiff towels and turn them fragrant. Instead, look for eco-friendly products like Handy Laundry Wool Dryer Balls and Expressive Scent Store's Linen Essential Oil to fluff and freshen them.
Clean your bathroom's sink drains once every month
A drain hair monster is one of the grossest things professional cleaners have encountered in homes. And this happens when you let hair, grime, soap scum, and other debris build up over time in the drainage. Add dead skin cells, greasy oils, and nail clippings to the mix, and it'll be extremely difficult for the water to move down the pipes. In extreme cases, the yucky mess might back up the pipes and prevent water from draining every time you turn on the tap. To avoid such a scenario, clean your bathroom's sink drains monthly.
However, avoid harsh drain cleaners since they're bad for the environment and can cause irreparable damage to your pipes. Certain products might also irritate your skin and eyes. So, use more natural options, like distilled white vinegar and baking soda. First, pour about ½ cup of baking soda into the drain. Then, add ½ cup of vinegar and let the reaction work for about 10 minutes. The bubbling mixture forces the accumulated grime to loosen up and move along. Finally, chase away any lingering residue with some boiling water. For preventative measures, invest in a drain screen, like Seatery's 2-pack of 1-inch Stainless Steel Filters, to stop the hair and debris from making its way into the drain.
Maintain the easily ignored items in your bathroom

The light switches are an often ignored spot when it comes to cleaning your bathroom. These high-touch surfaces aren't always wiped down as often as they should be, even though they're used multiple times in a day (sometimes, by different people). On top of the frequent touching, the electricity-backed warm frames encourage bacterial growth. It's no wonder they harbor disease-causing germs. So, make it a point to wipe the light switches, sockets, and their covers every week. Use disinfecting wipes or spray a little white vinegar, isopropyl alcohol, or hydrogen peroxide on a clean microfiber towel and use it to sanitize the frame and switch. Follow a similar strategy for your door handles.
Another easily-ignored item is the trash can. It's not enough to take out the overflowing garbage bags. Rub its lid and exterior surface every day with a disinfectant wipe. Moreover, spray the interior with a disinfectant every time you replace the trash bag. This won't just eliminate the lingering germs but also keep unpleasant odors at bay.
Your toothbrush holder helps maintain dental hygiene and speeds up your toothbrush's air-drying process. However, you must clean it to enjoy these benefits. This is because the dripping water droplets and germs on the brush's handle pool at the holder's bottom, providing the perfect environment for bacteria to multiply. For electric toothbrush holders, wipe down the base with a soft cloth and use a cotton swab to get any gunk out of crevices. For an ordinary holder, simply soak it in a hot water and liquid soap solution. Use an old toothbrush to scrub the hard-to-reach areas and get rid of the deposits at the bottom.
Organize your supplies
Now that you're done cleaning, it's time to gather your supplies and get them organized. When supplies are easy to find, regular cleaning is more likely to happen. Before getting all your tools and cleansers in order, it's a good idea to sterilize the toilet brush and brush holder. As you can imagine, they collect a lot of germs. You can sterilize the brush holder by pouring bleach into it and allowing it to soak for an hour. Then, dump the bleach into the toilet and rinse the holder with boiling water. To sterilize the brush, fill a bucket with hot water and add two to three capfuls of bleach. Let the brush soak for an hour. Rinse under hot water and place it back in the sterilized holder. Other tools, such as rags and sponges, can be washed in hot water with bleach in the washing machine.
A convenient way to store and organize your cleaning supplies is by keeping a container like Casabella's Multipurpose Cleaning Storage Caddy under each bathroom sink full of tools and cleansers. This tip lets you quickly grab what you need in every bathroom. Each bucket needs microfiber rags, sponges, baking soda, vinegar spray (½ vinegar, ½ water) or a bathroom cleanser, toilet bowl cleaner, paper towels, and glass cleaner. The toilet brushes can stay in their holder near the toilet. If you have little ones and it isn't safe to keep your supplies under the sink, keep them on a shelf or in the bathroom or linen closet instead. The important thing is to keep items all together, and organized in one place so you can find everything.
Schedule regular cleanings
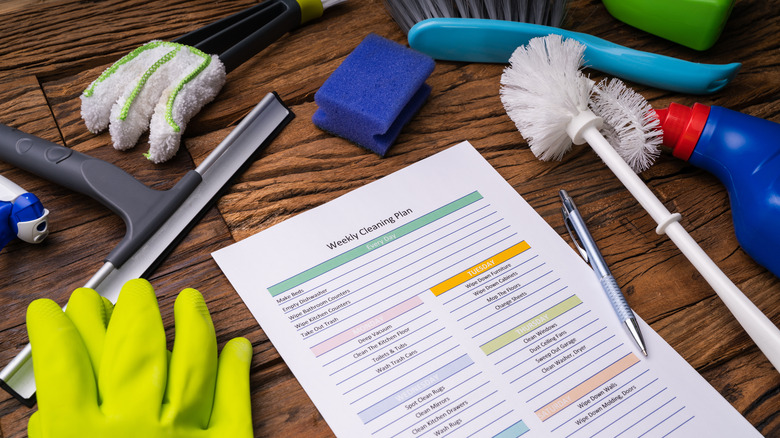
Keep your bathroom looking how it does on deep cleaning days by creating an effective cleaning schedule. Include daily, weekly, and monthly cleaning. This way, when deep cleaning time comes, you aren't shocked by extraordinary layers of dirt. You can put off deep cleaning a bit longer if the bathroom is always spotless.
Every day, when getting ready, use a towel to dry off the sink after splashing water. We've all made a mess when washing our face, shaving, or brushing our teeth. And because bathrooms are a breeding ground for germs, it's best to give them a good cleaning, especially the toilet and sink, once a week, and bathtubs or showers, every two weeks. It also doesn't hurt to sterilize the plastic shower liner once a week. You can do so with a hot wash and bleach in the washing machine. Schedule deep cleaning once or twice a year. Pick a day or evening that works best and stick to it for your weekly cleaning schedules. Soon, it will become a habit, and your bathroom will always be clean.