11 Easy Tips That Make Growing Carrots A Breeze
We may receive a commission on purchases made from links.
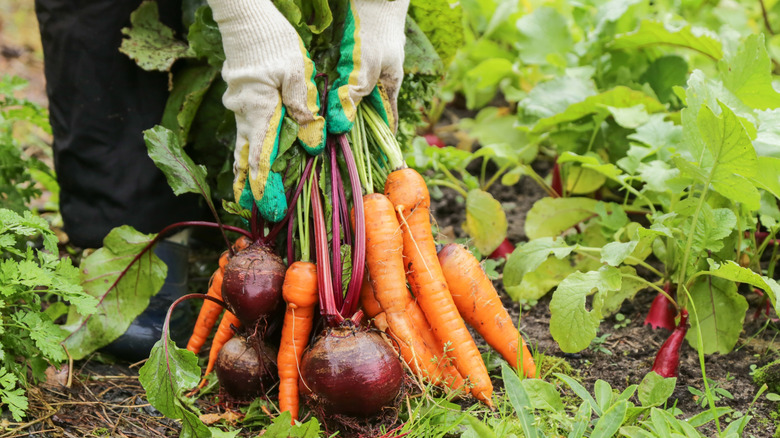
Carrots are tasty, cold-hardy vegetables to plant in your garden in spring, when the cool weather gives them their best flavor. Aside from a few quirks, these root veggies tend to be low-maintenance, making them perfect for beginner and expert gardeners alike. Although the long, orange carrots are what we typically picture, they come in a variety of shapes, sizes, and colors. In fact, it's believed that early varieties in Asia were originally purple and yellow; orange carrots arrived centuries later. However, no matter which color or size you choose, there are a few tips and tricks that will make growing these cool-season vegetables even easier.
First, make sure you have the basics covered. Ideally, you should choose an area of your garden that gets full sun, though carrots can tolerate partial shade. Moist, well-drained soil is a must, and they grow best in loose, fertile, neutral to acidic sandy loams. Because they'll grow in hardiness zones 2 to 11, carrots can easily thrive in nearly any climate. Although carrots taste sweeter after a light frost, they'll need warmer soil to kickstart germination, so make sure to plant when the soil temperature is between 45 to 85 degrees Fahrenheit. Once those conditions are met, carrots are pretty easygoing. However, they can be a bit particular about a few of their needs, so we outlined some tips below to simplify the process.
Avoid transplanting carrots to prevent root deformities
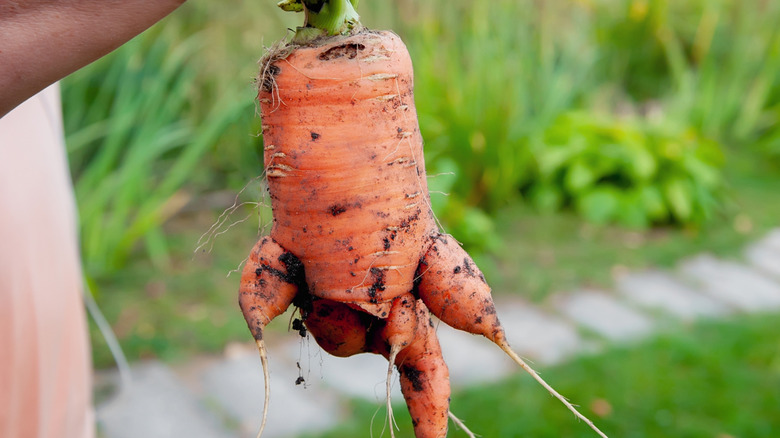
When growing most vegetables, it's pretty common to start seeds in small pots and then transplant them later. For many plants, starting seeds indoors allows you to get a head start on the season, while also giving you more control over spacing when it comes time to transplant. Carrots, however, don't like to be disturbed once they've started growing. Unlike many other plants with sprawling, fibrous roots, carrots grow one large taproot — the part you eat — and it shoots straight down. Transplanting young carrots can easily cause damage to their developing root and may cause forked or stunted growth.
For the best crop, skip carrot seedlings and sow the seeds directly where you want to grow them. If you've already started them indoors, try to transplant them when the roots are as tiny as possible. It's not a guarantee that they won't get distorted during the transplant, but the sooner you move them, the better chance you have of harvesting straight, healthy carrots.
Sow radishes with carrot seeds to mark their rows
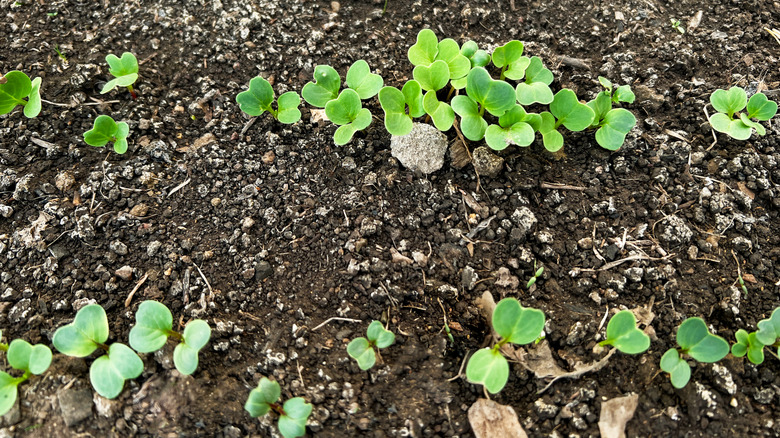
When sowing teeny tiny carrot seeds, it can be hard to keep track of where the rows are, especially since carrots take their sweet time to sprout. Radishes don't just germinate much faster, but their larger seeds make it easier to space out your carrots evenly. The benefits of planting radishes next to your carrots don't stop there — while the carrots are still getting established, the radishes help mark the row and loosen the soil with their quick-growing roots, in turn making it easier for your carrot roots to grow and establish.
Mix in a few radish and carrot seeds together and sprinkle them in the same row when planting. Choose a fast-growing radish variety — such as cherry bell, Easter egg, or French breakfast — so they'll mature before it's the carrot's turn to take up space. As your carrots settle in and start to grow, the radish's leaves will cast some shade over the soil, helping to keep it moist. Radishes have fairly shallow root systems, so they loosen the soil just enough to aerate it for your carrots, but not so much that it'll disturb them when it comes time to harvest.
Make a DIY seed tape to perfectly space your carrot seeds
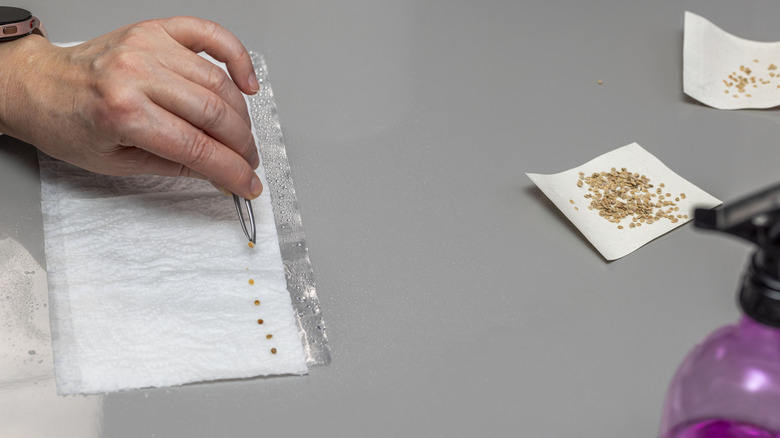
Once you see how tiny carrot seeds are, you may wonder how on Earth you're going to plant them. Because they're so small, they're not only challenging to work with, but it's hard to tell how many you've dropped in any given spot. Although you can sprinkle them in your garden and thin them out later, there's an easy hack that makes spacing a breeze from the get-go, minimizing the amount of additional work you would need to do later. Seed tape allows you to space them out ahead of time, so all you'll have to do is plant and water, skipping the thinning process altogether.
To make your own seed tape, you'll need a paper towel or newspaper, a flour and water mixture, a pencil, ruler, and plastic bag. You can also use a pair of tweezers to grab the carrot seeds more easily. Slowly add water to ½ cup of flour until you have a glue-like paste, and cut strips of paper that are 2 by 12 inches. Use a pencil and ruler to mark where you'll add your seeds, which should be about every 3 inches for carrots. Place a seed over each dot and seal it in place with a drop of the mixture. Let it dry completely and store the strip in a plastic bag. If you're preparing more than one type of plant, make sure to label the outside of each bag to prevent mixups. When you're ready, plant seed tape ¼ to ½ inch deep.
Prime carrot seeds for faster germination
Carrots can take up to three weeks to germinate, but you can cut down on some of the waiting time by priming the seeds first. Though small, each tiny seed holds an embryo protected by a hard outer shell. Once moisture surrounds a dry seed, it essentially "wakes up" and begins taking in water to kickstart the growing process. Soaking carrot seeds in water helps soften the seed coat faster, allowing the embryo to get a head start on putting out roots and, eventually, sprouting.
To speed up the germination process, soak carrot seeds in water for about an hour, a few days before you plan on planting them in your garden. Once they're done soaking, transfer them to a damp paper towel and fold it in half to enclose them inside. Place them in an airtight container, and sow your seeds within five days of priming. According to GrowVeg, covering your garden bed containing your freshly-planted seeds with a blanket can help maintain moisture while you wait. Although timing can depend on many factors, your primed seeds may germinate as soon as a week after planting, though it may be closer to two weeks.
Grow carrots in the right containers for healthy roots
While you may think you need a huge backyard to grow your own food, you can create a flourishing vegetable garden in a small space with the right tools. Although carrots are a common bed plant, they can thrive in containers as long as they're deep enough. Because their taproots grow straight down, you'll need to give them plenty of space if you want crisp, full-sized veggies. If you choose a container that's too shallow for your chosen variety, you might end up with stumpy or misshapen roots.
When choosing a pot for your carrot, depth is just as, if not more important than, width. You'll need to space your seeds at least 3 inches apart, so first, consider how many carrots you want to harvest. Standard carrots will be about 6 to 7 inches and will need at least 12 inches of growing space to reach their full potential. However, you can opt for shorter carrots if you want to use a smaller container. It's generally best to choose a pot that's atleast 150% the length of the variety of carrot you're growing. Shorter, round carrots like 'Orbit' and 'Thumbelina' grow well in containers.
Prep the garden bed first to get the best harvest
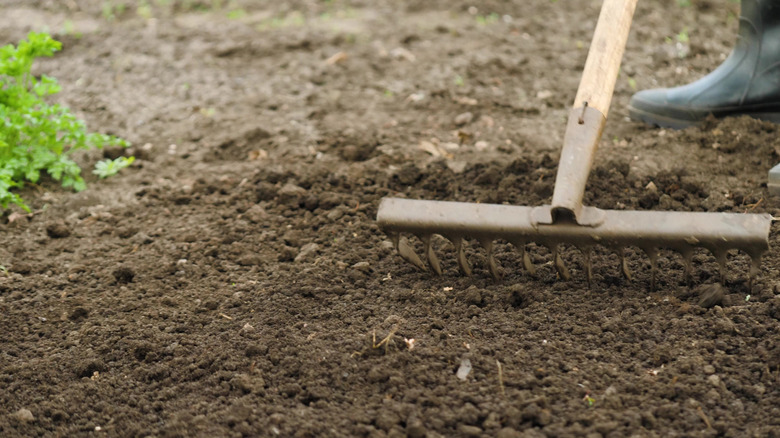
Carrots may be a low-maintenance vegetable, but they aren't without their quirks. If there's any obstruction, like a rock, stick, or even a hard clump of dirt, it'll get in the way of their taproots, causing twisted or forked growth. Many soils are amended with coarse materials like mulch to improve drainage, and you might also have some old roots or debris hiding below the surface. Before you can sow your seeds, you'll need to make sure your soil is thoroughly broken up and free of any debris that could distort your carrots' roots. It takes some work to prep the garden bed, but it's well worth it if you want long, straight carrots.
Go through your garden bed and break it up at least 12 inches deep, crumbling the soil as finely as possible so your carrots can grow freely without resistance. If you plan on amending your soil, choose a screened compost to add nutrients and improve texture. Alternatively, raised beds are a great option for growing carrots, as long as they're deep enough. You'll have full control over the soil that goes in, so you can skip some of the extra prep work.
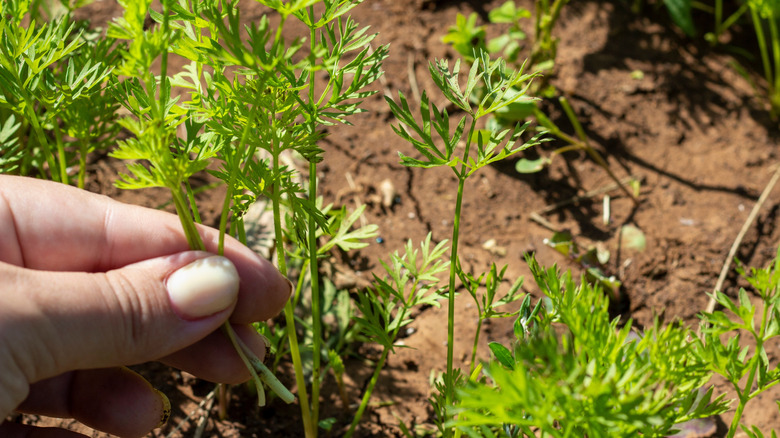
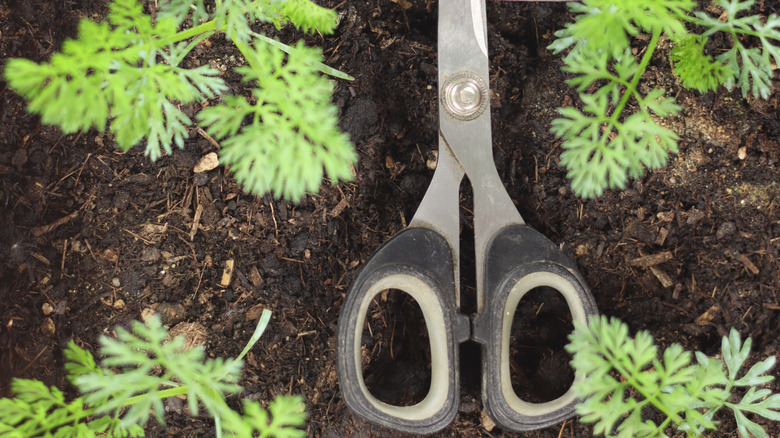
Thin seedlings with scissors to avoid disturbing the roots
If you went the traditional route and scattered your carrot seeds by hand, you might notice they're coming up a little too close together. Although it can be hard to sacrifice the small seedlings you've put so much work into, thinning your plants will make it easier for your chosen carrots to thrive. Depending on the variety, each of your carrot plants will need a few inches of room to grow. If you neglect to thin your seedlings, there will be too many plants fighting for nutrients, leading to an underwhelming harvest.
Once your carrot plants are 2 to 4 inches tall and have a few true leaves, use a pair of scissors or shears to thin them out. At this stage in their life cycle, their vulnerable roots are still developing, so plucking out the seedlings may disturb the neighboring taproots. Identify which plants are growing the strongest and snip any weaker, leggier ones at the soil line. Aim to have 2 to 3 inches of space between each of your carrots, giving each of them plenty of growing room.
Use drip irrigation to keep the soil consistently moist
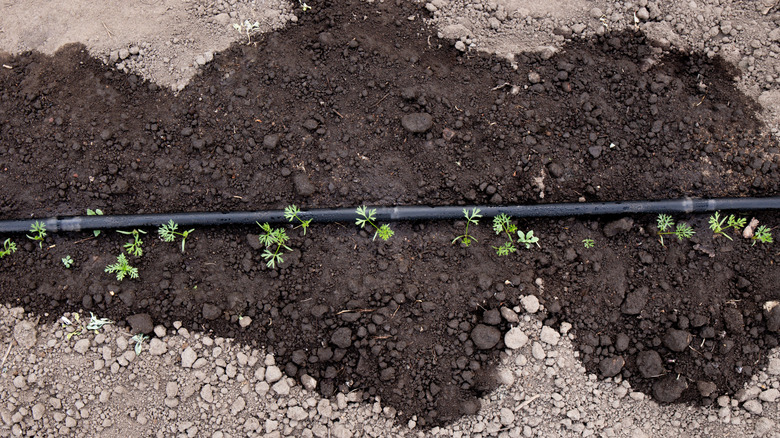
Carrots love regularly moist soil, but it can be tricky to find the right balance. If you give them too much water, they can develop hairy roots and start to fork. On the other hand, your carrots may develop root rot due to being waterlogged if they're underwatered. Additionally, heavy rainfall or excessive overhead watering can sometimes cause a tough, crusty layer to form on the top of the soil, which is hard for the delicate seedlings to break through. Drip irrigation works by slowly depositing water directly to the root zone, preventing issues like surface crusting, runoff, and uneven moisture that can throw off your carrots' growth. Because it targets the soil below the surface and keeps excess water off the foliage, it also helps to prevent fungal diseases.
The type of soil you have will impact how often you need to water. Heavier soils tend to hold onto more moisture and will only need water about every week. If you're growing carrots in sandier soils, the water will flow through more easily, so you may need to water twice each week. Consider installing a drip irrigation system, like the Toki-dot Drip Irrigation System, which helps keep the soil evenly moist, avoiding problems caused by moisture fluctuations. This is especially helpful when growing carrots in the summer heat, as the soil dries out faster and becomes more prone to crusting, especially when it's hot following summer rainfall.
Fertilize carrots the right way to avoid stumpy roots

It can be helpful to give your carrots a nutritional boost, but you don't want to overdo it. Carrots aren't heavy feeders, especially when it comes to nitrogen (N). Fertilizers high in nitrogen can cause the plant to focus on leaf growth, rather than developing healthy roots. Instead, look for formulas that are moderate in phosphate (P) and high in potassium (K), which support strong root development. If you've already amended your soil with organic matter, your carrot plants may not need any additional fertilizer.
The best time to fertilize your carrots is before planting, by mixing a granular blend directly into the soil. If your soil doesn't have organic matter, use a complete fertilizer like 6-6-6 with micronutrients, working it into the top few inches. Once your seedlings are 3 to 4 inches tall, you can switch to a feed low in N and higher in P and K, like a 0-10-10. Be careful not to overwater, as it can wash nutrients like potassium out of the soil before your carrots can absorb them. If the tops are looking a bit pale after 6 to 8 inches of growth, you can give them a light round of fertilizer to help them finish strong — just be mindful of giving them too much nitrogen.
Try companion planting to prevent pests like carrot flies and aphids
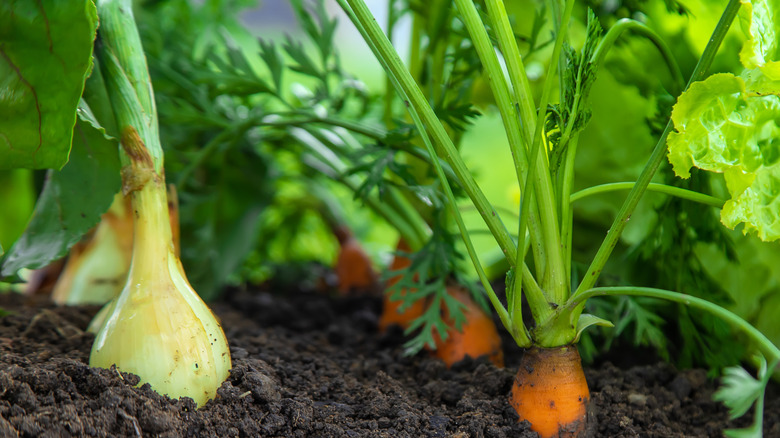
There's nothing more exciting than watching your tiny seeds develop into full, edible carrots. However, if you aren't diligent, there may be others who eat your plants before you have a chance to. Between caterpillars, slugs, aphids, carrot rust flies, and other pests that feed on carrots, it's always a good idea to take preventative measures to keep these unwelcome visitors away from your crops. Companion planting is one common, eco-friendly way to keep bugs out of your garden. Although its effectiveness is debated in the science community, many gardeners swear by planting herbs and flowers that are thought to either repel pests or attract their natural predators.
If you want to try your hand at companion planting to keep pests away from your carrots, planting tansies is a good place to start. According to a study published in the Journal of Pest Science, researchers in Germany found that tansy and other companion plants attracted more beneficial insects, like ladybugs and lacewings, which helped reduce aphid populations on nearby lettuce crops. Although research is limited on this flower's pest-repelling abilities, The Old Farmer's Almanac notes that tansy may also help deter cutworms and other common carrot pests. Planting onions nearby can also be beneficial; a study conducted at the National Institute of Agricultural Sciences in South Korea found that there were fewer attacks by carrot flies when onions were planted alongside carrots.
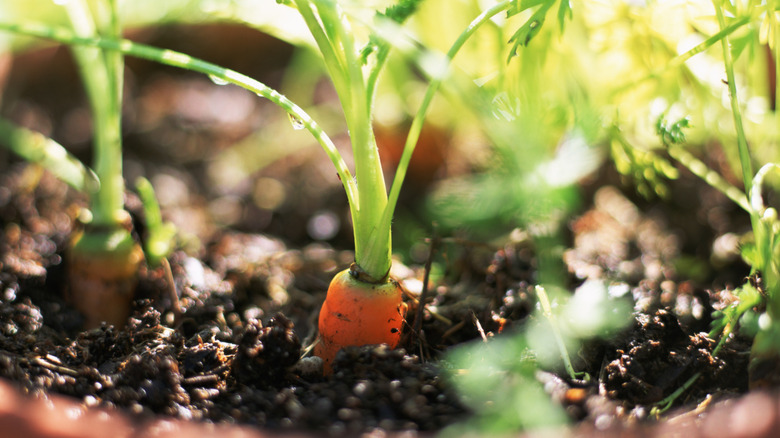
Loosen the soil before pulling carrots to prevent snapping
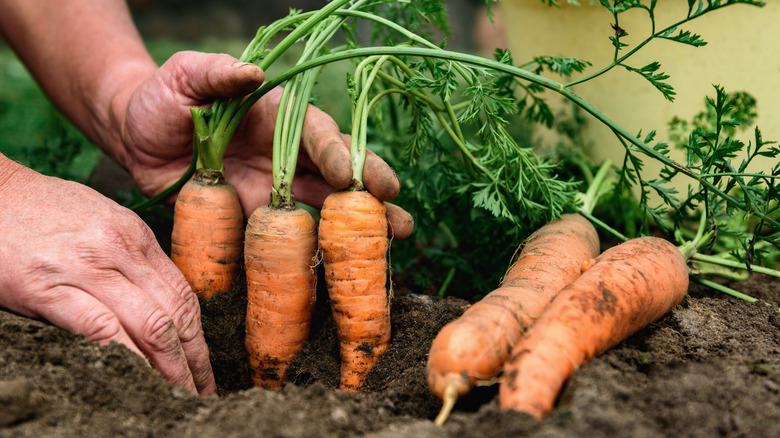
After all the love and effort you put into growing a healthy garden, the last thing you want to do is accidentally snap your carrots in half at harvest time. Their long taproots are more than just a crunchy snack; they anchor the plant deep into the soil. Although it may seem like they'd be easy to pull out, tugging on them, especially in heavy or compacted soil, can create tension that breaks them apart.
Depending on the variety, carrots are typically ready to harvest 70 to 100 days after planting. A good sign they're mature is when the roots reach 1 to 1½ inches in diameter at the top (just brush the soil aside to check). Water the area or wait until after a rainy day before harvesting. Not only will a good watering make it easier to get the carrots out of the soil, but it also helps keep the roots hydrated, so they don't dry out right away. Use a spade or garden fork to loosen the soil around each carrot before gently pulling them out. Once they're out, cut off the leafy tops and store them at 32 degrees Fahrenheit and 95% to 100% relative humidity. You can rinse them before storing, or wait and clean them when you're ready to eat.