How You Can Add A Chic Touch To Your Dining Table With Balsa Wood
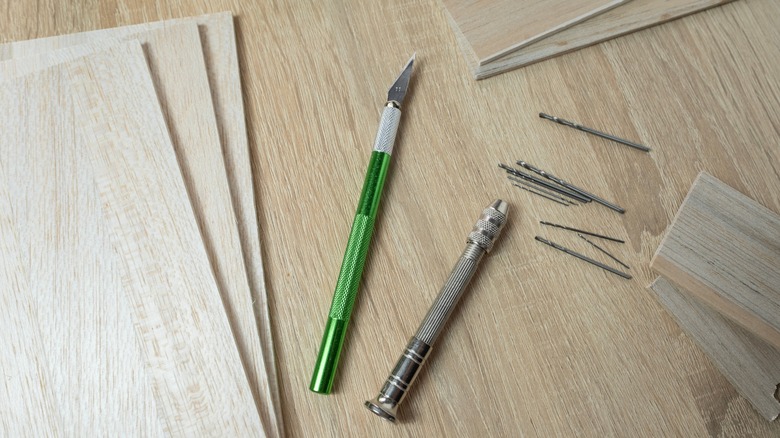
Imagine cutting a sheet of wood with nothing more than a utility knife. That's balsa for you. You may remember this ultralight-weight wood from model plane kits in childhood. Bring this material out of the mothballs to make an impressive marquetry-style wooden table runner. Cut into geometric forms and stained both in dark, medium, and light shades, this DIY is an unconventional take on typical table runners.
What is marquetry? This age-old craft involves cutting and assembling thin pieces of wood or another material into a pattern or image. The designs are often added as veneer onto furniture pieces. With how easy it is to manipulate balsa wood, this material is perfect for experimenting with for a decorative table accent. Your own stained balsa design will act as veneer on a more durable wooden board.
Design your own wood "mosaic" on a piece of ¼-inch thick plywood for a table runner that will instantly elevate your dining area. Copy the design described below, or consider geometric arrangements like stars, chevrons, or rows of multi-shade triangles often seen on rugs or quilts. The other ingredients for this concoction are wood stain in three colors (one light, one medium, and one dark), wood glue, spray adhesive, a clear sealant, some rags for applying stain, and enough balsa wood to cover the board fully, as well as some extra in case of mistakes. Raid the toolbox for a utility knife and/or a rotary cutter, a saw, sandpaper, a cutting mat, a pencil, and a ruler.
Cut the shapes out of the wood
For a covetable table runner bedecked with inlaid squares, trapezoids, and triangles, measure and cut a 4-foot by 1-foot rectangle of board. Cut three 20-inch by 4-inch pieces of balsa wood and six 28-inch by 4-inch pieces. On each width end, mark a center point 1 inch in, and draw diagonal lines from this center point to each corner of the wood. Cut and save these triangle shapes. You'll use them for both inlays and as templates for cutting angles. In pencil, lightly label this piece number 1. You won't number the triangles.
Use the triangle cuts to get the angles for both ends of the two remaining 20-inch balsa cuts. Place a triangle's base against the narrow end of the balsa cut, and mark the angle of one side of the triangle, using the ruler to continue the line. Repeat this same line on the other end of the cut but with the line angling in the other direction. Make two pieces like this, and label both number 2.
Grab four of the 28-inch balsa cuts. On one end of each piece, trace a line following the angle of one of the number 2 pieces. Measure one inch up from this line, and make another line that's parallel to the first. Cut along the lines for a trapezoid-shape. Repeat these steps to make four trapezoids. Save the remainder of those pieces, and label them all number 3. On the last two 28-inch cuts, trace a triangle on the ends of each piece, pointed-end out. Cut and discard the scraps, and label the pieces number 4.
Putting the pieces together

Measure 15 inches down from the point on both number 4 pieces, and cut a straight line widthwise. Place a triangle cutout's base flush against the cut end, trace, and cut out the resulting triangle. Repeat this on the other piece, and save all scraps; among them, you should have two 13-inch rectangles and four triangles. On both ends of the 13-inch scraps, trace and cut an inverted triangle. Label them number 5.
Coat pieces numbers 1 and 2 the darkest of your three stains, and stain the remaining numbered pieces in the next darkest color. Stain all of the triangles and trapezoids with the lightest color, and let them dry. First lay out your pieces on the plywood board, and then glue. Center piece 1 on the plywood lengthwise. Place both number 2 pieces on each side of piece 1 with their angled ends leading toward piece 1. Line up the four trapezoids against the ends of the number 2 pieces, and fill the remaining spaces on the length of the board with the number 3 pieces. Fit the pointed ends of both number 5 pieces into each side of piece 1. Place a square made from triangles into the cuts on number 5 pieces. Follow with both number 4 pieces, and fill the final gap with a triangle piece.
There's a difference between wood glue drying and curing times, so make sure to give your painstakingly laid balsa 24 hours before continuing. Top the surface with spray adhesive, allow it to dry, and follow up with sealant.