How To Paint Over Wallpaper Glue For A Smooth Finish
We may receive a commission on purchases made from links.
You've gotten rid of your old wallpaper and are ready to give your walls a fresh coat of paint. That stubborn wallpaper glue might make remodeling a challenge, but it doesn't have to ruin the experience. While it's optimal to remove all wallpaper adhesive before painting, you can still get a smooth finish when complete removal doesn't seem possible. A combination of methods involving adhesive solvents, scrapers, and sandpaper will help level out the leftover glue residue, and a solid primer will seal the wall for a smooth painting experience that might even seem like you know how to paint your home like a professional.
To remove as much wallpaper adhesive as possible and prep the walls so you can paint them, you'll need a plastic tarp or sheet, some painter's tape, an adhesive remover solvent, a putty knife, a sanding sponge, primer or sealer, a taping knife, paint rollers, and some joint compound. Before you get started, set up your work area by laying your tarp or sheet across the floor to protect it.
Prepping the wall
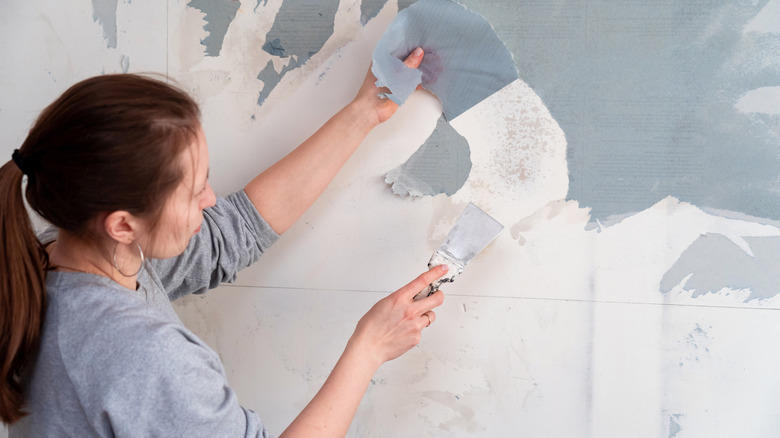
After you've carefully removed the wallpaper, you'll want to assess the leftover residue and apply an adhesive remover to aid in the removal process. Be sure that you wear gloves and a mask during the entire process to avoid inhaling chemicals and dust. Glue solvents, like Rust-Oleum DIF wallpaper stripper, can effectively remove most of the wallpaper and glue. However, a suitable alternative might be to DIY a solution that makes scraping wallpaper glue so convenient using Dawn Powerwash.
After allowing the adhesive remover to sit for the appropriate length of time, typically 15 minutes or slightly more, gently scrape away leftover paper and glue with the putty knife. Run your hand over the wall to identify any particularly rough areas. While you may not be able to remove the adhesive entirely, you'll want to smooth out the wall as much as possible.
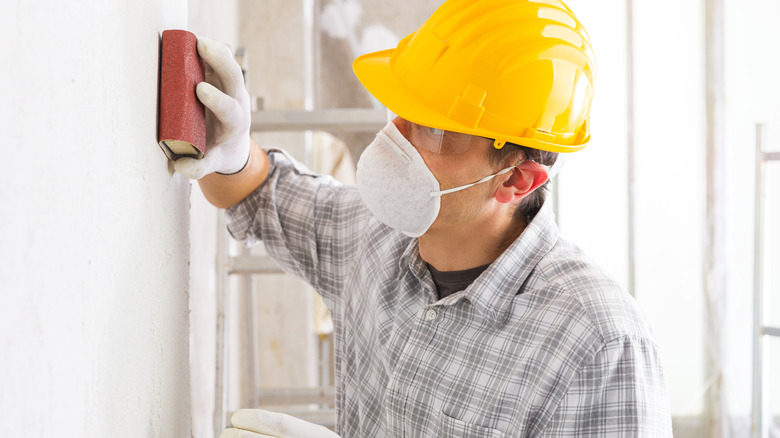
This is where a fine grit sanding mechanism comes in handy. Be sure to have a mask handy to avoid breathing in any dust. Sandpaper is acceptable, but a sanding sponge might provide a better grip. Sand in controlled motions, applying even pressure across the wall. Afterward, wipe the wall with a damp cloth and let it dry completely before applying a primer, skim coat, and paint.
Priming and painting
Keep in mind that many wallpaper glues are water-based and don't mix well with water-based paints. To avoid a textured finish, create a barrier between the paint and any leftover wallpaper adhesive. Use your painter's tape to line the baseboards, trim, and fixtures before starting the next few steps. For particularly rough surfaces, a sealer like Zinsser Gardz problem surface sealer can smooth any uneven spots in the wall and seal off any leftover glue. Another option is an oil-based primer like the Kilz original interior low odor primer, which will seal porous areas and prevent your paint from reactivating any remaining adhesive. To avoid skin or eye contact with paint chemicals, goggles and impermeable disposable gloves should be worn.
Once your sealer or primer has dried, you can apply a skim coat of joint compound. This can help repair any damaged drywall and smooth the painting surface. Use a paint roller to apply a coat of drywall compound across the wall, and use the taping knife in one vertical or horizontal motion to smooth the compound into a thin, even layer. Once this dries, use the fine grit sandpaper again to smooth out any imperfections before painting.
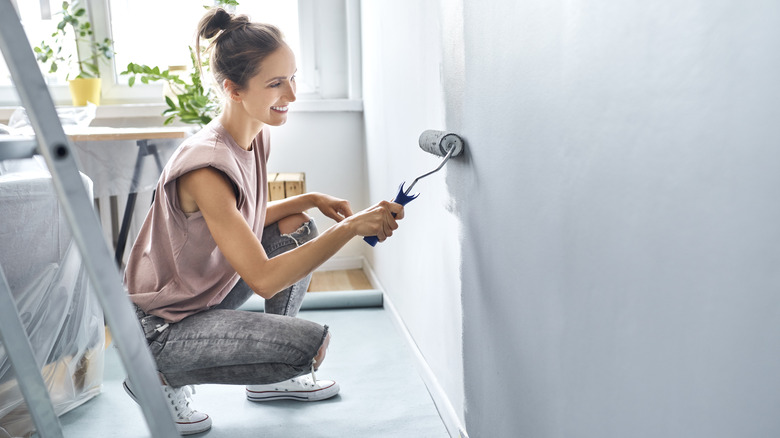
Now you can go in with your paint of choice. There may be some factors to consider when choosing between acrylic or oil-based paint, like dry times and durability, but this part of the process should be the simplest. Apply an even layer of paint and wait for the first coat to dry before applying a second layer.