The Kitchen Staple That Can Create An Industrial-Inspired Lamp Base
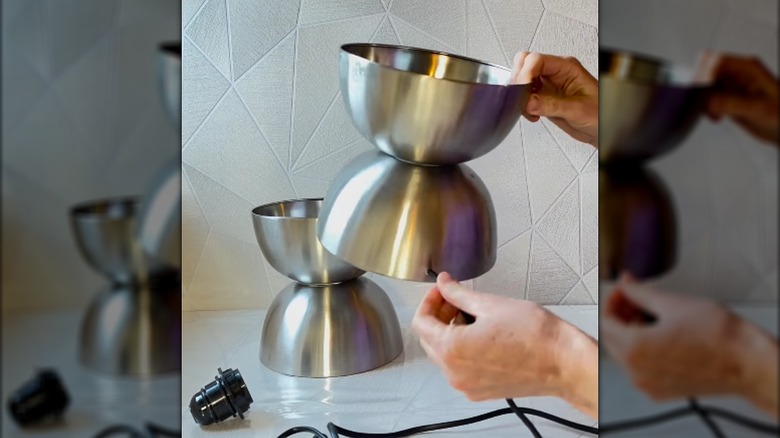
You usually use mixing bowls for whipping up a batch of something delicious. You can also use them to whip up a lamp! Stacked, coated in spackle, and strung through with a lamp kit, run-of-the-mill cookware can light up your life. Follow the leader, Instagrammer @diy_art_eva, who snapped up four metal mixing bowls for about $2 each and pieced them into lighting that absolutely belies its culinary origins. They joined two bowls rim to rim and sandwiched them between two more bowls, attached at the base. With the help of a kit, the mysteries of how to DIY a lamp are solved.
To cook up your own bowl lamp, purchase four identical bowls between 8 and 12 inches in diameter, a container of spackle, a lamp kit, heavy-duty glue, a sheet of particle board, paint in a color that strikes your fancy, rubber gloves, and lampshade. You can take the bowl theme one step further by morphing a fifth bowl that's the same size or larger into a shade. In addition, you'll need a piece of 1-inch-wide PVC about 4 inches longer than the height of the four bowls stacked end to rim. Hit the tool shelf for a jigsaw, paint brush, measuring tape, and two drill bits, one about the width of the lamp cord and one a tad wider than the PVC pipe.
Our inspirational Instagrammer used metal bowls with no lip; when the combined bowls are covered with spackle, the seam between the two is covered completely. If you're not able to find similar lipless metal bowls, you may be able to mask the projections with thicker spackling over that area.
Prepare the pieces
Trace one of the bowl's openings onto the board two times. Also trace a circular object that's about the same size as the bowl's base onto the board. (It may be challenging to trace the bowl's base itself.) Cut the three circles out with a jigsaw. Pair up the four bowls, and glue each pair together at the base. Give the glue plenty of time to dry and cure.
If you're feeling doubtful about how well your glue will bond the bowls to each other, grab a tube of Original Gorilla Glue. But don't use this glue all wrong by skipping an important step. Wetting the surfaces before adding glue helps Gorilla Glue adhere better. Also, give the bases a scrub with sandpaper first to rough up the surface to help improve the bond. After curing, measure and drill a hole at the center of each of the glued bowl pairs. About 1 inch from the rim of one bowl's edges, drill a small hole for the plug end of the lamp cord.
Edge the top lip of one pair of glued bowls, and set the other atop it so that two bowl rims form a sphere — or at least close to one. Make sure that the bowl with the hole in the rim is at what will be the very bottom of the lamp. Run the socket-less lamp cord through the hole in the rim of the bowl and the PVC pipe. Send the pipe through the center holes in the glued bowls.
Finishing touches
Center the smallest of the three wood circles on one of the larger ones, and glue it in place. Find the center of the combined wood circles, and drill a hole wide enough for the PVC. Glue the single large circle to the rim of the bottom of your glued stack of bowls. With the smaller wood circle facing outward, slide the disk over the PVC, and glue the pair of circles to what will be the top of the lamp. Again, give the glue time to dry and cure before continuing.
With a gloved hand, smooth several layers of spackle over the bowls so that it takes on a ceramic look. Once it's fully dry, add a few coats of paint in the color you've chosen. Hook up the lamp's socket to the cord, and screw on the bulb attachment. With a bulb and shade in place, your new lighting feature will illuminate your space while keeping its culinary secrets to itself.
If you've topped your lamp with a shade that's leaving something to be desired, or if you're looking for a cheap way to upgrade a yucky shade, customize it as well. There are scads of ways to cover your shade without lots of extra work or effort. Customize a one-of-a-kind lampshade by topping it with decoupage book pages. Just a bit of spray paint can make over a bland shade with ease. Or add on a true extra credit assignment by piecing together a modern metal lampshade with gold-painted Dollar Tree finds.