How To DIY Your Electric Fireplace Frame With Instagram-Worthy Results
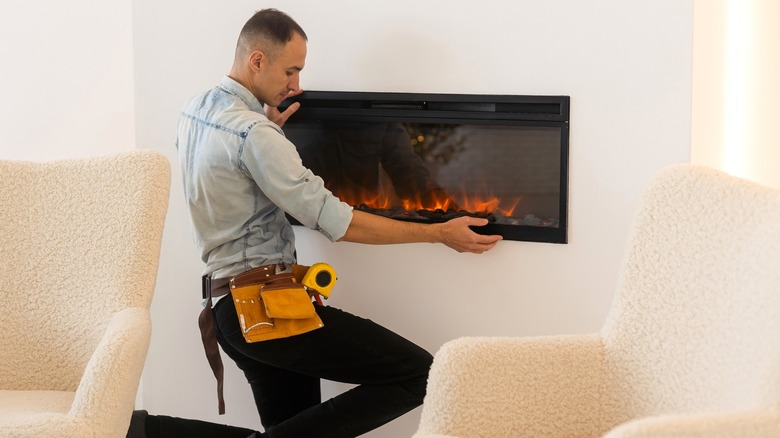
An electric fireplace insert can nestle into various custom setups, but it can be tricky to find a proper home for it. Some may have matching surrounds to consider, like a mantelpiece with a vacant wall beneath, but in many cases, you'll have to whip one up from scratch. For an avid DIYer, it can be a straightforward project, requiring only some 2-by-4 lumber and drywall to get you started.
The build is a wooden frame with a cavity for the fireplace that connects to the wall. The result is a seamless, built-in look. A few initial things to keep in mind before adding the fireplace and its frame are the location and the level of function you want. Build the frame to the ceiling or only as high as the mantel, leaving an open wall above to save you some time and effort. You'll need a space where you can maintain at least three feet of clearance from combustibles.
Ideally, there'll be an area with an outlet to hide behind the construction for a wireless finish. Consider a mantel, artwork, a TV, shelving, and other fixtures above the fireplace to complete the design. And if you feel motivated, take the design to an impressive level by adding hidden storage to your fireplace with a space-saving DIY.
DIYing an electric fireplace frame
Design your frame based on the electric fireplace's dimensions and the features you'll put around it. For a shallow electric fireplace needing only four or five inches of depth clearance, you can save time by building a low-profile rectangle with 2-by-6 lumber. Two supports can make the sides of the frame between a top plate and base plate defining the frame's width.
With this rectangle in place, add upright studs along the base plate and a horizontal spanner over the top of them, making a shelf for the electric fireplace insert. Add two studs on either side of where the insert will sit and a spanner across the tops of those, making a centered rough opening for the fireplace. The opening should be about 1½ to 2 inches taller and wider than the unit. Though they don't need venting, electric fireplaces need minor gaps around the sides and behind the unit for airflow.
For deeper units, build the frame out from the wall. Attach vertical framing pieces to the wall studs, with base and top plates extending several inches from them into the room. Build your frame at the end of these plates to make enough clearance for the deeper insert. Install extra studs to support a TV and other fixtures, as well as boards facing out to give you plenty of wood surface area for stable mounting. After that, if you hang your drywall like a pro, you can customize it into something spectacular.
Finishing your electric fireplace DIY for stunning results
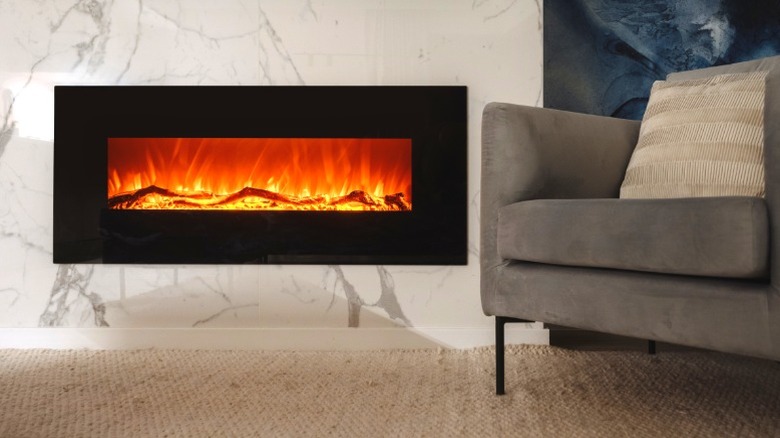
Many consider looks to be one of the hidden downsides of faux fireplaces. Fortunately, a well-designed frame can do plenty to pick up the slack and make the set an aesthetic benefit to the space. A simple paint application often works to great effect. Choose colors to complement your room's palette and any lighting effects your fireplace can pull off. Add decorative molding around the insert for a more dramatic and traditional fireplace setup. Or leave it bare, with only the trim kit surrounding the fireplace for modern minimalism. Likewise, the mantel can have a floating effect for cleanliness or the bold elegance of corbels to support it.
Alternatives to the painted structure include brick, tile, stone, and wood paneling to give your frame a more stylish direction. For instance, shiplap can create a breezy coastal vibe that you can match with a weathered driftwood mantel. Installing different textures over drywall can be an easy project, especially when you work with veneers. Stacked stone and brick veneers can enhance the comfort, requiring only an appropriate adhesive and a few basic tools. Meanwhile, smooth stone textures like slate and marble sheets supply sleek, modern sophistication. If you can't decide, mix and match materials like wood and stone for a wholly unique design.