Spring Garden Prepping Mistakes You'll Want To Avoid
We may receive a commission on purchases made from links.
Seeing those very first pops of green come up from under the snow might as well be a starting pistol for gardeners, signaling it's time to get our hands back in the soil. But hold your horses. Before you dive headfirst into the garden beds, there are a few common mistakes that are so simple yet devastating enough to make it difficult to get the yields or show of flowers that you want. We get it — it's tempting to jump right in with enthusiasm once the weather starts to warm, but a little foresight can save you many headaches down the line.
Spring prepping isn't just about shaking off winter's cobwebs; it's about laying a solid foundation for a thriving garden. Just a small amount of preventative work now means a much more bountiful harvest (and/or more blooms to enjoy) later. Let's explore some of the most common spring garden prepping mistakes and how to avoid them.
Trying to work wet soil
You know that feeling you get when you see a break in the rain, the sun peeks out, and you're itching to till, amend, or simply turn over those garden beds? We feel you; however, if the soil is still soggy, you're setting yourself up for trouble.
Working wet soil is like kneading clay. It compresses the soil particles, squeezing out the essential air pockets that plant roots need to thrive. This compaction leads to poor drainage, hurting root growth and making it difficult for plants to absorb vital nutrients. You may be just trying to give your seedlings or plantlets as much of a head start as possible, but in reality, you're creating a dense, inhospitable environment where your plants will struggle before they even get started.
Patience, though extremely difficult to practice, is your best friend in this scenario. Before grabbing your tools, perform a squeeze test. Take a handful of soil and squeeze it firmly. If it forms a dense clump that doesn't easily crumble, it's still too wet. Wait a few more days, allowing the soil to dry naturally. When it's ready, the soil should break apart easily in your hand. However, if you're on a strict time limit and working the soil earlier than the ideal time becomes unavoidable, you have options. Opt for a garden fork, like the Vnimti 4-Tine Spading Fork, to gently loosen the dirt without inverting the layers, which can help aerate the soil without causing as much compaction. Adding organic matter, like compost, can also improve soil structure and drainage over time. However, we want to emphasize that this is only in emergency situations as going into the garden too early could cause your baby plants or flowers to struggle harder than they need to.
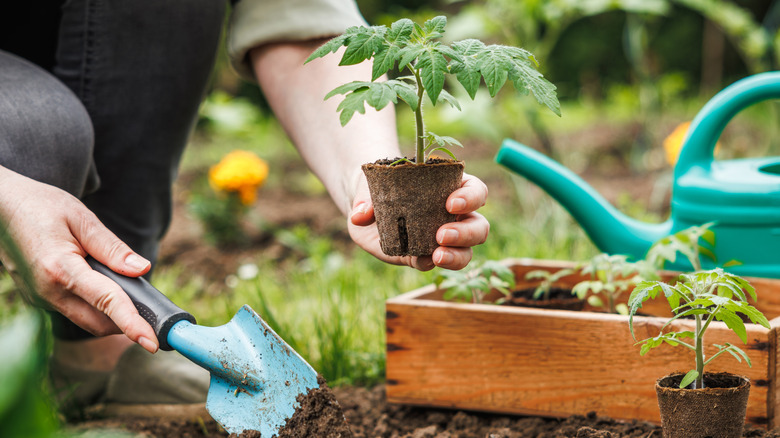
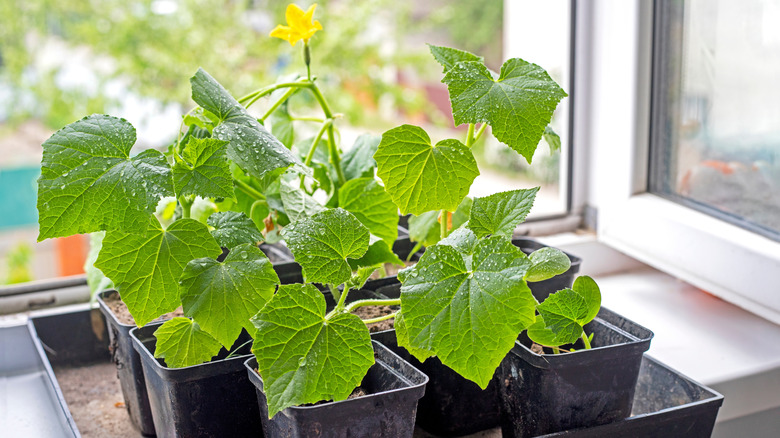
Waiting too long to buy seeds and plants

While it might sound counterintuitive, the excitement of spring can sometimes lead to procrastination, especially when it comes to acquiring seeds and plants. There's lots to do to get your garden up and running and it's easy to get caught up in the other dozens of garden prep tasks, pushing seed and plant purchases to the back burner. But don't let the overwhelm of possibilities or the assumption that your favorite seeds will always be available get the best of you.
By the time you're ready to plant, the varieties you hoped to add to your garden plot might be sold out, leaving you with limited options or forcing you to settle for less-than-ideal substitutes. Local nurseries and online seed suppliers typically see a surge in demand as spring progresses, and popular choices disappear quickly. This delay can not only limit your garden's diversity but also set your planting schedule back, potentially impacting your harvest and robbing you of the opportunity to enjoy early flowering annuals that prefer cool temps, like pansies.
Act early to avoid this. Once you know what you want, start shopping. Watch local and online catalogs for spring releases and order as soon as your gardening budget allows. For transplants, visit garden centers as soon as they open. Start seeds indoors weeks before the last frost to secure varieties, ensure healthy seedlings, and allow time to test germination and do other necessary prep tasks, like seed stratification. Being proactive guarantees you'll get the plants you want, not just the leftovers.
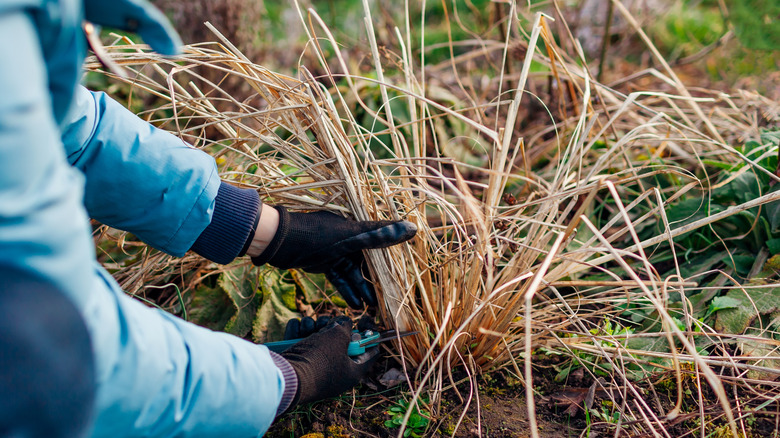
Pruning plants at the wrong time or in the wrong way
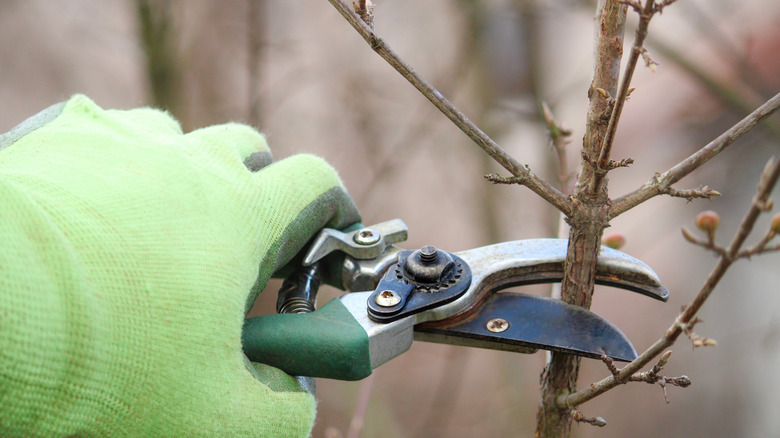
Out with the old and in with the new, right? Spring's arrival can trigger a pruning frenzy in gardeners who want to set their perennials up for success — and it's easy to assume that all plants benefit from a spring haircut. But not all plants are created equal. Pruning a plant at the wrong time can significantly impact its flowering and overall health. For instance, those eager to shape their lilacs or azaleas in early spring might unknowingly be snipping off this year's blooms. Similarly, ignoring the plant's natural bloom cycle can lead to a disappointing lack of flowers. This well-intentioned overzealousness can end up doing more harm than good, setting your plants back just as they're trying to wake up.
The simplest way to avoid this is by refreshing your memory about the growing conditions your plants need. Even seasoned gardeners can get their old wood and new wood plants mixed up, so take a second to again familiarize yourself with what needs pruning and when. You can check your local university's cooperative extension for localized recommendations for more information, but here's a quick rundown: Spring-flowering shrubs, like lilacs and forsythia, should be pruned immediately after they bloom, as they set their buds on old wood. Summer-flowering shrubs, such as hibiscus, Hydrangea paniculata, and spirea benefit from early spring pruning. When you do prune, make clean cuts just outside the branch collar and respect the plant's natural shape. Remember, less is often more, so avoid over-pruning.
Starting with dull tools
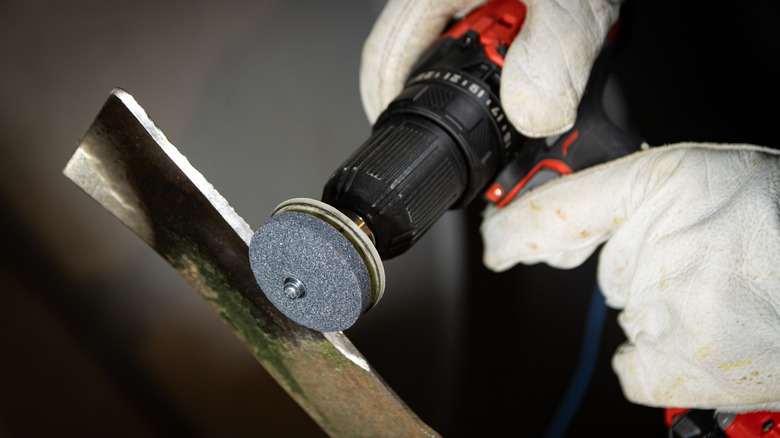
Spring gardening is a fresh start, a chance to nurture new growth. But if you're heading into the garden with tools that haven't seen a sharp edge since last season (or longer), you're setting yourself up for frustration. Starting with dull tools is a common oversight gardeners make, as it can be hard to judge whether a tool blade needs sharpening just by giving it a once-over. Nevertheless, assuming things are fine as-is will be one mistake that can have a seriously negative impact on your garden's health and productivity. Dull tools don't just make the work harder — they tear and mangle plant stems instead of making clean cuts, leaving plants vulnerable to disease and slowing their recovery.
Luckily, this problem isn't as cumbersome as it sounds if you just take a moment to give your tools a quick sharpen at the start of the season. One budget-friendly tool that can sharpen dull shears is a carbide blade sharpener, such as this Corona Garden Tool Blade Sharpener. Alternatively, you can use a sharpening stone or file on hand tools. Something like this Berry&Bird Sharpening Stone could also come in handy for sharpening the edge on shovels (which can make digging a lot easier), as well as axes, machetes, and lawn mower blades. Speaking of which, consider having larger tools professionally sharpened if you're not comfortable taking off the blades yourself. Lawn equipment stores will usually sharpen things like mower and chainsaw blades, and outlets like Ace Hardware may also often offer blade-sharpening services.
Cleaning up the garden too early
When those final flecks of frost fall away, it's natural to want to tidy up the garden, removing every trace of winter's damage. However, rushing this process can be a costly mistake that shows its repercussions once it's too late to fix. Wildflowers rely on debris to keep them warm, while many beneficial insects, like pollinators and predatory bugs, overwinter in garden debris, leaf litter, and even hollow plant stems. By clearing these areas too early, you're not just removing unsightly remnants — you're also eliminating vital habitats for these helpful creatures who act like a security detail for your garden. This can disrupt the garden's natural ecosystem, leading to pest imbalances and a decrease in pollination. With a staggering number of honeybee colonies collapsing every year, that's a mistake we can't afford to make.
We know that you want to add a little oomph to your garden aesthetics ASAP, so instead of a complete overhaul, spring clean your garden gently. Begin by removing any clearly diseased or damaged plant material, since this could harbor pathogens. Then, wait until daytime temperatures consistently reach above 50 degrees Fahrenheit before clearing out whatever debris is left, allowing your overwintering insect bouncers to emerge naturally. Consider leaving some leaf litter and hollow stems in less conspicuous areas of your garden — this will give your beneficial bugs a place to live for the long term without disrupting new growth. As you clean, gently turn over small sections of debris to check for any slow-moving insects that might need a few more days to wake up. By taking a more measured approach, you'll support your garden's ecosystem and ensure a healthier, more balanced environment for your plants.
Not doing thorough weed control
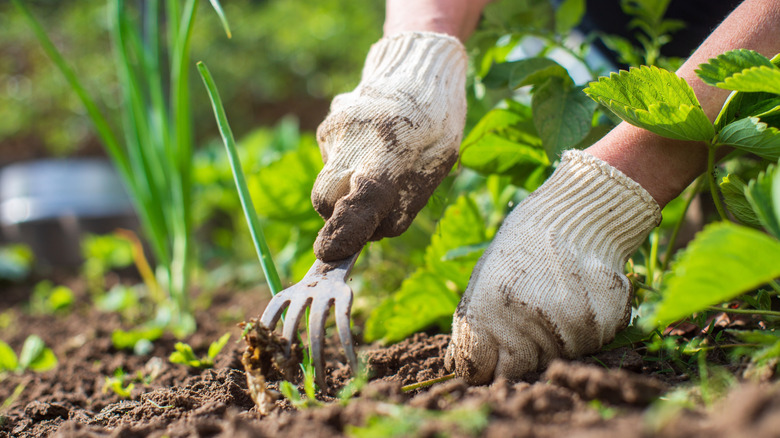
Spring's warmth awakens more than just your favorite flowers. The temperature change signals weeds to make their grand entrance. While it's tempting to quickly pull or hoe the biggest weeds and call it a day, this surface-level approach often leads to a frustrating cycle of regrowth. Weeds are resilient, and many can regenerate from even the smallest root fragments left behind. This means that a seemingly cleared bed can quickly become overrun again, stealing vital nutrients and water from your cultivated plants. Skimping on thorough weed control in spring sets the stage for a season-long battle in which you're constantly playing catch-up instead of enjoying your garden.
To break this cycle you'll need to adopt a strategic and consistent approach to weed control. Before planting, take the time to meticulously remove whatever weeds you see, getting as much of the root system pulled as possible. Don't worry, it's not as intensive of a chore as you might think. To make things easier, here are some of the best weed removal hacks to try (and a few to avoid). Hand-pulling after a rain or watering can make removal easier while a garden fork or weeding tool can be invaluable for loosening soil and extracting deep-rooted weeds. Once that's done, consider adding a fresh layer of mulch to suppress weed growth and conserve moisture. By investing a little extra effort in thorough weed control during spring prep, you'll create a healthier, less competitive environment for your plants, allowing them to thrive throughout the season.
Not replanning or remapping your garden first

It's easy to get caught up in the excitement of new seeds and plants, diving into planting without a clear plan. However, this haphazard approach can lead to a chaotic and inefficient garden. Without a map, you could end up with overcrowded beds, incompatible plant pairings, or wasted space. This lack of planning can result in a garden that's difficult to manage, less productive, and ultimately, less enjoyable. Not taking the time to plan, even just a little, is like trying to build a house without a blueprint. You're setting yourself up for a confusing and potentially frustrating outcome.
But don't worry, good garden planning doesn't require you to be a landscape architect. You can use online tools or garden planning apps, but a hand-drawn rough sketch is perfectly fine. Plus, it gives you an excuse to break out the colored pens you purchased from the last time you tried hand lettering (we see you). Draw a quick mockup of your garden beds, noting the dimensions and orientation. Decide which plants you want to grow and where they'll thrive while noting spacing requirements and succession planting to maximize any vegetable harvests — and the rate at which both perennials and annuals grow and flower. Consider factors like sunlight, soil type, and plant compatibility. If you're rotating annual flowers or vegetable crops, make sure to note that, too. A well-thought-out garden plan, no matter how simple, will not only save you time and effort in the long run but also create a more organized and productive space.
Ignoring late frost warnings
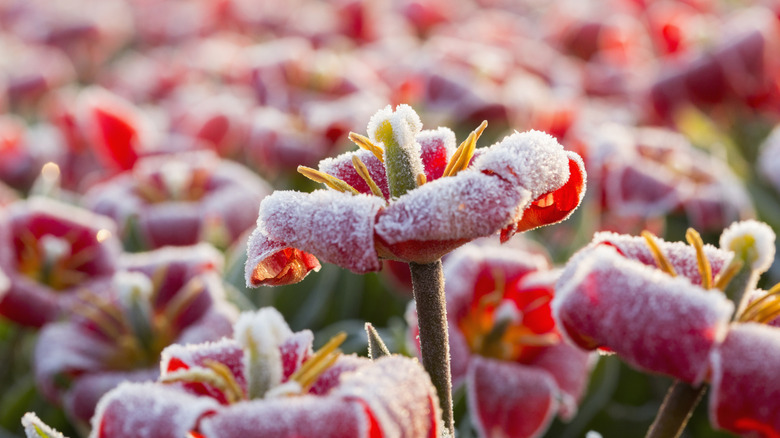
The first sign of warmer days can lure even the most seasoned gardener into a false sense of security. Just when you think winter's stranglehold on your garden has loosened, a late frost can swoop in and wreak havoc on tender new growth. It's easy to get carried away by the sunshine and forget that unpredictable cold snaps are a common spring occurrence. Ignoring late frost warnings can lead to devastating consequences, damaging or even killing vulnerable seedlings and newly emerged plants. This oversight can set your garden back weeks, forcing you to replant or nurse damaged plants back to health.
The best way to prevent this is by staying informed and being prepared. Regularly check your local weather forecasts, paying close attention to overnight temperature predictions. If a late frost is anticipated, take proactive steps by first watering your plants thoroughly before a frost, as moist soil retains heat better than dry soil. However, be absolutely sure to water the soil and not the leaves of the plant, as wet leaves can freeze, making the problem worse than before. Next, cover vulnerable seedlings and young plants with frost cloths, blankets, or even cardboard boxes, and move container plants to a sheltered location, like a garage or shed. If you don't have time to keep uncovering plants during the day (as leaving blankets and boxes on them is not a good idea), frost cloths are definitely the way to go, as not only do they provide better insulation, but they also let light through, allowing you to leave them on during the day if more frost is predicted that night. Plus, you can get 300 square feet worth of something like the Homoda Plant Covers for just $20.
If you've already planted tender seedlings and a frost hits, don't panic. Assess the damage after the frost has passed and prune any visibly injured foliage. With a little foresight and quick action, you can minimize the impact of late frosts and keep your garden growing strong.
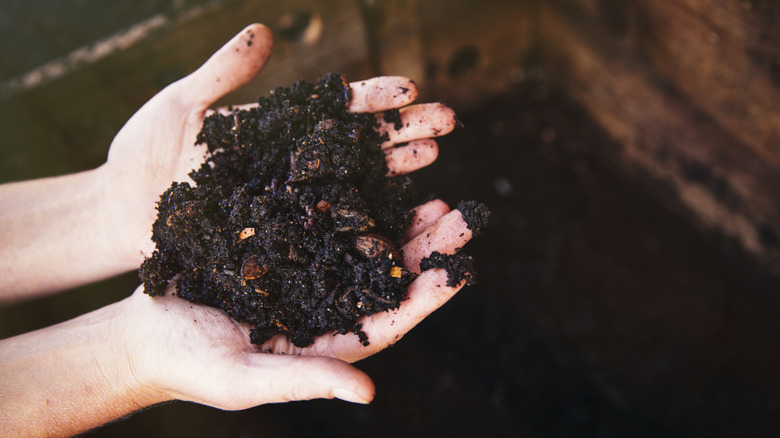
Not cleaning and sanitizing garden tools and containers
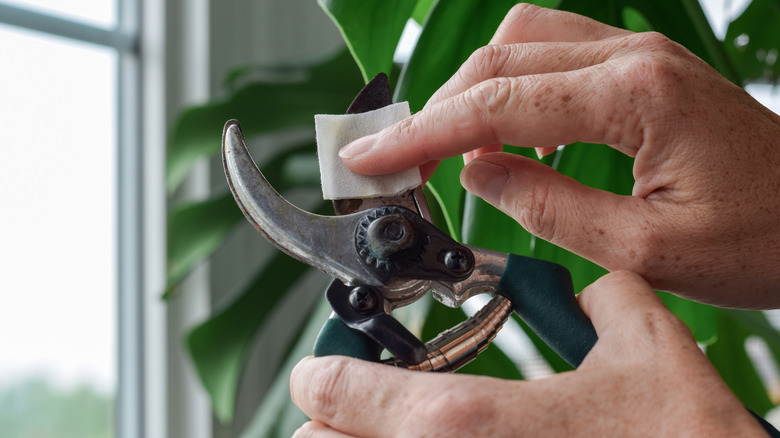
Spring is a time for fresh starts, but if you're reusing tools and containers from last season without a thorough cleaning, you might be unknowingly introducing old problems into your new garden. Soil, debris, and plant residue left on tools and pots can harbor fungal spores, bacteria, and even overwintering pests. Using these contaminated items can spread diseases and infestations to your healthy plants, undermining your efforts before they even begin.
To ensure a healthy and productive start to your gardening season, make cleaning and sanitizing a crucial part of your spring prep. Start by scrubbing tools and containers with soapy water to remove any visible dirt and debris. For containers, especially those previously used for plants that showed signs of disease, they'll need a deeper clean and thorough sanitization to eliminate any lingering pathogens. After the soapy water wash, soak them in a disinfectant solution, such as diluted bleach, for at least 30 minutes. Pay special attention to pruning shears and other cutting tools, as they come into direct contact with plant tissue. Allow tools and containers to dry completely before using or storing them. Also, for containers, consider using new potting mix to minimize the risk of soil-borne diseases and provide fresh nutrients for your plants.
Not hardening off your seedlings
You've nurtured your seedlings indoors, giving them a perfect, safe environment for growth and now it's time to put them in the garden. But taking them directly from the cozy confines of your home to the harsh realities of the outdoors is a recipe for disaster. Indoor seedlings are delicate; they haven't experienced the sun's intensity, the wind's force, or the fluctuating temperatures of the outside world. Plunging them into these conditions too quickly can lead to sunburn, windburn, stunted growth, or even death.
Hardening off is the gradual process of acclimating your seedlings to outdoor conditions. The goal is to slowly expose them to more direct sunlight and wind over the course of about two weeks. Look for a mild, overcast day and place the seedlings in a sheltered spot outdoors, like an exposed porch, for just an hour or two. Then, gradually increase the amount of time they spend outdoors each day. Once they've spent around six to eight hours outside every day — the typical amount of a full-sun day — and can tolerate direct sunlight and wind, they're ready to be transplanted into your garden. This slow and steady approach will ensure your seedlings are strong and resilient, ready to thrive in their new environment.
Not thinning your seedlings
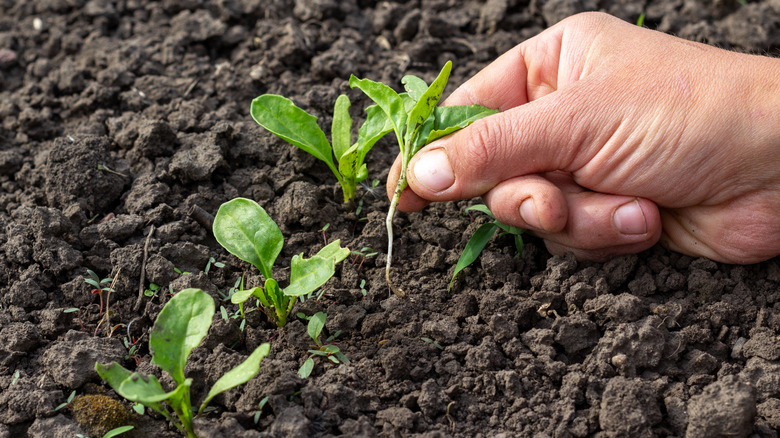
It's tempting to let all your seedlings grow, especially when they're young and full of potential. But overcrowding is a common mistake that can hurt your garden's success. When seeds are sown too closely together, they compete for limited resources like light, water, and nutrients. This competition leads to weak, leggy seedlings that are more susceptible to disease and less productive.
Once your seedlings have developed their first true leaves, it's time to thin them. Thinning seedlings is the process of removing excess sprouts to provide adequate spacing for the remaining plants. Small scissors are best for thinning seedlings, but pinching off the weaker ones also works, as it leaves the strongest ones to grow in the full space. Check your seed packets for recommended spacing, and aim for that distance between the remaining seedlings. While it may hurt you to do it, especially after they've all worked so hard to germinate, don't be afraid to be ruthless. Removing some plants is crucial for the health and vigor of the others.