The Simple And Affordable DIY Shelving System That Will Tidy Up Your Bathroom
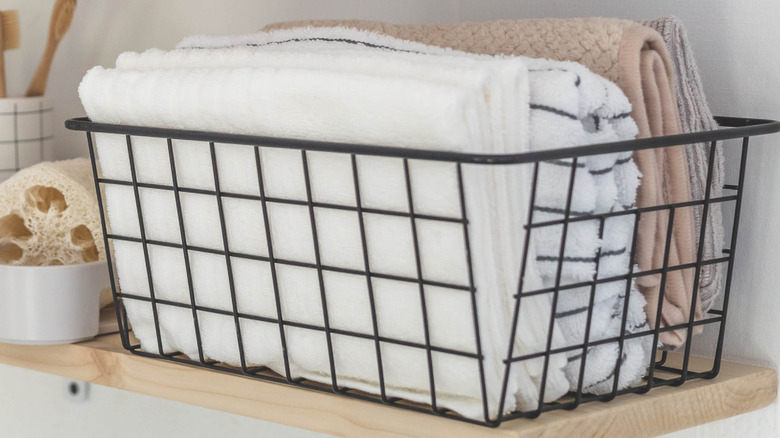
If you don't have adequate cabinet space or a bathroom closet, all your toiletries, towels, and cleaning supplies can end up being stored on the countertop or on top of your toilet's tank. This can make your bathroom feel chaotic while making it harder to clean. If you have been searching for solutions to your bathroom storage issues, you may have found that your options are limited to bulky behind-the-toilet shelving units (that don't fit in every space) or mounted shelves, which require drilling holes in your wall (not great for renters). Fortunately, there is a DIY bathroom storage hack that doesn't take up a lot of space or require wall mounting. This shelving unit is made up of three 6-foot-long, 1-by-2-inch wood posts and two Essentials Gold Iron Rectangular Baskets from Dollar Tree.
Instead of being mounted above the toilet, this storage solution is simply placed behind your toilet where it will lean against the wall. This makes it the perfect solution for renters, as well as homeowners who want to avoid having to patch up holes in the future. All you need is a saw, a drill, screws, wood stain (optional) and your wood posts and baskets. This easy bathroom storage hack is also affordable. The wood can cost you under $12 and the baskets are $1.25, bringing the cost of this project to just under $25, including screws and optional wood stain. It isn't difficult to assemble, either.
How to assemble your over-the-toilet storage rack
To make this DIY bathroom storage idea, cut one of your wood pieces in half with your saw, leaving you with two 6-foot pieces and two 3-foot pieces. These shorter pieces will be the crossbars where your baskets will hang. Then, lay your long wood pieces on the floor, spaced to the width of your toilet tank, and place your crossbars. The bottom crossbar should be placed to allow clearance for one of your baskets, taking into consideration any items that will still be kept on top of the tank. When you space the top crossbar, consider the depth of the basket and the height of the items that will be stored in the lower basket.
Once everything is measured and adjusted, drill pilot holes and connect the crossbars to the supports with screws. Then, place screws in the crossbars to hold your baskets, leaving part of these screws exposed so your baskets can hang. (You could also use double headed screws for this part of the project.) Then, place the grid behind your toilet and hang the baskets.
The toilet's tank should prevent the grid from tipping forward, but if you have kids or want to store heavy items in the baskets, you might consider mounting it to the wall, if that's an option. This can be done by using drywall anchors or toggle bolts. Heavy-duty command strips could also possibly be used instead, or you could use longer 1-by-2 inch boards for the vertical sides that can sit on the floor on either side of your toilet.
Making your new bathroom storage unit beautiful
Now that you've got your new basket grid up, there are several ways in which you can upgrade it to make it more aesthetically appealing and customize it to your needs. The first and most obvious way to customize it is with paint. This can be done either prior to assembly or after. You can make it a paint shade that's perfect for bathrooms or go with something bold and unique. Using stencils to paint patterns, applying decorative stickers, or wrapping the wood in attractive laminating paper are also ways to make your new shelving unit look beautiful. Before sprucing up your basket grid, though, it's a good idea to apply a coat of moisture-resistant wood stain since bathrooms tend to get humid.
If you don't want your cleaning items and toiletries exposed for guests to see, you can customize your basket shelves by adding cloth liners. To do this, place fabric inside the baskets and cut the pieces so that there is an inch or two hanging over the edge. Then, fold the edges and hot glue them to the part of the fabric that's lining the basket. If you are crafty, you could also sew a fabric liner. To provide even more privacy for your toiletries, try making lids for your baskets out of cardboard. You can cover the cardboard with matching fabric and attach a handle using hot glue. This way, you have a bathroom storage solution that's both functional and beautiful.