Grouting Mistakes To Avoid Making When DIYing A Tile Installation
We may receive a commission on purchases made from links.
Installing a new tile floor or backsplash is a job many homeowners may choose to take on themselves. While this is certainly a task you can DIY, it is also possible for things to go wrong. One area that many have trouble with is grouting. As you probably know, grout plays an essential role in an installation. It fills the gaps between the tile, helping to prevent moisture from getting into the subfloor or the walls behind the tile. The compound also helps keep the tiles in place, ensuring they don't slide around and reducing the risk of cracks or chips.
For these reasons, if you make a mistake when grouting, it can have serious repercussions. You could be opening yourself up to mold and moisture issues, decreasing the lifespan of your new floor, backsplash, or shower wall, or wind up with a surface that looks sloppy and aesthetically unappealing. If you want to know how to properly apply grout, you've come to the right place. We'll share some of the most common mistakes to avoid and help you learn what you should do instead to ensure a professional-quality installation.
Choosing the wrong type of grout
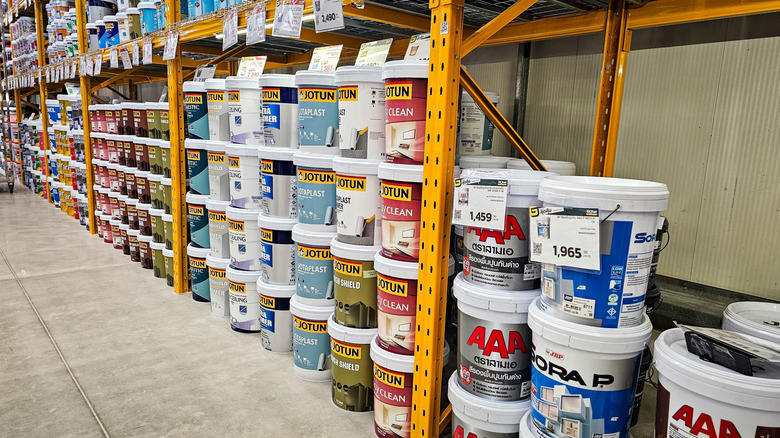
If you've never installed tile before, you might be surprised to learn that there are different types of grout (sanded, unsanded, and epoxy) — and choosing the wrong one could have negative consequences for your project. For example, using unsanded grout to fill wide tile seams (more than ⅛ inch across) will make cracks more likely to appear. And using sanded grout with polished tiles could result in visible scratches that turn your new project into an eyesore.
To choose the right grout for your tile, you need to consider where you are installing it, the type of tile you're using, your budget, and more. Epoxy is a popular choice for many projects, particularly those in moisture-prone locations — it's waterproof and stain-resistant, which makes it great for bathrooms and outdoor use (though it can yellow in too much direct sunlight). However, epoxy grout dries relatively quickly, which will limit how much time you have to work with it, and increase the odds of an improper application.
Sanded grout is another option you might consider. Its strength and longevity make it popular for higher traffic areas. However, like we said above, its rough texture can scratch certain types of tile. A slightly more expensive alternative is unsanded grout, which offers better malleability, making it a bit easier to apply — it also won't scratch your tiles. However, because it isn't as durable (but has great adhesion and doesn't slump as easily as sanded grout), you should generally use it for walls, rather than flooring.
Not choosing the right grout color to complement your tile

While choosing the wrong grout color might not have a negative impact on the surface's moisture resistance, it can definitely hurt the look and feel of your space. Unfortunately, choosing a color is not as simple as you might think. For example, if you want to accentuate the shape of your tile, choosing a similar grout color would be a mistake because everything will just morph into one nearly solid surface. Conversely, if you're going for a more subtle look, choosing an overly contrasting or bright grout might result in your wall or floor being much flashier than you were hoping.
Instead of rushing to pick up the first shade option you can find, take some time to evaluate your design preferences. Opt for a darker or contrasting color to pull more attention to the space or to really make your tile's design stand out. An option that is only a few shades darker or lighter than the surrounding tile may be best if you desire a more neutral look for the space. As you're choosing the right grout color for your tile, don't assume that the color depicted on the packaging is a 100% accurate illustration of what the dried product will look like. Once dried, color variations are common and could end up throwing off your entire design plan. Instead, check actual grout samples for a true representation of what you should expect.
Failing to be prepared with the appropriate tools for applying and wiping away excess grout

If you don't have the necessary tools on hand before you start the grout application process, you could find yourself facing serious challenges. You might not be able to properly mix the grout. Even worse, you may get the compound mixed, only to discover that you are unable to smoothly and correctly apply it between the tiles or wipe off the excess properly. If you improvise and use the wrong tools, you may be left with an uneven application, unwanted gaps, or dirty tiles.
So, what special tools are necessary to ensure a seamless application? One of the most important is a grout float, such as the Troxell Urethane Grout Float. These tools are designed to help ensure that the entire gap between tiles is filled. You'll also need a grouting sponge, like one from the QEP Extra Large Grouting, Cleaning, and Washing Sponge Set, when you're ready to remove the excess compound. These are different from kitchen sponges because of their hydrophilic construction, which ensures they are able to absorb liquids without losing their shape and accidentally pulling grout out from the gaps. Beyond these specialty items, you'll also need a bucket for mixing and protective gear, like work gloves, goggles, and a respirator mask.
Applying grout before the mortar has cured
One of the key mistakes you want to avoid when tiling is applying the grout too soon. If you grout before the adhesive cures, it can cause a wide range of problems. If the mortar under the tiles isn't set, they may shift around. This can result in uneven tiles or even ones that fall off if you're installing a shower wall or backsplash. Another problem that premature application can cause is cracks. Again, moving the tiles can make them more prone to cracking and other damage. And beyond problems with the tiles themselves, applying the compound too early may also open you up to potential future mold problems. If the mortar is still wet, all that moisture can remain beneath the surface, creating a welcoming environment for mold.
To avoid these issues, it is essential not to rush to apply the compound. It is advisable to wait about 48 hours to ensure that the mortar is able to fully dry and lock the tiles in place. If conditions are cold or humid, it's wise to extend the drying time. If you're operating on a very tight schedule (we see you, weekend warrior), a quick-curing mortar (such as the Mapei UltraFlex LFT Rapid from Lowe's) can cut down the drying time to a few hours, but is more exacting to work with and leaves less room for error — so we'd advise only going this route if you are already comfortable laying down tile and can work quickly and neatly.
Forgetting to protect painted walls and other surfaces
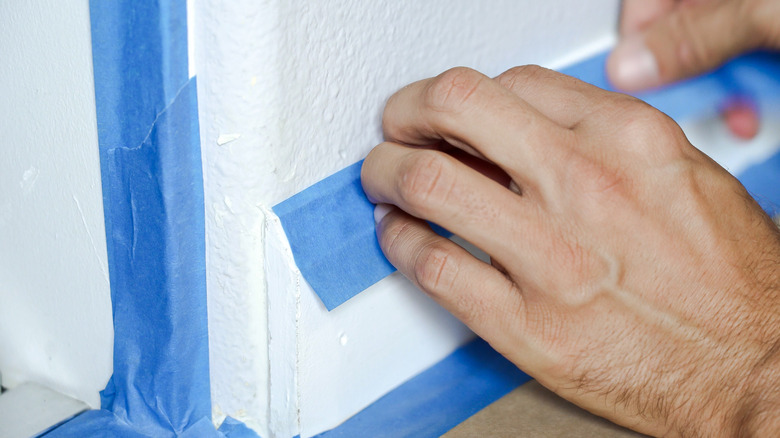
Grout is messy to work with. If you inadvertently get it on other surfaces in your bathroom or kitchen, it is likely to cause damage. Remember, the compound is both damp and (often) a different color than the walls, fixtures, and other surfaces in your space. It could permanently discolor these areas, or could even damage the drywall or mar wallpaper. For these reasons, forgetting to protect these surfaces is a serious mistake that you want to avoid.
Fortunately, protecting the other surfaces in your home is relatively easy. You'll just need a microfiber cloth (like the Homexcel Microfiber Cleaning Cloths) and painter's tape (such as the ScotchBlue Original Multi-Surface Painters Tape). Use the microfiber cloth to clean the surfaces you wish to protect. Removing any dust or other debris will help ensure that the tape is able to fully adhere to the surface. Then, apply the sticky strips over the area right where it meets the tile you'll be working with. Be sure to press down firmly on it to keep the tape in place. Wait about half an hour before you start grouting to make sure that the tape is set and isn't peeling off of the surfaces you covered.
Forgetting to clean the joints and tiles before applying the grout
Whether you're removing and replacing grout or laying entirely new tile, it is essential not to skip the step of cleaning the joints before applying a new binder. Any dust, dirt, old specks of grout, or excess thinset in the joins can spell big trouble. Debris and excess thinset sitting in the gaps can interfere with the grout's ability to set properly and even leave tiny openings for water to penetrate beneath the tile.
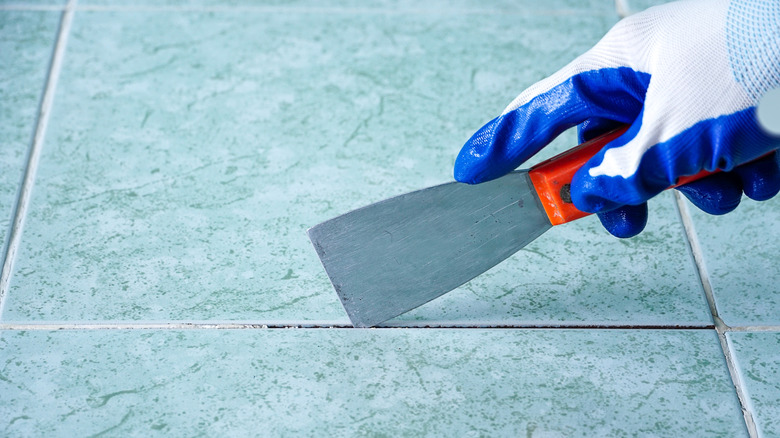
If you are removing old grout, but keeping the existing tile, you'll need to use a grout saw (like this Coitak Tile Grout Saw) or a putty knife to remove all traces of the hardened compound. To speed up the job, you can use an oscillating tool and an attachment like Dewalt's Oscillating Fastcut Carbide Grout Removal Blade. After grinding out the old grout, use a shop vacuum to thoroughly clean the area. Then, you can do a more thorough clean-up using a damp cloth. For new tile installations, you'll also want to wipe the surface and the space between the joints to ensure they are prepped and ready. However, if there is excess thinset preset in the joints, first run a razor knife along them to clear the grooves (roughly two-thirds of the way down the thickness of the tile should be free from thinset).
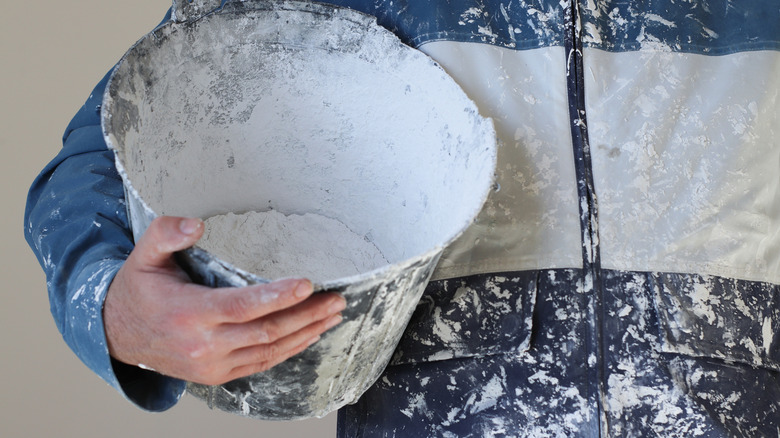
Adding too much water when mixing the grout
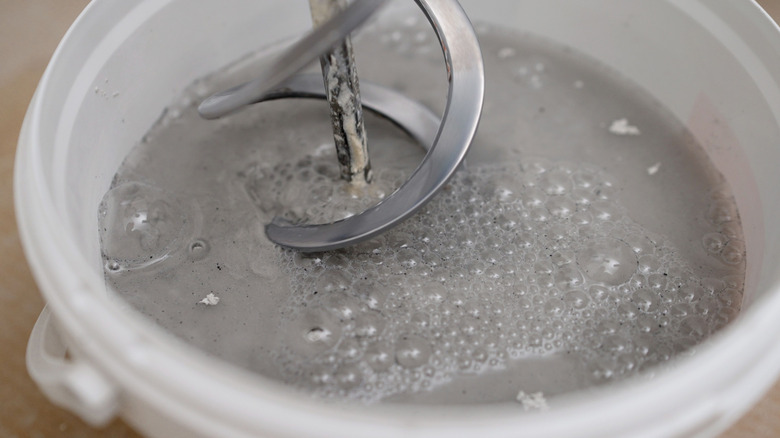
Achieving the proper consistency is imperative when working with grout. Excess liquid will cause the compound to become too thin and runny. It can make proper hardening unlikely, which will certainly interfere with the grout's ability to seal the joints between the tiles.
To prevent the catastrophic outcomes that overly liquidy grout can cause, it is essential to know how much water to add when mixing. Check the directions on the packaging from the manufacturer, but also pay attention to the consistency as you mix, to make sure you're adding the right amount. Once mixed, grout should be malleable, but still very thick. If you dip your putty knife into the bucket and the compound slides right off of it, the mixture is too thin. If it sticks nicely to the end of the knife, that's what you want to see.
If you inadvertently add too much water, all is not lost. You can add more of the powdered compound from the package until the desired consistency is achieved. However, if you've already used up the entire bag, you could find yourself in a tight spot. To avoid this issue, only mix part of the bag initially so you have that extra buffer.
Skipping the step of allowing the grout to slake
Once you've finished mixing the grout, moving on to start applying it immediately will be a mistake. Failing to let it slake will prevent the cement, polymers, and other grout components from fully hydrating and, ultimately, from bonding properly. This step is crucial in ensuring a strong and durable mix that will perform as expected. So, if you skip it, it is more likely that your grout work will chip or crack in the future.
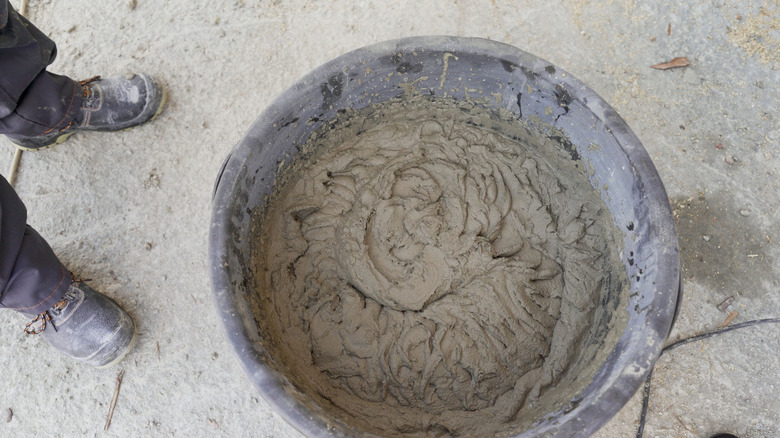
Instead, simply wait between 10 and 15 minutes to let the mixture slake. After slaking, the grout will be a bit thicker than it was when you finished mixing it — this is what you want. The consistency should be thick and sticky, much like that of peanut butter — perfect for spreading with your preferred implement.
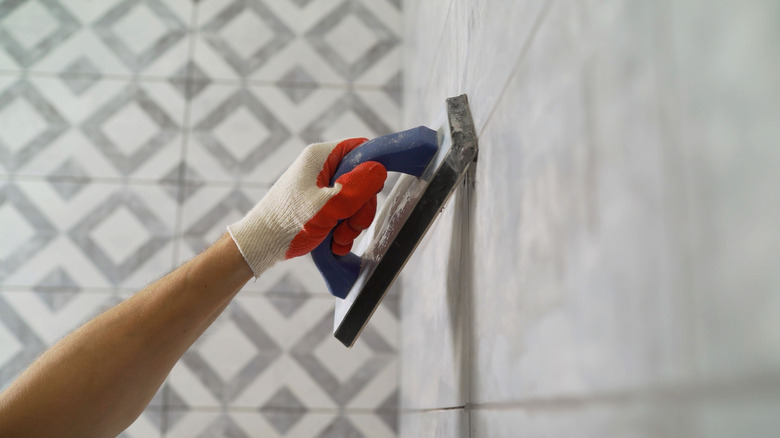
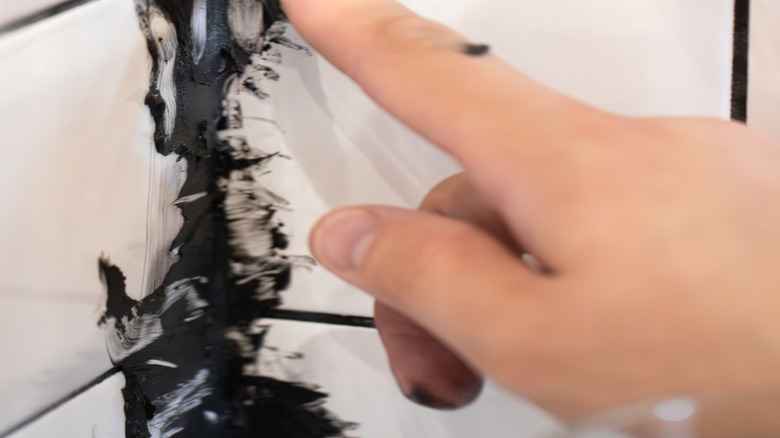
Not understanding how to properly apply the grout
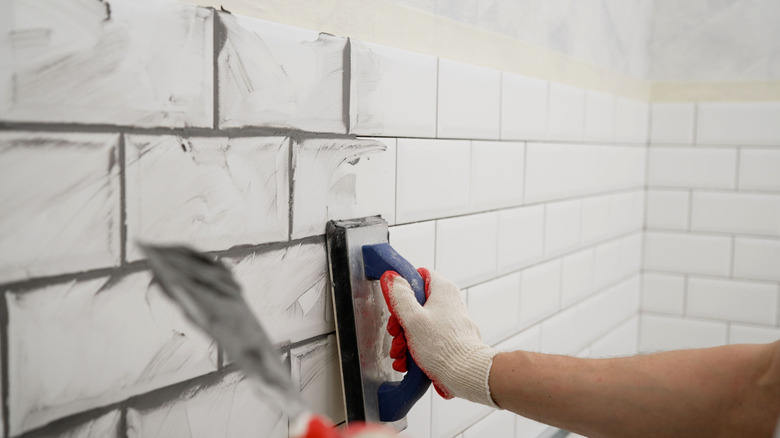
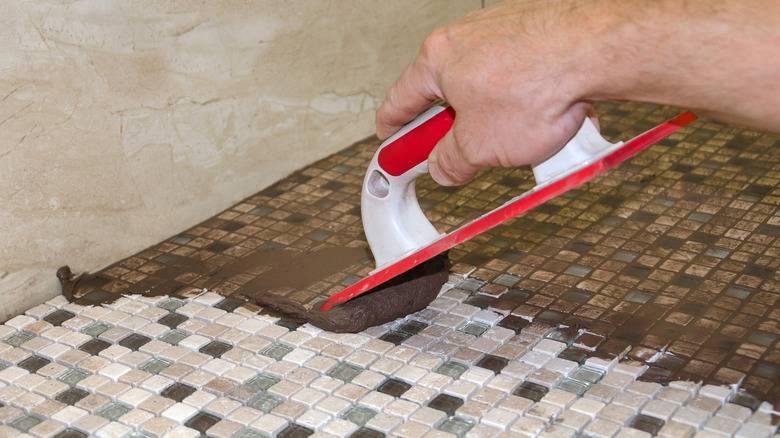
After slaking (and another quick stir), you're finally ready to apply the grout to your tile. However, there are still some serious mistakes that you could make during this step. If you don't hold the grout float at the appropriate angle, you're not going to fully load each opening. As you might expect, this can result in a weaker application and increase the chances of moisture penetration and a future full of cracked tiles.
The best way to properly grout tile is to hold the float so that its side is perpendicular to the tile surface. You don't want to move it in the direction of the joint openings. Instead, slide it diagonally across them, making sure that you're using the edge or corner of the float to fill the entire gap with the compound. This method provides a much more thorough and gap-free application than you'd be able to achieve if you were to move the float vertically or horizontally.
Failing to give the grout enough time to set
After applying grout, you will need to wipe the excess off the tiles. However, jumping to do this too quickly is a mistake you'll regret. If the compound isn't given adequate time to set, you could inadvertently wipe it out of the gaps that you want filled, instead of just off the tile itself. This can leave you open to moisture or tile issues down the road, as well as messy-looking grout lines.
As a general rule, it is advisable to wait between 15 and 30 minutes before you start wiping excess off of the tiles. This is typically long enough to let the grout set up. However, this timeline is just a general guide because of the different variables that can impact set times. For example, if you're in a very humid environment, the grout is going to take longer to set because of all the extra moisture in the air. The thickness of your lines will also impact set times, as wider applications will take longer. And, remember, this is just giving the grout enough time to slightly dry before wiping things down. The length of time you should wait to use your shower after grouting tiles or to walk on a newly laid floor will be much longer — typically at least 48 hours.
The grout should lose some of its wet, slick look once set. Different types of grouts also set up at different rates, so check the box, follow the manufacturer's instructions, and watch out for additional directions that might come into play under weather extremes. For instance, Mapei's rapid-setting grouts might not be suitable for use in very high temperatures.
Not knowing how to properly remove excess grout
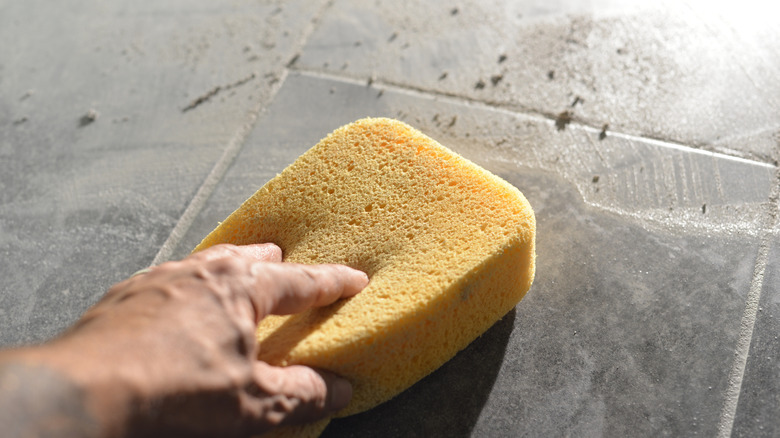
Removing excess grout from tiles requires multiple steps in the right way, at the right time. If you fail to remove the grout properly, it could harden and become more difficult to remove later. However, as we mentioned above, sponging it off too early can also result in inadvertently removing some of the compound from the joints.
The first step in the process is completed right after you've used the float to spread and apply the compound. You'll want to use the float again, removing as much of the excess spread all over the tiles as you can. With the float, create snaking, S-shaped passes across the surface. Don't overstress about getting everything — that'll come later. You just want to remove the thicker layer for now.
After the grout has had that 15 to 30 minutes to set, you can use the special hydrophilic sponge to give the surface a better cleaning. Again, this sponge type is essential, as it will be able to maintain its shape and keep you from accidentally scraping or smearing grout out from the joints. Keep the sponge damp — not dripping wet — and continue making passes and rinsing it out until the surface is mostly clean. There will still be a slight hazy finish covering it — that's ok. After waiting an additional 30 minutes or so, you can remove the hazy layer using a dry microfiber towel. Depending on the size of your project, you may need a few towels.
Applying grout — not caulk — where vertical and horizontal surfaces meet
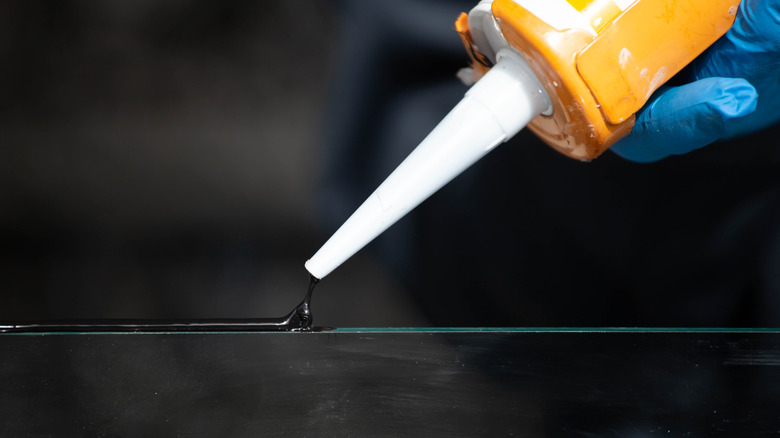
If you're working on a project that involves grouting walls and flooring, such as in a shower, you might assume that you should also add the compound along the edges where those two surfaces meet. While sealing grout can help prevent water from penetrating, it is important to point out that the material is not generally waterproof. Most grout is the opposite — being porous and able to absorb water. So, if you apply it along the edges of a shower floor, small amounts of water could seep into the walls.
So, if you shouldn't grout these areas, what should you do? The best choice is to use caulk anywhere that a vertical and horizontal surface meet. Unlike grout, caulk is waterproof, and it will help prevent moisture from seeping beyond the pan. It's also easier to apply in these tight areas, and it has some flex to it, which reduces the chances of cracks in the seams.
Not storing leftover grout properly so it is available in the future
After you finish your project, you should consider storing some of the leftover powdered grout. This way, if you need to remove a broken tile or touch up any parts of the job, you'll have the right color on hand. However, it is essential to know the correct way to store the dry grout. Otherwise, you may pull it out in the future only to discover that it is unusable. Even when stored dry, grout is still porous. So, if any moisture from the air mixes with it, you won't be able to use it.
For this reason, air-tight storage is best for preserving the powdered compound. You can pour it into a zippered plastic bag and seal it shut. Just be sure to roll the bag before zipping it to remove any excess air. Once bagged, pick a cool and dry area to store it.