Overlooked Kitchen Appliances You're Forgetting To Clean

We may receive a commission on purchases made from links.
Kitchen appliances are indispensable tools, helping you achieve everyday tasks. But they can only do that if dust, grease, and pet hair don't hinder their efficiency. Now, if you're diligent about cleaning all your major and small devices, you might think that you're in the clear. However, there are lots of appliances you might be forgetting to clean thoroughly, including ones in your food prep area. There are a few reasons for this. One, hidden spots like your fridge's condenser coils are out of sight, out of mind. Other times, you might not even know that you're supposed to be cleaning the area you're neglecting, such as a refrigerator's gasket or its water dispenser. Even though they may seem trivial in the grand scheme of things, they can make a big impact on your expensive appliances.
Case in point, dusty condenser coils will make it difficult for the refrigerator to achieve the desired level of cooling. Or, a filthy hood filter may impact your kitchen's odor. The good news is that you don't need expert-level knowledge or specialized tools to maintain all of your appliances. You just need to clean them properly and maintain the required frequency to keep them in tip-top shape. So, here's everything you need to know to get started.
Vacuum your fridge's dirty condenser coils every six months
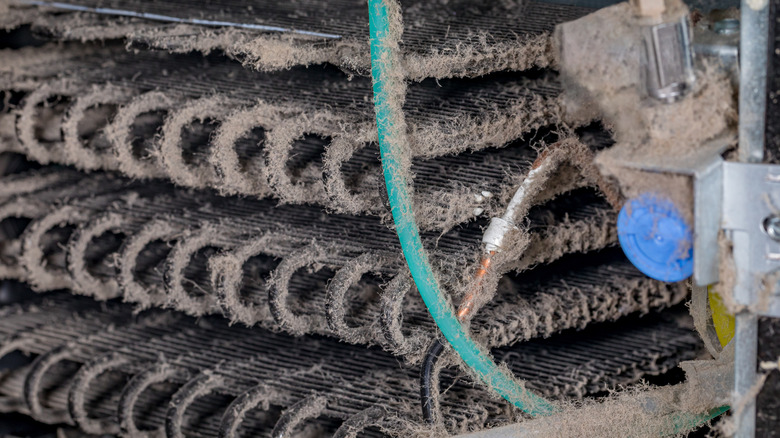
If your fridge is struggling to keep your meat, produce, and dairy fresh, you might think its performance has gone down. However, before writing it off and choosing a new refrigerator for your kitchen, check if the condenser coils are covered in dust, dirt, and pet hair. Grimy tubes don't work as well to eliminate the compressor's heat and keep the refrigerant cool. This can put a load on your energy bills, lead to compressor problems, and shorten your appliance's expected life. So, make it a point to vacuum the condenser coils twice annually. However, you might have to clean them quarterly if your pets shed heavily.
To clean the overlooked coils, start by unplugging the appliance. Now, look for a horizontal grill at the door's base. If you don't find it there, carefully move the fridge away from the wall and check the back for a cover near the bottom. Once you find it, pull it off to uncover the coils. Cover the area around your fridge with an old cloth to minimize the cleanup afterward. Next, attach a crevice tool to your vacuum cleaner and thoroughly suck up as much loose debris as possible. Then, gently move a brush like the GE Coil Cleaning Brush along the tubes' curves and the hidden nooks and crannies. Finally, run the vacuum once more to get rid of the lingering dust and hidden hair. After you're done, snap back the grill and move your refrigerator back to its original spot (if you moved it).
Greasy range hood filters must be cleaned or replaced every three months
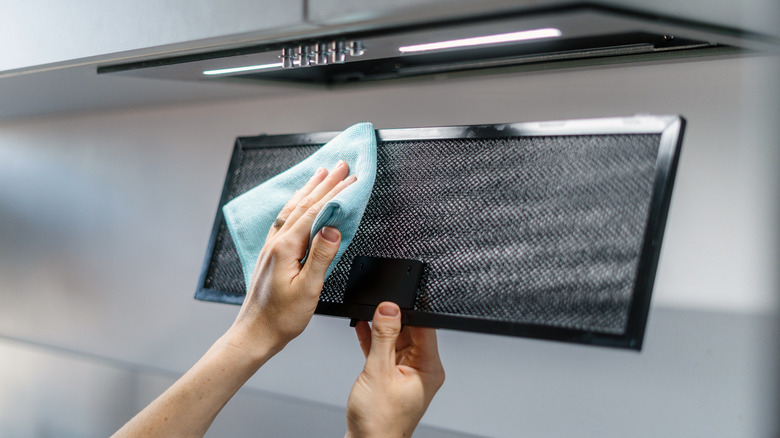
Have you ever wondered where the smoke, fumes, and grease from your cooking go? The range hood above your stove sucks it all up through a fan, where the molecules get stuck to an attached filter. Over time, they can build up in the filter and reduce its efficiency. This won't just negatively impact your kitchen's air quality and give way to residual odors. The extra moisture can also be the perfect breeding ground for bacteria. Additionally, the greasy screen may become a fire hazard that can even tempt creepy crawlies (like cockroaches) to visit the all-you-can-eat buffet.
So, to ensure your range hood does its job well, clean the often-overlooked filters every three or four months. However, if you cook often, stick to a cleaning frequency of four to six weeks. Remember, only mesh filters can be cleaned. If your hood has a charcoal (or carbon) one, you'll have to replace it after three to four months of service. If these varied periods are confusing, perform the paper test to determine if your filter is filthy. Simply switch on the hood and hold a piece of paper under it. If it gets stuck, you're in the clear. If not, you must clean or replace the filter.
To clean your mesh filter, follow the user manual to slide it out of the range hood. You can then either put it in the dishwasher and run a hot cycle with your usual detergent, or soak it in a large container or sink filled with boiling water. If the latter, add ¼ cup of baking soda and a liberal dash of dish soap (or use a powerful vinegar solution). Let it soak for 10 to 15 minutes and use a soft brush to clean it. Rinse and let it dry before putting it back.
Clean your dishwasher's innermost parts every month to maintain its performance
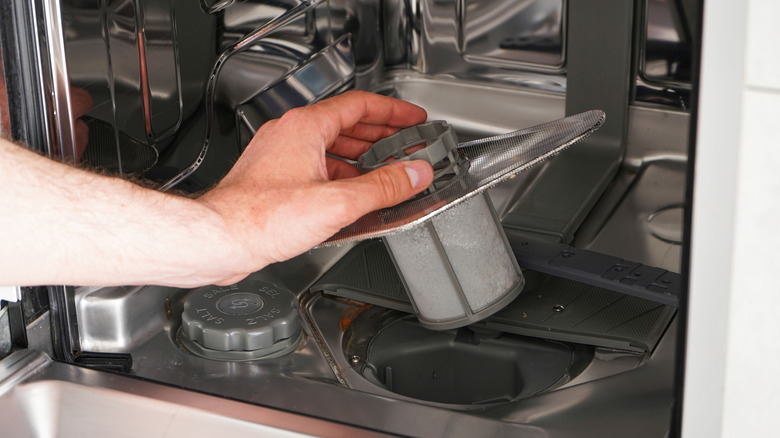
Several parts work in tandem for your dishwasher to thoroughly clean your dirty cookware, dishware, and cutlery. While you may regularly clean the racks, doors, and walls, you might be overlooking its filter, spray arms, gasket, and drains. Unfortunately, the appliance's cleaning prowess will take a nosedive if there are food particles, soap scum, and grease clinging to them. It could also degrade the machine and shorten its life. Further, the rotting buildup can allow bacteria and mold to establish their foothold, causing the washer to smell rank. This is why you must sanitize your dishwasher's innermost parts monthly. However, you may have to clean it more frequently if you use it a lot or it starts to smell bad.
Before you start, grab the appliance's user manual to easily locate each part and pop them out (wherever possible). The first item on the agenda is your dishwasher's filter. Take it out and put it under warm running water to dislodge any stuck debris. If it's too dirty, dip it in a bowl containing hot water and distilled white vinegar (apple cider may stain) in a 1:1 ratio. Wait for about 15 minutes, then gently scrub it with a soft sponge or brush — steel wool and scouring pads could damage it.
Now, remove the sprayer arms and employ a clever toothpick hack to keep your dishwasher working like new and clear the clogged nozzles. As for the gaskets, clean them weekly with a baking soda and water paste. Simply apply it to the rubber surfaces, and rub it with a soft brush before letting it air dry. Finally, remove all rotting particles around the drain, then pour in some baking soda followed by vinegar to loosen away the grime.
Garbage disposals must be cleaned weekly to minimize odors
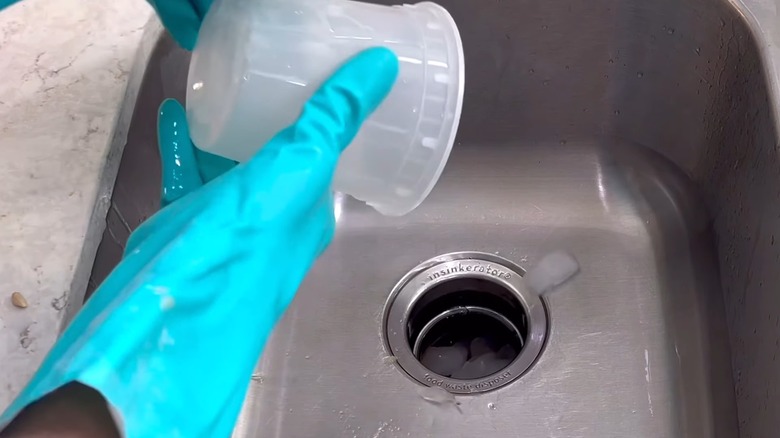
Although necessary to break down solid food waste, your garbage disposal is an out-of-sight, out-of-mind spot you're likely forgetting to clean. This will cause food particles to accumulate and grease to cling to its walls, giving way to unsavory odors. Even worse, it might start making rattling noises when in use or take extra time to drain. If left unattended, the waste may solidify over time and cause blockages or harm the device's blades. To ensure your kitchen doesn't smell rotten or you don't have to foot the bill for repairs, make it a point to clean it every week.
Begin by turning off the power supply to your garbage disposal. Remove the baffle (the rubber flaps at the mouth of your sink's drain) and clean it using dish detergent and a soft-bristled brush. If it isn't detachable, get an old toothbrush or a dedicated grout brush like the SPARTA Crevice Brush to make sure you don't leave behind stuck food particles. Once it's clean, use a flashlight to check the state inside. Grab needle nose pliers to take out any stubborn objects like stuck celery and dried-up pasta noodles. Never put in your hands to pull out the items, or you could injure yourself. Then, dump ½ cup of baking soda and 1 cup of distilled white vinegar to clear the blockages and get rid of bad smells. Give it a few minutes and pour hot water down the drain. To freshen and sharpen the blades, turn the power back on and drop in a cup of ice cubes and ½ cup of course salt. Now, turn on the blades and run cool water until the ice is melted.
Scrub your microwave's grease filter monthly and replace the charcoal filter semi-annually

Even if you deep clean your microwave weekly, chances are you're overlooking the filters responsible for purifying the air when you cook. Positioned at the top of your over-the-range appliance, a charcoal filter absorbs strong odors during your cooking sessions. On the other hand, you'll find the grease filter beneath the device. It ensures that food molecules and grease from the stove don't make their way to your microwave's ventilation. Given their importance, you must keep them clean, or the clogged filters will slack at their jobs. Scrub the grease filters every month and replace the charcoal ones (they can't be cleaned) bi-annually.
To do so, first, disconnect your microwave from the power source and don your rubber cleaning gloves. Next, find the rectangular or square metal and mesh grease filter beneath the appliance and slide it out of its slot (or as directed by the manufacturer's manual). Submerge it in a container or sink filled with soapy hot water for 10 minutes. You might want to add ½ cup of baking soda and let it soak longer if the filter is really filthy. Then, gently rub the mesh filter and metal frame with a soft sponge or brush. Wash away the soapy solution and dry it using a clean microfiber cloth. You can even let it air dry. Avoid sliding the filter back in, even if it's slightly damp, to steer clear of an accidental fire.
A toaster's crumb tray and racks demand weekly or bi-monthly cleanup
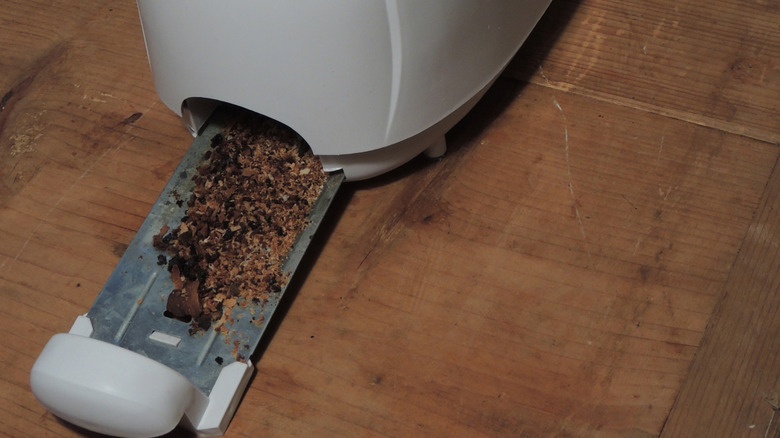
Is your Smeg toaster delivering burnt or stale-tasting bread? Leftover crumbs and debris from your previous toasting sessions might be to blame. This is because these tiny particles can interfere with your appliance's heating elements and give you unevenly toasted bread. The overly-cooked crumbs may also start emitting a burnt smell in your kitchen. Their buildup can even negatively impact your device's longevity and damage it. To avoid these problems, clean your pop-up toaster's crumb tray and racks regularly. The exact frequency will depend on how often you use it. For example, if you use it every day, schedule a cleaning session every week. However, if you use it a few times a week, a bi-monthly cleanup will suffice. More seldom users can get away with monthly maintenance.
Unplug the device and wait for it to cool down. Meanwhile, move a trash can near your cleaning area. Then, look for a handle-like contraption on either side of your toaster (you'll likely find it at the bottom). Pull it out with a steady hand and dump the accumulated crumbs into the bin. If you still see some stubborn gunk, soak the tray in a warm water and dish soap solution and use a clean toothbrush to clean it. Now, see if your toaster has removable racks, and clean them in a similar fashion.
The blender gasket must be washed after each use to minimize cross-contamination risks
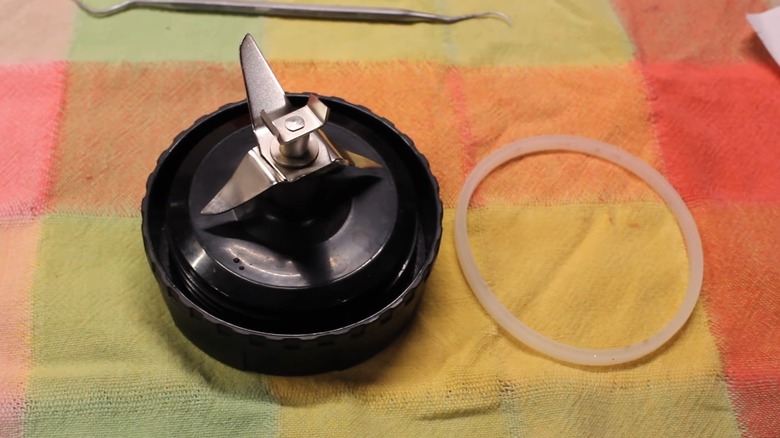
Rinsing your blender's jar and lid after each use might be obvious. Yet, ignoring the gasket (the rubber or silicone ring creating a seal between the blade and the base) can promote bacterial growth. This is because food molecules often get stuck in the seal. Add moisture to the mixture, and you have the perfect environment for germs, mold, and mildew to grow and thrive. The stuck particles might also make their way into subsequent blends, promoting cross-contamination and deteriorating the quality and flavor. Given this, you should wash the gasket after each use.
After you blend your smoothie, disassemble your blender and use your nails or a pair of tweezers to carefully pluck out the gasket. Wash it using a solution of warm water and dish soap to get rid of the particles. Use a thin brush and move it around thoroughly to clear out the hidden debris. Rinse it clean with water and set it aside to air dry. If you can't wait, thoroughly dry it with paper towels or a microfiber cloth before returning it to the pitcher.
Refrigerator door seals must be wiped once every two weeks
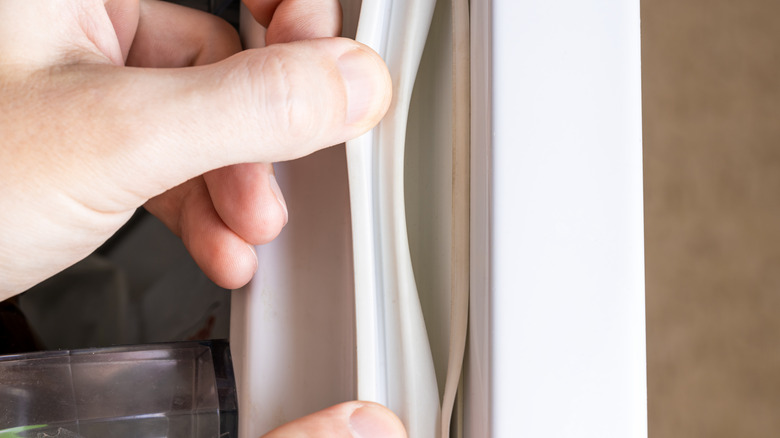
Although not concealed like the other items on this list, your refrigerator's door seals may not grab your attention even when you gear up to deep clean the appliance. However, cleaning this part of your fridge is more important than you realize because it keeps cool air inside and doesn't let in warm air. But this difference in temperature often leads to moisture beading on the gasket, allowing black mold to grow near your stored food items. Plus, sticky residue on the seals can make it tougher to open the door. This may lead to increased tugging that could yank the seals out of place over time, putting the insulation in jeopardy. So, try wiping them down twice monthly. That being said, don't wait to wipe off grease or oil-based spills — attend to them immediately.
Cleaning your device's door seals is incredibly simple. All you have to do is dampen a clean microfiber cloth (substitute it with a toothbrush for stubborn marks) in a water and mild soap solution and use it to wipe the gasket around the door. Wipe the residue off with a damp cloth and then go over the seal with a dry cloth.
Cleanse your fridge's water dispenser mechanism every two months

Wiping your fridge's exterior is necessary to maintain its shiny appearance. But a quick pass over the water dispenser with your microfiber cloth isn't enough. For starters, processing hard water will take its toll and cause a buildup of calcium and magnesium in the dispenser's pipe. These minerals can leach into the dispensed water and will leave a metallic taste in your mouth. It could also affect the dispenser's water pressure, increasing the time for a glass of water to fill. So, to ensure the mechanism offers clean water and functions at peak level, cleanse the dispenser every two months.
Find the water supply valve to the dispenser and shut it off. Then, open the appliance's doors and unscrew the copper tubing connecting the water tank to the dispenser. Using a funnel, fill the tube with distilled white vinegar and hold it upright for about 10 minutes. Now, turn on the dispenser and place a bowl underneath so it can collect the vinegar. After this stops, dip a brush in distilled white vinegar to clean the nozzle. Since the opening size might vary, it's helpful to have a brush set like the Klemeu Pipe Cleaner Set, which comes in 12 different sizes. Finally, connect the copper tubing back to the water tank and run the dispenser to flush out any lingering vinegar.