Important Soil Preparation Steps You Shouldn't Skip Before Installing Sod
We may receive a commission on purchases made from links.
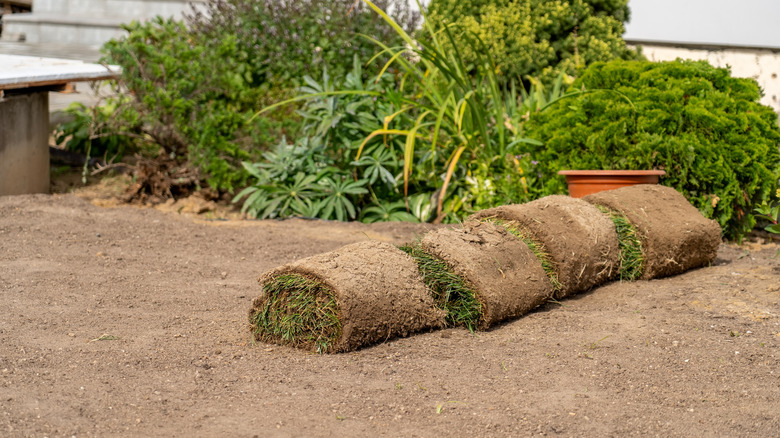
There's a lot to think about when trying to install sod properly. You need to make sure it is accurately spaced out, tamped down correctly, and given sufficient water to help it grow. However, before you should even start thinking about laying the sod itself, you must make sure the soil is properly prepared. If it's not given the necessary attention, then the sod you apply might not establish strong and healthy roots. As you can imagine, this can cause the grass to die, leaving you with a brown lawn, back at square one, and with a huge hole in your pocketbook.
Ahead, we'll detail some key preparation steps that, when carefully followed, will ensure that your soil is rich in the right nutrients and has the perfect composition for the new grass to flourish. These steps will also help make sure the roots can firmly anchor, ensuring water and all of those essential nutrients are actually able to reach the sod.
Testing the soil to check for nutrient deficiencies
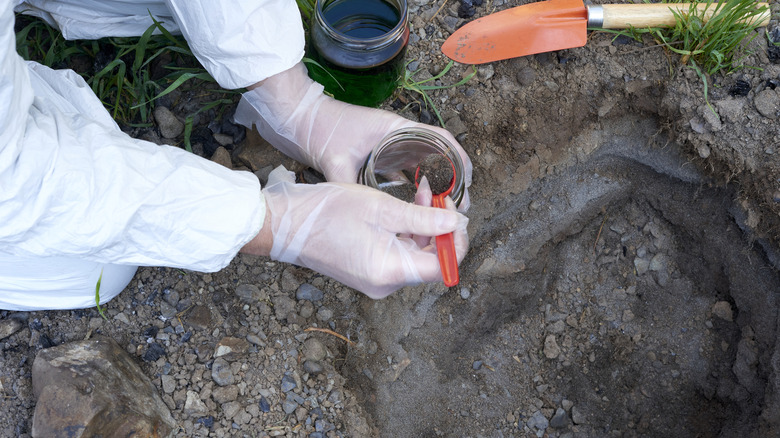
When you're thinking about preparing your soil for successful planting, one key step that you should never overlook is testing it. Without the proper nutrients and pH levels in the dirt, you are setting your new lawn up for future struggles — or even complete failure. To analyze your soil, you can order a kit (such as the MySoil Soil Test Kit) and send your samples to a laboratory. Be sure to closely follow the directions on the test kit you choose; most require multiple samples taken from a specific depth. Once you have the results, you can determine the best course of action for amending the soil to give your new lawn the best chance of establishing itself and staying healthy.
Specifically, the results should provide information about the levels of phosphorus and potassium, among other key nutrients. You can use these levels to guide your search for the best fertilizer. For example, if the phosphorus test value for your samples was between 0 and 13 parts per million (ppm), you will want to apply 1 ½ pounds of phosphorus per 1,000 square feet of lawn. An example of such a fertilizer is Espoma Bone Meal, which has an NPK of 4-12-0.
The test results should also include the pH level of your lawn. The ideal pH for growing sod is between 6.0 and 7.5. If your soil is too acidic (pH less than 6.0), then you will want to apply lime — such as Espoma LL30 Organic Lightning Lime – to it to increase the level before laying the sod. If the pH is too basic (greater than 7.5), you may want to add up to 25% more nitrogen, phosphorus, and potassium than what you would typically add to the lawn. This is because of how challenging it is to lower soil's pH. So, with the additives, you'll be helping the lawn grow in spite of the reduced nutrients.
Removing any existing grass to ensure proper sod-to-soil contact
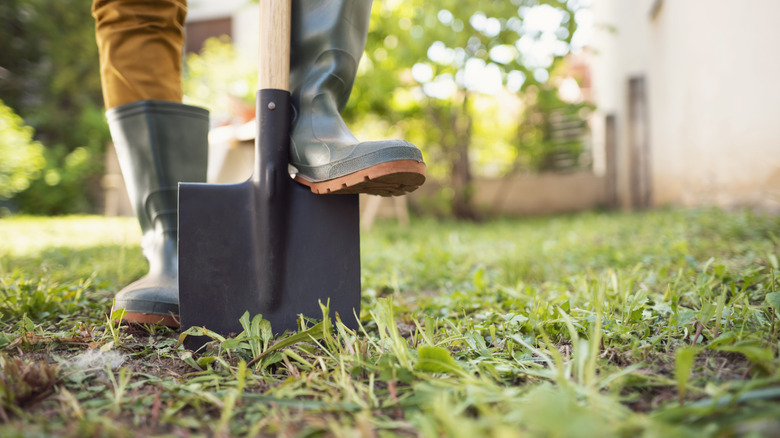
If you've decided to purchase sod to give your old and dying lawn a second chance, you should make sure that you don't skip the step of removing any existing grass that is still around. You may wonder what the harm is in leaving a few patches of dying grass, assuming that they'll just fully die once covered. However, there are several flaws to this line of reasoning. One of the main problems is blocking the sod's roots from touching the soil. If they can't get to the dirt, then they aren't going to be able to take root as well — or at all. If you want your lawn to have that manicured look, this also won't be possible if you plant the turf over existing grass. You're much more likely to have little hills and divots all over the place.
To avoid these problems, you must kill or remove any grass that is currently on the lawn. Depending on the area of your yard and how much grass needs to be removed, you could consider renting a sod cutter or hiring a landscaping company to use one to remove the existing greenery. If you're only applying sod to a small section of the yard, then you might be able to pull the grass with a shovel and other gardening tools, making sure to pull out all the roots as well. Additionally, you could consider other easy ways to kill the grass in your lawn, such as spraying the area with an herbicide like Compare-N-Save's Glyphosate Concentrate Grass & Weed Killer Herbicide.
Removing weeds to prevent them from causing future problems
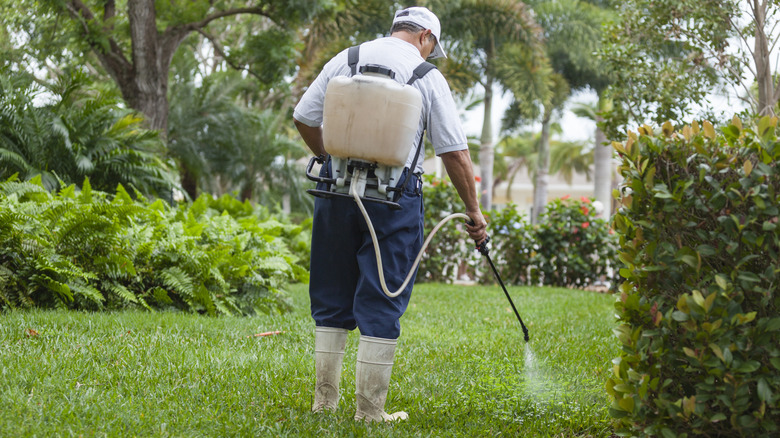
Just as you shouldn't lay sod over grass, you also should never lay it over weeds. If you skip the step of clearing them from your yard, you'll likely find yourself searching for ways to prevent weeds from taking over your new lawn in the near future. Beyond their potential to block the new turf from reaching the dirt, as existing grass can do, they will also compete with your new grass for water and nutrients, weakening your freshly-established sod.
Because killing weeds — especially a full lawn's worth — isn't a simple task, you must start well in advance of when you're planning on having the sod delivered (at least a few weeks ahead of time). Choose a non-selective herbicide like Compare-N-Save's Glyphosate Concentrate Grass & Weed Killer Herbicide for this task — it should kill any weeds it comes into contact with, including any existing grass. Apply it as many times as needed to eliminate weeds, and then wait a week to 10 days to make sure that no new growth pops up. Once you're confident that everything has been killed, you'll want to properly dispose of the dead weeds in sealed trash bags.
Clearing the area of trash and other debris
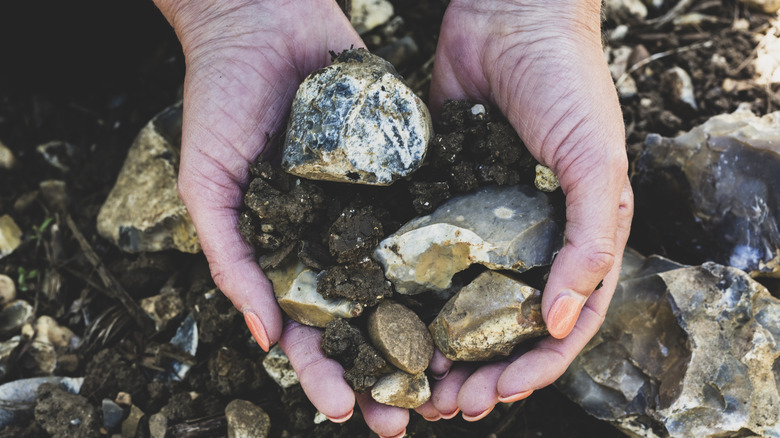
As we've explained, if you want your new lawn to establish and thrive, then it is essential for the roots to make contact with the dirt beneath them. Grass and weeds aren't the only things that can get in the way of this happening. Any other trash, construction scraps, rocks, pieces of wood or sticks, and other debris can also get in the way. Because of this, you will want to thoroughly inspect your lawn for any organic or non-organic items that could form a blockage. The goal is always to have an unobstructed surface on which to lay the sod on.
For those who are planning on laying sod around a new build, it will be important to speak with the crew building your home — ideally before they get started. Some companies may temporarily toss stuff in the yard, which could present a future problem when it comes time to lay the new turf. Make sure they have a dumpster in place — and that they're actually using it — to avoid leaving foreign objects in the yard that could become a problem in the future.
Addressing drainage issues before laying the sod
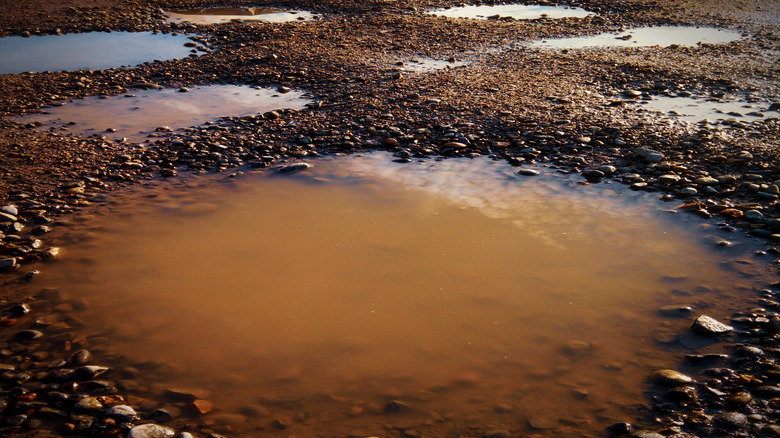
Before you install sod — not after — is the best time to identify and address any drainage issues plaguing your lawn. There are a few indicators to be on the lookout for. One of the most obvious is pooling water. If there are any areas prone to developing puddles after a rainstorm, then it is likely there is a drainage issue. The water shouldn't remain on the surface for long; it should be draining into the soil before it gets the chance to pool. The color of your existing grass is also something to look out for. If you've had issues with the grass yellowing, it could be because the roots are waterlogged from drainage problems, preventing sufficient oxygen from reaching them. A lawn with poor drainage can succumb to issues like root rot and lawn disease.
You can use a soil probe — like the HiHydro T-Handle Soil Probe — to assess the moisture content. Another thing you can do is dig a hole in the dirt and determine how quickly water poured into the hole drains. If it doesn't drain quickly, then you likely have an issue.
If there is a drainage issue, there are a few things you can do to address it before installing the new turf. One is to aerate the lawn to provide better air circulation and to help make sure the roots are able to access the water and nutrients they need. You can do so with a tool like the Walensee Metal Spike Lawn Aerator. You could also consider amending the soil with some peat moss or compost, both of which improve the soil structure and allow for better drainage.
Tilling the soil
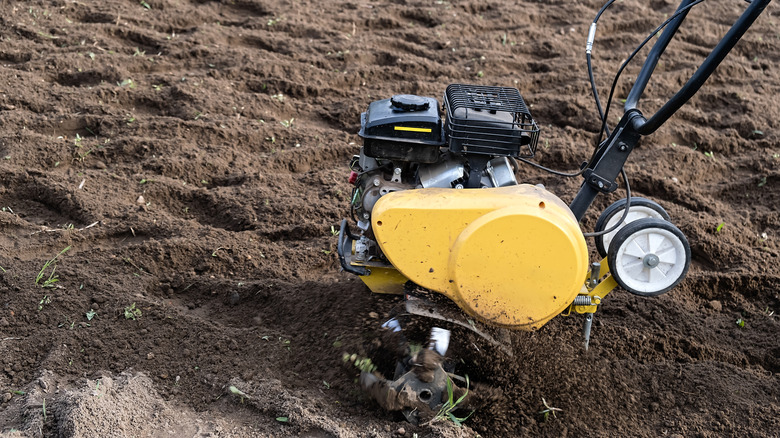
There are several reasons why you shouldn't skip the step of tilling, or loosening, the soil before laying a new lawn. If your dirt is compacted and you don't address it, you may start seeing signs that your sod isn't taking root. This is because the roots of the new grass will not be able to deeply establish themselves due to how hard the dirt is. As mentioned above, compacted soil is so densely packed that there aren't air pockets. These air pockets are essential for both drainage and helping ensure that roots get what they need to support the growth of the turf. If your soil is overly compacted, you'll also find that you need to water your new sod more. On the other hand, if it is loosened up with air pockets, the dirt will be able to hold on to more moisture, giving the roots more to drink between waterings.
Tilling soil isn't overly complex, especially if you have the right tools. While you could use hand tools, doing so will be very time-consuming and labor-intensive, especially if you're covering a large area. Instead, the best option is to rent a rototiller from a local home improvement store. With it, you'll want to work down to a depth of at least 4 inches to ensure that the soil is fully broken up. After you've tilled the whole area, you can rake to level out the surface and pull out any roots, rocks, or other debris that were turned up.
Ensuring that you have enough topsoil — and purchasing more if you don't

To get your sod off to the healthiest start possible, one thing you'll want to do is to make sure that you have enough topsoil in place. The reason topsoil is so important is because it does a far superior job of holding nutrients and water than other dirt. This means that your sod will get what it needs to survive — and that you may also have an easier time taking care of it due to the decreased watering needs once it has fully established. Purchasing additional topsoil can be especially important for new home builds (as the soil can be compromised by construction) or yards with a history of poorly growing turf.
Before purchasing topsoil from a local home and garden store or other retailer, you will want to inspect it. The mix you purchase should have a deep, dark color, highlighting the rich organic matter that is present in it. Additionally, you should make sure that the topsoil you choose doesn't have an overabundance of rocks or other materials that could interfere with the sod taking root. Purchase enough to apply at least 3 inches over the surface. Finally, you should use that rototiller once more to incorporate it into the dirt beneath it. Doing so will give your new sod the best odds of establishing healthy and deep roots beyond the 3-inch layer of topsoil.
Leveling or grading the soil to prevent pooling water or overly steep slopes
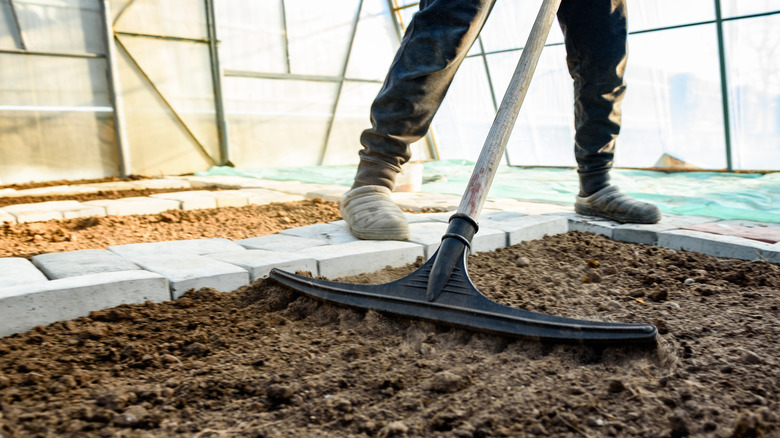
While the terms leveling and grading may be used interchangeably, they have different meanings. However, both tasks are often necessary before sodding. Let's start by discussing leveling, as this is something the average DIYer can tackle on their own. If the soil beneath the sod isn't leveled first, portions of each strip won't be fully pressed against the dirt. This can impact its ability to take root, and, therefore, the ability to gain the nutrients and water needed to stay healthy. After tilling and spreading topsoil, you can use the flat side of a landscaping rake to help you level the surface. Simply drag it across the dirt to make sure everything is evenly distributed and relatively uniform.
Grading may also be necessary, though it is a more involved process that is typically best left to a landscaping professional. To properly grade your yard, its slope needs to be adjusted to prevent pooling or slopes that are overly steep. If the slope is too great — such as a drop that is greater than 1 foot for every 4 feet — water can rush down the hill too quickly. This will cause greater erosion as the traveling water washes away sod and other nutrients. It can also make mowing the new grass challenging. If your yard is too steep, contact a professional to see if they'll be able to adjust the grade enough. If that is not possible, then you might want to reconsider sodding the affected area. Instead, you could opt for a retaining wall or an easier to grow and maintain ground cover.
Rolling the soil so it is ready to accept the sod
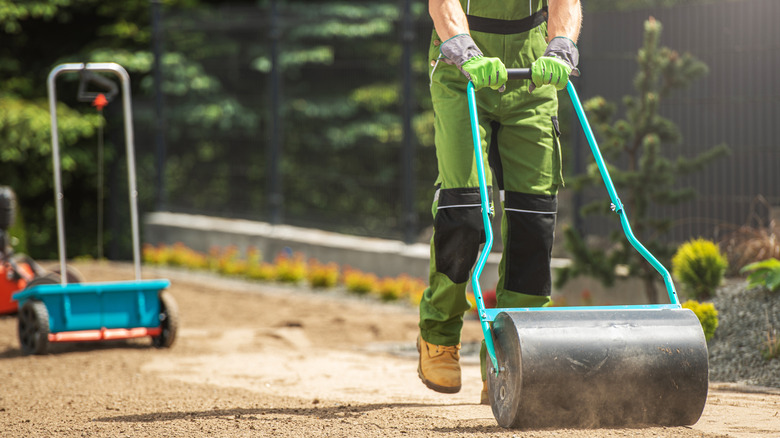
The next important step that shouldn't be overlooked is rolling the soil. Using a heavy roller that weighs around 200 pounds will help ensure that the soil is sufficiently firm to create a solid base for the sod. If the base isn't rolled, you run the risk of sink holes developing once the sod is in place. This can happen if the soil in one section of the yard ends up compact farther down than the areas around it once the new turf is laid.
To complete this step, you'll need to rent a roller from a local home improvement store or landscaping supplier. To make the roller heavy enough, it will need to be partially filled with water. Avoid over-filling it, as it can make it too heavy and cause it to overly compact the soil, undoing the work you did when tilling. Or, if it's too heavy, it'll just push clumps of soil around, rather than smoothly rolling over it. In most cases, filling it about halfway should ensure it weighs the appropriate 200 to 300 pounds. The goal of rolling is to compact the soil enough that a person can walk across it without sinking in too deeply (less than ½ inch). After rolling, you can reassess the level of the surface. If need be, add more topsoil to sections that are significantly lower than those around them.
Pre-watering to moisten the soil before installing sod
You may already know that your sod is going to have high watering needs in the weeks after it is laid. However, it is also important to water the soil before you even lay any new turf over it. When the soil is moistened, it can help the sod start to take root and gain the nutrients it needs. It also provides the roots with a good initial dose of hydration.
However, there are a few key considerations to keep in mind before you pull out the hose or sprinkler. First, if it has recently rained in your area, pre-watering may not be necessary since it will already be slightly damp. Second, you must make sure that you don't add too much water. Again, the goal is only to dampen it. Over-watering and subsequent puddles may threaten the sod's ability to stay in place or take root. Plus, you'll be creating a messier work environment for yourself.