Thrift A Glass Plate To Make The Most Beautiful Accent Window
We may receive a commission on purchases made from links.
Thrifting a beautiful glass plate and transforming it into an accent window is a creative and budget-friendly way to add character to your space. Whether you're working with a delicate vintage find, heirloom dishes, or even a bold modern design, repurposing glass plates into a window can create a stunning focal point that plays with light in mesmerizing ways. The best part is that you have options. There are three methods to bring this idea to life — one involving a custom-built wooden frame and the other two using a more freeform artistic approach.
If you love DIY projects with a touch of nostalgia or if you're into retro design trends that are making a comeback, this is an ideal way to preserve meaningful pieces in a way that enhances your home. A custom-designed window can add to a rustic farmhouse feel, a vintage aesthetic, or even a touch of whimsicality to an otherwise neutral interior. With a little practice, it's possible to master one of the methods that will suit your vision. This isn't going to be a half-hour project, but switching up your window options should be carefully considered, and the end result will be worth it. For those newer to these types of projects, we'll cover safety considerations, materials, and expert tips to ensure your creation is both beautiful and durable.
Gluing glass plates to a custom window frame
Give your chosen glass plate a permanent home in a window by crafting a custom frame that fits its unique shape. If you aren't getting your plate professionally cut, you probably already have the needed equipment to do so. Most of the equipment includes tools most homeowners should have, such as wood, a glass cutter designed for curved surfaces, masking tape, wood glue, nails, sandpaper, and corner brackets.
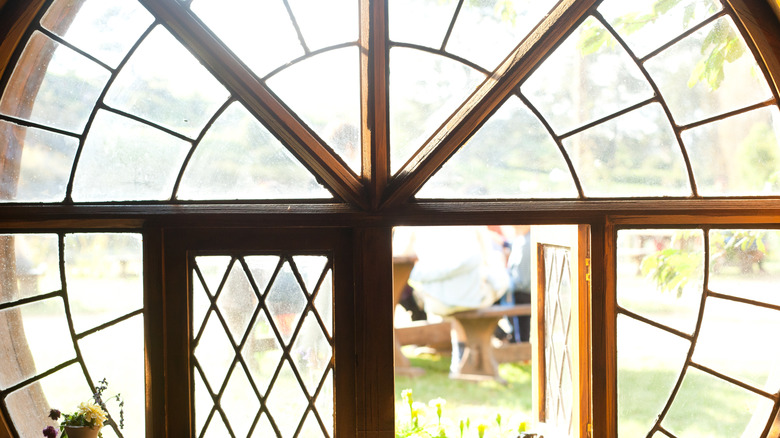
Since glass plates aren't naturally window-shaped, cut the edges slightly to create a more structured form — typically, a hexagonal or octagonal shape works best, like in Cottage Campers Australia's hobbit window in the above video. First, place masking tape over the cutting line (to prevent cracks) before scoring the edges of the plate using a glass cutter to shape it into a hexagon or octagon so it sits neatly in its wooden casing. Once shaped, smooth rough edges with fine-grit sandpaper or a glass-smoothing tool.
Next, construct a wooden frame that matches your plate's new dimensions. Cut thin strips of wood at an angle to fit together snugly, then secure them with wood glue and finishing nails. To ensure durability, reinforce the joints with corner brackets. Finally, mount your framed glass plate into an existing window opening or use it as a standalone decorative panel in an indoor space or as a suncatcher. Stained glass or lightly tinted glass plates work especially well in this application, casting a soft glow when sunlight filters through.
Choosing the right glass plate for cutting
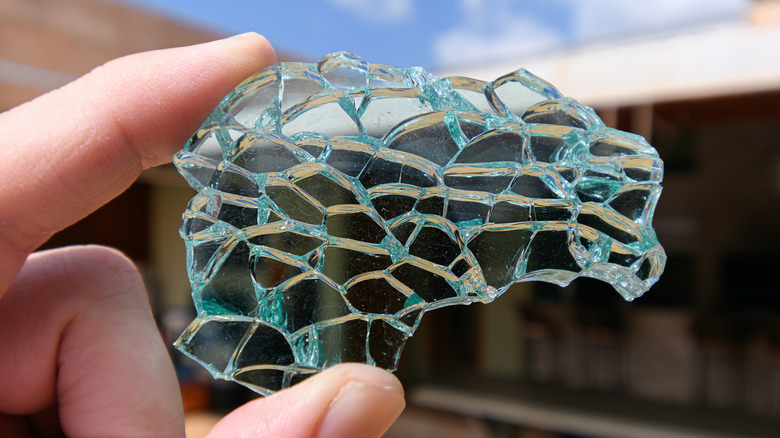
Before diving into cutting and framing, it's essential to choose the right type of glass plate for the job. Not all glass is safe to cut, and understanding the difference between standard glass, tempered glass, and pressed glass will save you frustration (and potential breakage). Regular or pressed glass plates are the best options for this project. They cut more predictably and don't shatter as easily as tempered glass, which is designed to break into small, blunt pieces when damaged. Of course, this means that if your tempered glass window breaks, it should be much safer than standard or pressed glass.
Two of the best places to shop for vintage furniture or glassware are flea markets and thrift stores. But, without a description of the items like in a regular store, you struggle to identify a tempered glass plate. You could try holding it under polarized sunglasses, as tempered glass often shows distinctive stress patterns and has slight imperfections upon close inspection.
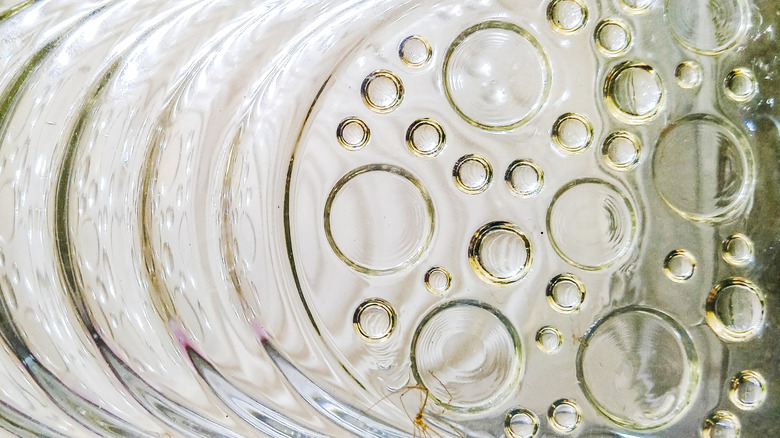
If you're not comfortable cutting glass yourself, take it to a professional glazier who can safely trim it for you. Additionally, opaque or patterned glass works exceptionally well for accent windows as it diffuses light beautifully and adds a decorative touch without being too transparent. If you're using an heirloom plate, consider testing the technique on a similar thrifted piece first to get a feel for the cutting process before risking something sentimental.
Floating glass plate window art
If cutting glass isn't your thing, you can use a strong adhesive to attach glass plates to a framed window pane instead. It preserves the integrity of your plate while transforming it into a unique decorative feature that brings in more natural light while beautifying your space. To get started, you'll need a wooden window frame, E6000 or clear silicone adhesive, a caulking gun (if using silicone), painter's tape, and a clean cloth for wiping away smudges.
Begin by cleaning both the glass plate and the window to remove any dirt or greasy residue. Arrange your glass pieces face-down on the glass. Once you're satisfied with the look, apply a generous amount of adhesive to the rim of the plate, carefully pressing it into place on the window glass. Secure it with painter's tape and allow it to dry according to the manufacturer's recommendations, typically 24 hours. Once dry, remove the tape, clean up any excess glue, and admire how the glass plate catches and refracts the sunlight. It's also a great way to display a collection of cherished plates without permanently altering them.
While this method is simple, adhesive can sometimes leave smudges or an uneven bond, especially if the plate doesn't have much surface contact with the window. It's also a more permanent solution, making adjustments difficult once the glue has dried. That said, this technique is perfect if you're looking for a quick and elegant way to repurpose a thrifted plate.
Creating a stunning glass plate window with resin
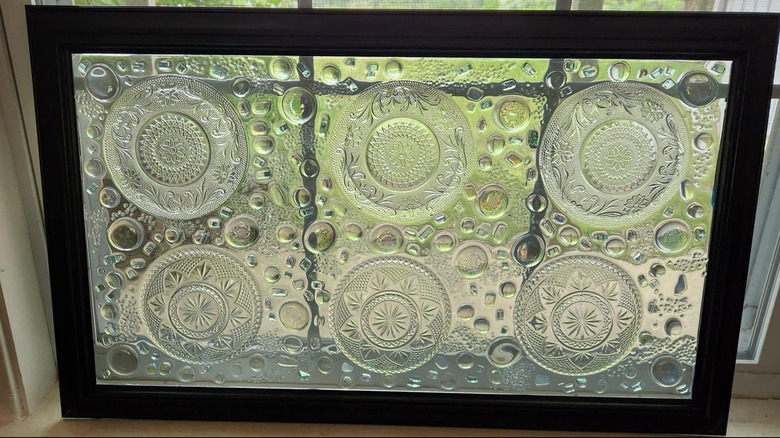
For a polished look, use resin instead of a traditional adhesive to create a floating glass effect. Resin fills in gaps seamlessly, making it an excellent choice for plates with intricate designs or uneven edges. Epoxy resin is the best option for durability and water resistance, though UV resin cures faster under direct light. To begin, clean your thrifted glass plate. Mix the resin according to the manufacturer's instructions, adding any desired colors for a stained glass effect.
Place your plates and glassware upside down on the glass pane in an arrangement of your preference. If you're securing the plate inside a frame, apply 100% silicone to the back and let it cure completely. Afterward, pour a thin layer of resin over the glass from the center of the piece to avoid bubbles. Finally, cover the piece to prevent dust from settling while it cures away from direct sunlight and at room temperature. After 24 hours, your unique glass plate window will be ready to display.
Unlike glue, which can leave visible marks, resin creates a seamless and glass-like bond. It's also a better option for curved or uneven dishes that don't sit flat against the glass. However, resin requires more preparation, has a longer curing time, and must be handled carefully to avoid bubbles or dust contamination. If you're willing to take the time, the result is a breathtaking, light-catching display.