Turn A Dollar Tree Picture Frame Into A DIY Jewelry Storage Solution
We may receive a commission on purchases made from links.
Your jewelry is a work of art, so it stands to reason that how you display it should also look like a work of art. If you're crafty, like @openmimd076 on TikTok, making such a piece of art starts with a trek to the Dollar Tree to buy a picture frame that you'll turn into a jewelry holder worthy of being hung in the best jewelry museum in the world, your home. It's also an unexpectedly easy way to declutter your jewelry and free up space on your counter.
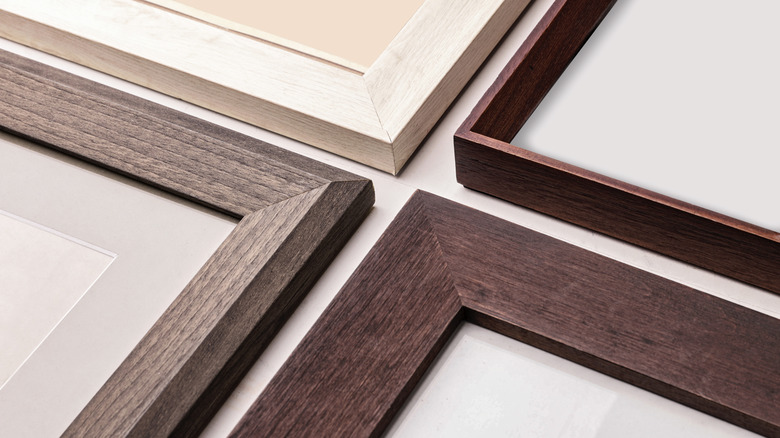
The jewelry holder comes to around $5 or $6, depending on how many supplies you already have on hand. The raw materials for the project consist of a Dollar Tree picture frame in the size of your choice, decorative mesh, and wrapping paper. If you want to add some fun to the project, you can splurge on a more interesting mesh pattern for the jewelry holder. For example, the EXCEART Store on Amazon offers craft mesh in a spider web design. This'll add to the cost, but add to the cool factor, too.
It's also worth noting that while the picture frame only makes one jewelry holder, you can reuse the rest of the materials to make more jewelry holders. All you need to do to scale up this DIY project is to buy more picture frames and decorate them with the mesh and wrapping paper you already have. Finally, the tools you need to pull this off are simple, too. Scissors and a pen or pencil should be all you need to get yourself going with this.
Morphing your picture frame into a jewelry holder
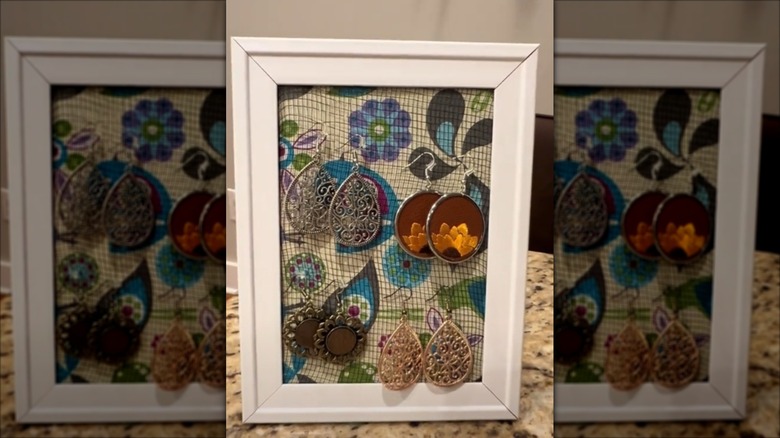
When you're creating the jewelry holder, some disassembly is required before you can make the craft — you'll need to take the picture frame apart by pulling off the cardboard back and the protective plastic film in the front. Then you'll need to measure and cut the craft mesh and wrapping paper to fit in the frame. The frame's cardboard back becomes the measuring stick you need to cut these two items to fit the exact specifications of the frame. When you're ready to cut the wrapping paper, lay the frame's back piece on top of it and trace around the square with a pencil or pen. Then cut the rectangle out of the wrapping paper.
Cutting the mesh requires a bit of an adjustment, however. Because your earrings will hang on the mesh, the mesh should be slightly larger than the back of the picture frame. This extra material allows you to tuck the mesh into the frame's back once you reassemble the frame, keeping the mesh in place once the weight of your earrings starts to pull on it.
After all the pieces are cut, the picture frame gets reassembled with the mesh in front and the wrapping paper behind it. The order of this setup creates a decorative backdrop for the piece, making it look artsy.
Doing more with this DIY jewelry holder craft
There's an advantage to using wrapping paper as decorative material here. If you wish to change the design to match the turn of the seasons or to commemorate a holiday, exchange one wrapping paper design for another.
However, you're not limited to wrapping paper as a backdrop when making this Dollar Tree picture frame craft. Decorative shelving paper and fabric work well, too. Additionally, some fabrics have great thematic decorative potential. Burlap is just the thing to support a rustic decorative theme, while silk is perfect for a luxury setting, and gingham or a floral print would bring English country style into your home.
Although the original design of this DIY only holds earrings, you can adjust it to hold rings, too. First, cut some strips of decorative ribbon. Be sure to cut the ribbon long enough so that the two ends can be tied together once the glue dries. Next, at the center point of the ribbon, put a dollop of hot glue on the ribbon and stick it to the outer frame of the jewelry holder. Finally, slide your ring onto the ribbon and fasten it in place by tying the ends of the ribbon. This latter hack can be a great way to repurpose your old ribbon, too, so get creative.