Build Your Own Outdoor Kitchen Table Using An IKEA Fan Fave

We may receive a commission on purchases made from links.
Fans of last-minute barbecues can take a clue from their favorite build-it-yourself brand, IKEA. The furniture company is all about solving problems, and for the avid outdoor cook, few problems are bigger than not having enough places for your guests to sit come dinnertime. However, home gourmands with one of IKEA's GRILLSKÄR three-tiered shelves already have the solution — they just need to know how to MacGyver the piece to fit their needs.
To understand how this outdoor kitchen hack works, you need to know how you're actually intended to assemble the GRILLSKÄR shelf. It consists of a tabletop and two lower shelves. Additionally, the top portion of the unit has a lip on one side that's a couple of centimeters high. This piece prevents items from sliding off the back of the table and onto the floor when the unit is pushed up against a wall.
When you use the unit as intended, the middle shelf and tabletop lip serve valuable functions. However, they do make using the GRILLSKÄR shelf as a table uncomfortable, unless you make some adjustments. Our suggested hacks involve removing the unit's middle shelf and then evening out the table top with a piece of plywood. To do this, you'll need a tool kit, a piece of 24" by 33" plywood, and a tablecloth for good measure. It may not be your dream dining table, but it'll work in a pinch.
Turning your GRILLSKÄR three-shelf unit into a table
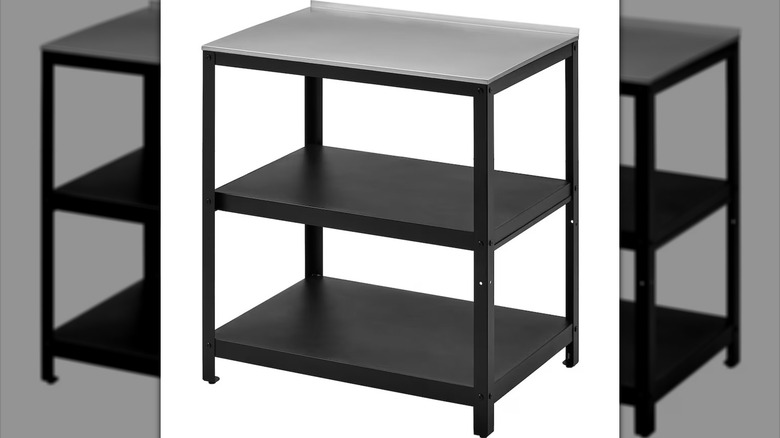
As with most IKEA furniture, some assembly is required to put the GRILLSKÄR together, but in this case, that's to your benefit. You're going to take apart part of the shelf to transform it from a makeshift outdoor kitchen island into a bonafide dining table. More specifically, you'll do away with the middle shelf so that the people who sit at this MacGyvered table don't bang their knees on it while eating dinner.
Do keep in mind that it's probably not a good idea to remove the bottom shelf. The construction of the tabletop is such that it requires at least one shelf to keep the unit stable. The tabletop is fastened to the legs by just four screws, making it vulnerable to wobbling. The bottom shelf provides reinforcement for the table, preventing that wobble.
However, leaving the bottom shelf as-is does pose a few obstacles. It'll be difficult to scoot any chairs very close to the table. However, it is possible for guests to slide their bodies forward on their chairs and rest their feet on the bottom shelf for the duration of dinner. In other words, they don't scoot their chairs closer to the table. They scoot themselves closer to the table instead.
Dealing with the tabletop
As for making the GRILLSKÄR's tabletop more comfortable, that's where the piece of 24" by 33" piece of plywood and the tablecloth come in. You can fudge the dimensions of the wood a little bit, but you want most of the tabletop to be covered with the plywood. You also want it to be as high or higher than the lip on the one side of the table. In other words, the plywood should be as thick as the lip is tall. Placing the plywood on top of the table evens out the tabletop by effectively getting rid of the lip.
The plywood itself could be rough, which isn't something that your guests will want to deal with during dinner. However, you don't need to use high-end countertop materials like granite to remedy this issue. The plywood will work if you put down a tablecloth, preferably a thick, plastic one, like this Smiry Rectangle Tablecloth on Amazon. This addition smooths out any splinters and rough spots while also making the table look festive for the occasion.
If you don't have a thick plastic tablecloth, you still have some options. You can try laying down two tablecloths, or you can put down a plastic tarp first and then roll the tablecloth out on top of that. Just make sure that the tarp gets completely covered by the tablecloth to keep the table from looking unsightly.