Mike Holmes Explains The Importance Of Leveling A Floor Before Laying Tile (And How To Do It Right)
If a construction veteran like Mike Holmes says most of the bad tiling jobs he's seen are caused by poor or no floor leveling, then it's only right to take his word for it. And it makes sense, too, because a level floor will help ensure a stable installation that'll last. Basically, a level floor allows for even weight distribution when you walk on the tiles or items on it. This will prevent those unwanted stress points on tiles that cause them to shift or crack over time. In the long run, safety is a bonus of leveling your floor before tiling since it prevents sunken or raised tiles that could pose tripping hazards.
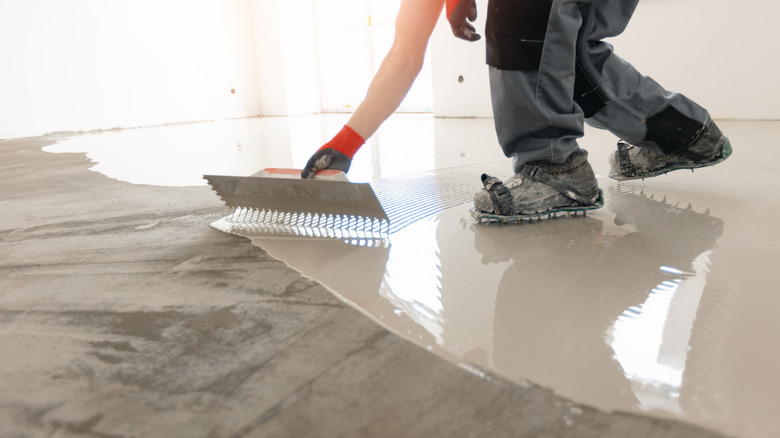
There are many ways to level your floor before tiling. You could decide to use a thick mortar bed, then beat the tiles into the mortar with a rubber mallet to achieve a level surface. Alternatively, adding extra mortar to the back of the tiles that'll be installed on the area with dips is another method. However, a flooring tip that Mike Holme swears by is using a self-leveling compound on the floor surface to level it out. It's the quickest and easiest way to achieve a level, smooth, and even surface for tiling. In addition, the material is easy to apply and spreads smoothly and evenly to cover all the needed areas. It also dries within hours, allowing quick completion of your tiling project.
How to level your floor surface using a self-leveling compound
Before applying the leveling compound, you have to properly prepare your subfloor first. You should start by cleaning up your floor. Use a vacuum cleaner to get rid of loose dirt and debris, and wipe down with a wet cloth or mop to remove dust. Also, ensure to remove old adhesives to make it easier for the self-leveling compound (SLC) to adhere to the substrate's surface. The next step is to prime the surface. Priming is necessary for improving the bond strength between the SLC and the floor as well as controlling moisture absorption by sealing the substrate's surface. Mix the primer according to the manufacturer's instructions then stir well. Apply a thin coat across the entire surface, and let it dry.
Once you've primed the surface, you'll need to get to mixing your SLC with water. The exact ratios for mixing are always found in the manufacturer's instructions, so be sure to check them out. For example, for the LevelQuik Self-leveling Underlayment, the mixing ratio is 5¼ to 5¾ quarts of water for every 50-pound bag. In the case of the Sika Level-125 underlayment used by Mike Holmes, the correct mixture requires 1 gallon of water per bag. Mix carefully until you have a lump-free mixture. Proceed to pour the mixture on the surface, starting at the wall furthest away from the exit and slowly making your way out of the room. When pouring, always leave a wet edge by pouring your next bucket of mixture on the edge of the previous pour for a smooth flow.
Tips for pouring self-leveling compound and mistakes to avoid
One flooring mistake you should avoid is forgetting to patch any cracks in your substrate before pouring the self-leveling compound. A great tip would be to insert a backer rod into the cracks so you don't exhaust a lot of sealant while filling them. Another thing to avoid is being slow or failing to get all your materials ready before mixing the compound. Once mixed, self-leveling compounds begin to set rapidly. You'll need to pour carefully but quickly, and since you'll likely use multiple mixing buckets, it's wise to have them handy. Also, get enough bags of the compound. You're better off having excess than having to rush to the store to buy more in the middle of your project. Using a paddle mixer attached to a drill to mix would make your job a bit easier, too.
You can help your SLC flow and smoothen out by using a gauge rake, which will ensure the compound spreads across all the needed areas and doesn't have air bubbles. You can also use a trowel or squeegee to make sure the compound also gets to the floor's edges and corners. Depending on the thickness and type of compound as well as the weather conditions, you'll typically need to wait at least two hours for it to fully dry and at least 24 hours before it's fully cured. One mistake you don't want to make is failing to give the surface enough time to dry and cure because this can weaken the final finish. Always be sure to check the manufacturer's instructions for the specific drying and curing time.

