DIY A Cheery Bathroom Countertop Organizer Using Affordable Dollar Tree Items
We may receive a commission on purchases made from links.
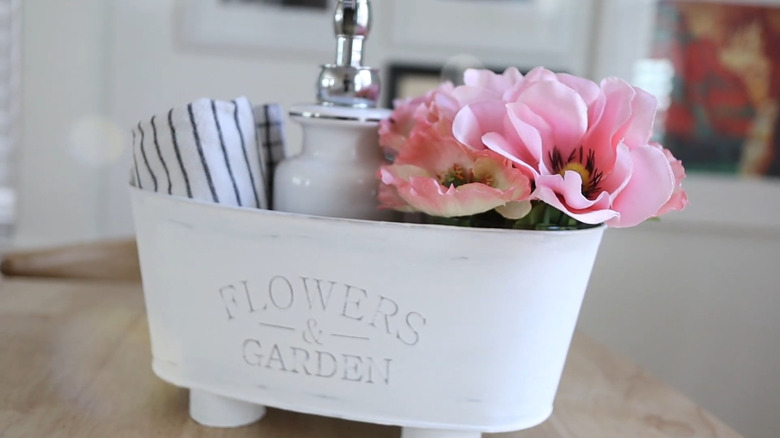
If bathroom clutter has overtaken your drawers and counters, you likely feel like you are undergoing a daily scavenger hunt just trying to find the right lotion or body spray each morning. Instead of sorting through piles of stuff, make your routine a little easier with a DIY project that organizes your bathroom counter. You will transform a humble Dollar Tree staple into a cheery bathroom organizer with just a few simple supplies. The project uses the Garden Collection Galvanized Metal Planter, elevating it into a charming display to help keep your bathroom clutter-free.
Affordable and packed with potential, Dollar Tree planters have multiple creative uses around the home. With the help of the retailer's Crafter's Square Wood Cubes, a bottle of wood glue, and a coat or two of chalk paint, this particular planter turns into a clever countertop bin. The process is quick and easy, perfect for a weekend DIY project, even if you're just starting to embrace your crafty side. No more will you have to dig for random bathroom essentials in your cabinets and beyond because you'll have a decorative accent as functional as it is cute! Here's what you'll need to create your new organizer.
Turning Dollar Tree items into a bathroom organizer
As you begin crafting, decide what type of paint and what color you'd like to use on your planter. Chalk paint is a good choice for a vintage or rustic aesthetic, especially in neutral shades. FolkArt Home Decor Ultra Matte Colors are a popular pick for crafters who like the distressed effect the paint can offer. Paint with as many coats as you need, keeping in mind this planter features embossed lettering, so it's visible even after you finish. For an optional final touch, the YouTuber who shared this project, That Practical Mom, also recommends going over the painted surface with sandpaper to add a more weathered effect.
For the "feet" of your organizer, you'll need to collect at least eight wood cubes from the package. Paint them all the same color as the planter for a seamless look, or a contrasting shade, such as a rich ebony or cheerful yellow. Setting two blocks in each corner of the planter, glue them to the bottom of the planter, keeping it upside down while it dries.
Ways to customize and use your countertop organizer
Once you've completed your organizer, gather your most-used items to store inside. You don't have to stick with bottled products, however. The oval shape is perfect for holding folded hand towels for guests, especially if you have already added a rustic style to your bathroom. Setting it in a guest bathroom? In addition to hand towels, you could arrange bars of soap, rolled washcloths, and new loofah sponges for their convenience. Need a stylish toilet paper holder? Set it on the floor or the back of the toilet to store your extra rolls. You can also explore other ways to customize it and make it even more beautiful, such as by wrapping it with a few layers of twine or gluing on some artificial flowers.
This DIY project was originally intended for the bathroom, but there's no rule that says you can't use it in a kitchen either. Imagine how good it could be for gathering your assorted cooking oils, bags of flour, and baking goods. It could also be used as a handy coffee or tea caddy, or as a way to hold snacks, especially if your cabinets are at their limit. Perhaps it could even be a clever magazine or mail holder for your landing area or foyer. Put it where it will offer the most use, and you'll love the results.


