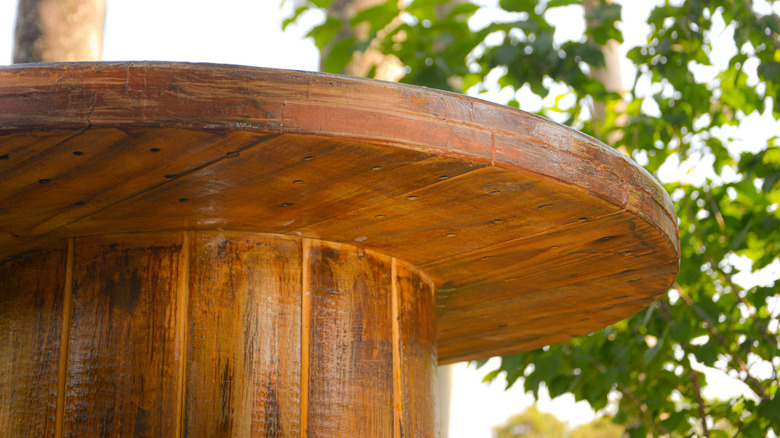
Transform An Old Wooden Spool Into An Outdoor Dining Set With This DIY
Finding unique patio and garden furniture can be challenging due to modern mass production. You might find yourself struggling to find pieces that stand out and encompass your personal style. The limited availability of customizable, distinctive designs can be a real problem. In addition to the lack of unique pieces available, mass-produced outdoor furniture items also often lack both durability and sustainability. If you find something high-quality and unique, there is usually a steep price that accompanies it. For these reasons, upcycling is becoming a popular choice for creating unique furniture. Outdoor furniture can be created using an endless variety of interesting items.
From making patio furniture out of cinder blocks to repurposing old household items into patio furniture, there are so many opportunities to DIY something unique. One such idea is turning an old wood cable spool into a patio table with benches. This trending outdoor furniture hack does take some work, but the end result is stunning, and there are loads of ways to make it your own.
For this project, you'll need a large wood spool (these can often be found on Facebook Marketplace or purchased from local suppliers) and a few 2 by 4 inch beams. To cut the spool and assemble the table and bench set, you will need a jigsaw, electric screw driver, and some hardware. For the finish, you need some sandpaper and outdoor wood stain. While this DIY does take some work, it doesn't require a ton of skill or experience to pull off.
How to make an outdoor dining set from an old wood spool
To start this project, you'll need to gather your tools and pick out your hardware. This is going to include 16 brackets, the corresponding number of screws, and 16 more screws for your leg stabilizing bars. Then, cut your 2-by-4s to make 16 legs. If you are confident in your measuring and sawing abilities, cut your leg stabilizing bars at this time, as well. The length and width of the legs will depend on your preference. The length of the stabilizing bars, though, should be the same as the width of the benches — keep this in mind.
The next step is marking a circle around the center of one side of your wood spool and using your jigsaw to cut along the mark. This will leave you with a circular piece of wood with a large, hollow center. Mark and cut this hollow circle into four even pieces. These will be your bench seats.
If you haven't already, cut your eight leg stabilizing bars to the width of the benches. (If you are working by yourself, there is a genius tape measure feature that will help.) Then, use two screws to fasten each bar to both ends of the underside of each bench. Place each bench leg inside the stabilizing bars and fasten them with your brackets. The brackets should be screwed securely to both the legs and the bottom of the bench.
Putting the finishing touches on your wood spool table set
If you have made it to this step, you should already have a rough-looking version of a wood spool table. Now, it's time to sand and finish your table and bench set. For this, you can either hand sand it with a piece of sandpaper or use an electric sander, taking care to make sure the rounded edges keep their shape. After you have everything nice and smooth, all you need to do is apply a coat of outdoor wood stain. There are plenty of shades of transparent wood stain to choose from, but there are also solid colors available, as well.
When the stain has dried, take your furniture set to its spot on your patio. Your wood spool should already have a hole in the center, so just find a pretty patio table umbrella and place it right in. That's it! You now have a unique, sturdy, sustainable, and budget-friendly DIY outdoor furniture set.
Ways to elevate this outdoor furniture idea
If you like the idea of this project, but you are looking for something even more unique, there are so many different ways you can customize it. For example, you could cover the top of the spool table with a colorful waterproof fabric, staple it at the sides, and cover the stapled edges with rope. You could then wrap the barrel with rope, as well. If you chose not to make benches out of your spool, that would leave the bottom of the table available for some complementary paint colors.
If you want something really unique and colorful, you could use some grout, clear epoxy, and wood glue to place stained glass pieces on the top of your table. To create the DIY mosaic table look without the mess, you could also just use paint. You would do this by applying thin strips of painters' tape to create the randomly sized "glass pieces". Then, you'd fill in the sections with vibrant colors of your choice.
If painting your spool table is the direction you'd like to go in, but you are not interested in the mosaic look, you could apply a base coat of whatever color you like and then use large stencils to paint flowers or symmetrical patterns. You could even use stencils to monogram your table. This is a great idea for a wedding, anniversary, or housewarming gift!

