Transform Old Spoons Into A Unique Storage Rack To Put Your Coffee Mugs On Display
We may receive a commission on purchases made from links.
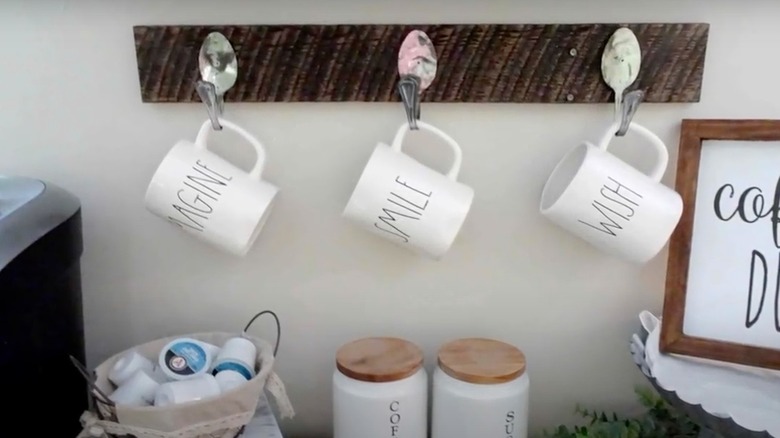
There's nothing quite like sipping on that first taste of morning Joe. When it's from a mug you've taken from your DIY coffee cup rack, even better. What's cool about this DIY piece for the coffee bar of your dreams is that it's made by repurposing old spoons. In other words, from a thematic perspective, it goes with everything else you've already decorated your coffee bar area with: cups, coffee spoons, the works. For this project, you'll flatten and bend the spoons, then attach them to a piece of wood.
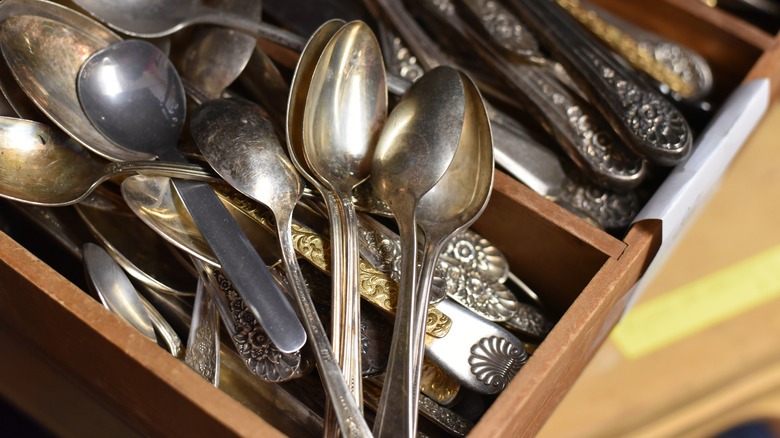
The tools and supplies required for this project make use of some of ardent DIYers' favorite resources. You'll need three or four (or more) cheap spoons, which you could get from a thrift store or Dollar Tree. (You'll get bonus points if you nab your grandma's old set of spoons from the attic instead.) A one-by-four in the length of your choice creates a solid backdrop for the spoons, and some quarter-inch screws hold them in their spots on the board.
As far as tools go, a hammer, an anvil, wood stain, a sponge brush, sandpaper, a sander, and a drill turn the raw supplies into a clever coffee rack. A pencil to mark the board and possibly a measuring tape will come in handy, too. Some assembly is required, of course, but that's all part of the fun.
Putting the mug rack together
Prep for this project starts with you treating the wood if necessary. What you'll do for this step is determined by your goals for the project. For example, if you're going for a rustic look, a little sandpaper on the rough edges may be enough. If you want a more polished stained backdrop for your spoon rack, then you'll want to sand the wood to make it ready for staining. If you are staining it, give it a good swipe with a sponge stain brush and set it aside to dry.
The spoons require some plastic surgery to get them in shape for this task. Place the head of a spoon on the anvil and then pound it flat with your hammer. Repeat the process with the handle until it's flat, too, then repeat with all the spoons. After that, drill a hole in the center of the head of the spoons. Once the spoons have all been pierced, bend the handles around the round part of the hammer's head. This creates the hooks for the cup rack.
For the last step, place the spoons on the board at even intervals and mark the board with their locations. The tip of your pencil should fit into the hole you drilled in the head of each spoon, allowing you to mark the board with each spoon's spot. You can use a measuring tape to ensure that every spoon is evenly lined up or eyeball it for a rustic look. Once you've marked it, use the drill to screw the quarter-inch screws onto the board.
Making your coffee rack personalized for the space
Some decorative styles, like shabby chic, level up your pieces without making them look brand new. That style would work well with this piece. You'll swap out the dark wood stain for some white paint. To DIY a distressed paint look, add a coat of paint to the board and use your distressing material of choice (wax, for example). A good brush with the sandpaper roughs things up a bit more and encourages bits of the wood to peek out from behind the paint.
Adding decorative elements is another way to personalize this DIY coffee rack. If you have some foodie or coffee quotes you adore, use the Hosomono Letter Stencils to write the quotes on the board in pretty lettering. Take things one step further by painting flowers or sweet little bumblebees.
However, if that doesn't quite strike your fancy but you don't want to leave the board plain, empty out the foil bags your favorite coffee brand comes in, flatten them, and then glue them to the wood. This creates a wallpapered themed backdrop for your mug rack. The only thing left for you to do is attach the spoons to the board and hang it up. Alternatively, if you're looking for a different DIY, check out another DIY mug rack idea with Dollar Tree items.

