DIY Stunning Floating Display Shelves On A Budget With A Clever Dollar Tree Hack
Are you looking for a savvy way to transform your space with floating shelves? Construct them yourself with little more than Dollar Tree cutting boards. Connect a cluster of cutting board pairs at 90-degree angles for equally easy-to-make and easy-on-the-eye storage that's perfect for holding lightweight pieces.
To make your own zig zag floating shelf or shelves, pick up several pairs of Cooking Concepts Bamboo Cutting Boards from Dollar Tree; a grouping of six will make one shelf with three triangular surfaces, but a trio of angular shelves at different lengths prove that design's "rule of three" really is a surefire formula for an appealing display.
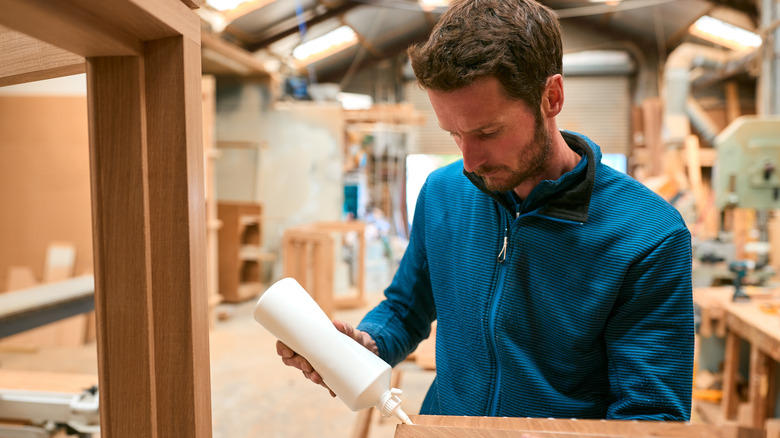
Hold your cutting boards together with a mixture of wood glue and nails. If you have a brad nail gun, great! But hand-hammered nails will work as well. Hang them on the walls with hardware like triangle rings or sawtooth hangers. Paint 'em, decoupage 'em, or enjoy 'em as is, since the light blonde stain on these $1.25 cutting boards is pretty attractive in and of itself.
Instead of using the cutting boards, if you have a scrap wood stash, see if any pieces could work as shelving pieces. Trim them into 9-inch by 6-inch sections similar to the cutting boards, gussy them up with a bit of sanding and staining, and your zig zag shelf project will have an even smaller price tag.
Zip up zig zag shelves
If you're planning on painting or staining your shelves, sand each board first, then paint or stain. Once dry, stand one cutting board on its short side, flush with a wall, on top of a table or counter; the consistent angle and stable surface help line up and hold the boards in place while the glue dries. Apply wood glue along the short end of another cutting board. Laying it flat on the counter, press it into the vertical board to hold it in place. Repeat this with the remaining pairs of boards.
Once the glue dries, reinforce the connections with a couple of nails. Like you did for the individual pairs of boards, connect two or more sections at 90-degree angles with both glue and nails. Your shelf should look like a series of zig zags with open Vs facing up at each end. Avoid splitting the wood as you nail the boards together by pre-drilling pilot holes that are about the same diameter of the nail shafts.
Measure and mark roughly 1 inch down from the top endpoint of each V. This is where you'll place your hanging hardware. Make sure that each hardware piece sits in the same spot on each V, because each one needs to reach a nail that's attached in a horizontal line on the wall. For sawtooth hangers, face the jagged edge down so the teeth will catch against the nail in the wall. For triangle rings, affix one hanger per side of each V, near the top.
An alternative idea
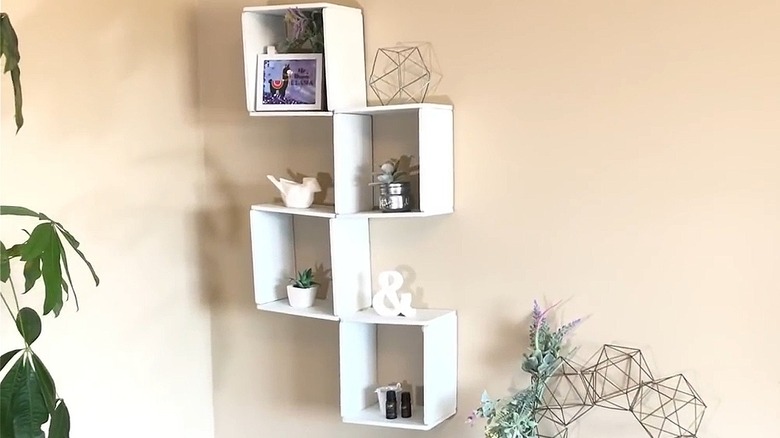
The zig zag design of this floating shelf is part of its charm, but the lack of flat surfaces limit what you can set on them. For a more versatile version of a cutting board floating shelf, assemble three or four squares made of four cutting boards each. Connected at alternating corners, you can hang these squares either vertically or horizontally.
Start by sanding each board and then painting them if desired. Once dry, adhere the narrow ends of four boards together with glue and nails. To link individual squares, run a line of glue along the outside edge of one short side of a square, and press it against the opposite corner edge of another cube. This won't make a really reliable hold between each shelf, so if you can angle a couple of nails into the glued area, you'll end up with a sturdier unit. Just make sure that your nails hit points in both squares. However, you don't need to rely on the bond between each square for structural integrity. Repeat this pattern for the remaining squares so that alternating corners are linked with glue and nails. To hang your squared-off unit, hammer in two nails per square for each top board to rest on.