Thrift A Budget-Friendly Cookie Tin To DIY A Trendy Bathroom Storage Solution
The cookies are long gone, the crumbs have been brushed away, and the empty tin is languishing on a thrift store shelf. Or maybe you even have one waiting for you on a dusty shelf at home. Metal cookie tins are infinitely useful. They're durable and easy to adapt for other purposes. They can be drilled, painted, and customized to suit various needs. So, the next time you happen upon one, snap it up for an unexpected bathroom storage hack.
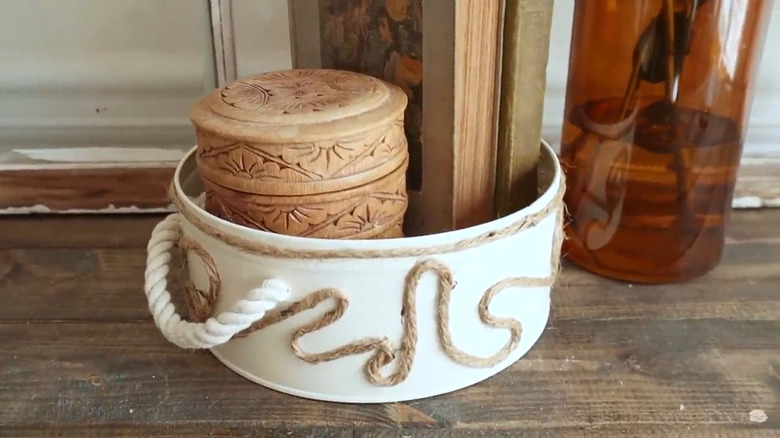
Crisp white accented with rustic twine and handles made from nautical rope is a timelessly fresh style. Yet, virtually any color or type of accent will look amazing and serve a plethora of purposes for bathroom storage. Grab some cotton rope, a marker, a glue gun, a drill, and a can of spray paint in white, off-white, or another tint that's calling your name. If you'd like to add a curvy decorative design to the tin's exterior, also set aside a roll of jute twine. You can upgrade your cookie tin with or without a lid.
Customize your thrifted cookie tin
Eyeball where you'd like your rope handles on each side of the tin. Mark two spots about 3 to 4 inches apart (depending on the size of your cookie tin) with a marker, and also mark two spots with the same spacing on the opposite side of the tin. Using a bit that's the same width as the nautical rope, drill holes into the marked spots; drilling before painting eliminates the chances of damaging your paint job. Give both the exterior and interior of the tin a few even coats of paint. Also, paint both sides of the lid if you're including one for your project.
Dab a bit of glue to the of your rope to prevent fraying. Once the paint is dry, send the rope through one of the drilled holes, from outside in. Knot the cut end, and drape the rope along the outside of the container to the other hole, gauging how you'd like the handle to hang. Cut the rope with enough slack to make another knot. Dot glue on the cut end, send it through the neighboring hole and tie it off. Repeat these steps for the handle on the other side of the tin. If you're using the lid as well, create a similar handle centered on the lid if you like.
To embellish the tin's exterior with twine, you can freehand an abstract design of curlicues and waves, all affixed with hot glue. If you're doubtful of your artistry, encircle the top and the bottom rims of the tin with a few rows of twine instead. (Since this step relies heavily on hot glue, the secret to a better hot glue gun experience is sitting in your medicine cabinet: Coat the gun's tip with a bit of petroleum jelly to keep the glue from accumulating around the opening.)
Devise some dividers for bathroom storage
Your cookie tin organizer can hold nearly anything you want as-is, but with a bit more effort and upcycled materials, you can outfit your tin with fabric-lined compartments perfect for storing makeup, hair accessories, and other small items. Find a corrugated cardboard box that has a side that's larger than the mouth of the tin. You'll also need some scrap fabric. Repurpose old clothing with thin woven material rather than opting for new material.
Trace the mouth of the tin onto the cardboard, and cut out the shape. For a lining, snip a piece of fabric that's slightly longer than the tin's circumference and a few inches longer than the tin's height. Glue the edges of the fabric right side up around the exterior of the tin, ½ inch over the lip. Before gluing the overlapping end of the fabric, fold over the cut end to hide the raw edge. Cut a circular piece of fabric that's a few inches wider than your cardboard circle. Center the cardboard piece on the fabric circle. Fold over and glue the fabric in place. Set it face up inside the tin.
Use a few more cardboard and fabric pieces to create dividers for the tin. First, decide how many sections you'd like. Cut pieces of cardboard that are as wide as the tin is tall, and trim them to fit into the tin in the arrangement you'd like. Cover them with fabric, and glue the pieces inside the tin with the cut fabric edges touching the lining to hide them.