How To Start Your Own In-Ground Vermicompost Bin For Your Garden Beds
We may receive a commission on purchases made from links.
Of all the creatures you might come across in your garden, earthworms are likely one of the most welcome. The presence of worms is a sign that your soil is quite healthy, and the worms will continue to keep it that way. While you can try to intentionally attract worms to your garden, another way to reap the benefits of worms is vermicomposting, and you can do it right in your garden beds.
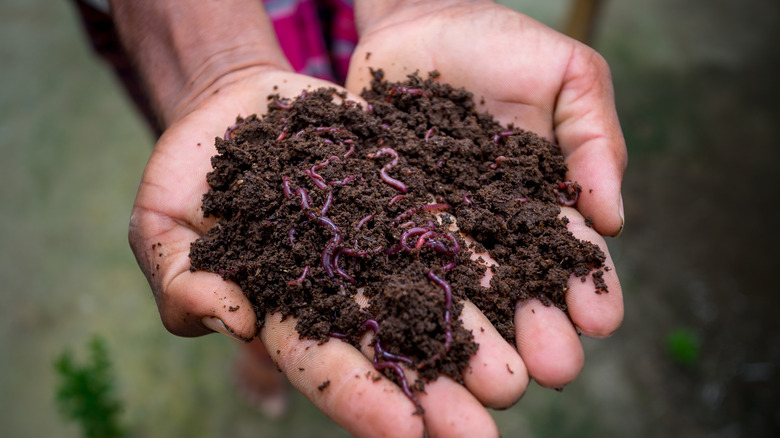
Earthworms are like living waste recyclers. They eat decaying material and excrete it back out in the form of castings, which have far more nutrients than the original soil alone. In addition to making these nutrients available to plants, worms help aerate the soil and improve drainage as they tunnel and feed. The result is higher-quality soil and healthier plants.
Vermicomposting uses the soil-enriching powers of worms on a smaller, more controlled scale to reap similar benefits for your garden. It's a convenient, flexible method — you can start worm composting in your kitchen as well as outdoors. But for saving space and avoiding mess, you can't beat garden bed vermicomposting. It's not smelly, doesn't attract pests, and doesn't require you to keep worms indoors.
How does in-ground vermicomposting work?
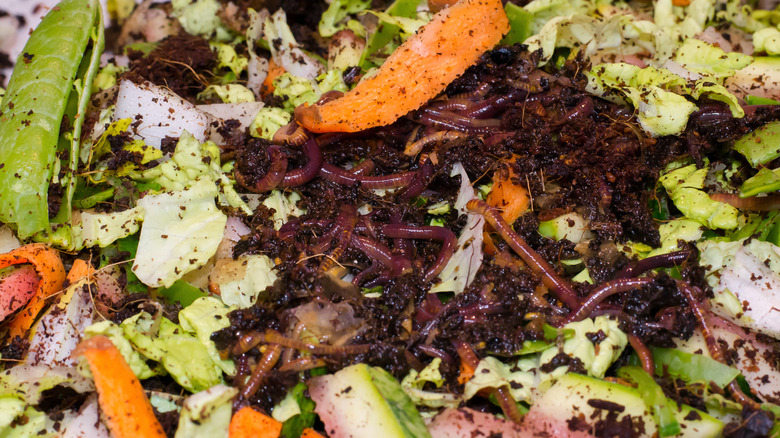
Worm composting involves providing organic materials, like discarded food scraps, for worms to eat in a closed container. The worms do their thing, creating nutrient-rich castings that can be used as fertilizer and soil enrichment material. With regular vermicomposting, you must harvest the castings and apply them to your garden by hand. In-ground vermicomposting, on the other hand, allows plant roots to access the castings directly, though you can also harvest them to spread them out more.
In-ground vermicomposting typically uses smaller bins than other composting systems; a plastic bucket from 1 to 10 gallons can work, and a 5-gallon bucket is a good middle ground. You can also buy a prefab vermicomposting bin online, such as the Vego 8-gallon In-Ground Worm Composter. You'll place the bucket in your raised bed or ground-level garden, burying it deep enough that the lid is level with the soil's surface. The location should be dark, moist, and cool for the worms' health. Light can harm worms over time, as can temperatures higher than 85 degrees. A secure or weighted lid is an important addition to prevent light or rainfall from getting in.
Drill evenly spaced, ¼-inch holes across the sides and bottom of the bucket to allow for ventilation and so that the worms can move in and out of the bucket. Then, add a couple of inches of shredded paper bedding, a sprinkle of compost materials, another layer of bedding, and about ¼ to ½ pounds of worms to start the composting process. You can also add some well-aged manure or compost to speed the process along. Expect to get harvestable castings in three to six months.
Which worms and food scraps should you add?
Typically, in vermicomposting, only four types of worms are recommended: the red wiggler or redworm (Eisenia fetida), red tiger (Eisenia andrei), blue worm (Perionyx Excavatus), and African nightcrawler (Eudrilus eugeniae). Of these, the red wiggler is the most common, and the same holds true for in-ground bins. These worms are adapted to living on the soil's surface and reproduce quickly.
However, red wigglers can't survive freezing temperatures. If you live in a place with cold winters, you can try to keep them alive by insulating your compost bin with straw, hay, and/or mulch on top of the lid. You can also empty the bin and start over next year or keep some of the material to stock the next season's bin. Another factor is that, like most earthworms in North America, red wigglers aren't native to the continent and could potentially harm ecosystems if they escape. In cold areas, they will die off in winter anyway, and they are unlikely to thrive in the wild because of their high nutrient needs. But if you are concerned — or can't get your hands on any — you can also use worms from your garden or wait for them to move in on their own.
As for what to feed worms for healthy garden compost, offer as many vegetable and fruit scraps as you like, making sure to balance with bedding material to keep the habitat light and breathable for the worms. Add tea bags, coffee grounds or filters, crushed egg shells, grains, and potatoes in moderation. Avoid feeding citrus, pineapple, dairy, onions, garlic, meat, fish, or pet waste.