Don't Toss An Old Clipboard When There Are 12 Creative Ways To Repurpose Them
We may receive a commission on purchases made from links.
Clipboards were once an office and classroom staple, especially if you found yourself frequently on the go. Nowadays, however, they aren't nearly as common, primarily due to the shift in popularity from physical to digital documents. If you find that you have leftover clipboards that were rendered obsolete, either thanks to the changing workforce or a change in your daily activities, you don't have to let them go to waste. Thanks to their simple design and sturdiness, clipboards are one of the office supplies you should be repurposing around your home. Whether you want to create some new wall decor to spruce up your space or are looking for a tool to lend a helping hand with your crafting projects, an old clipboard might be just the thing you need.
As an added bonus, most of these DIYs are incredibly simple and require very few additional materials to complete. With just a few minutes (and maybe a bit of glue or paint here and there) you can transform something that was collecting dust into a brand-new item that you'll actually use. It's good for the environment, good for your wallet, and good for your space. What's not to love?
Display photos without a frame
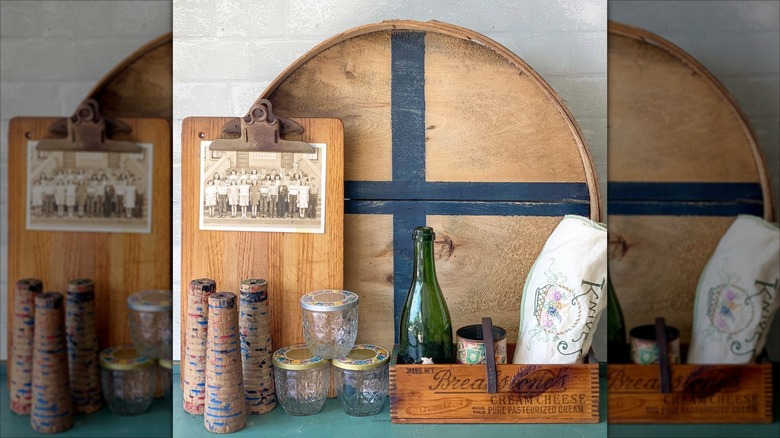
If you frequently like to swap out the pictures you have on display, this DIY might be for you. A plain clipboard can act as the perfect backing for your favorite photos. Simply clip them on, then prop up the clipboard or attach it to the wall. If you want your display to be free-standing, you can also add a some legs or place the clipboard on something like this Plate Holder Easel Display Stand from Amazon. When it's time to change pictures, all you have to do is release the clip.
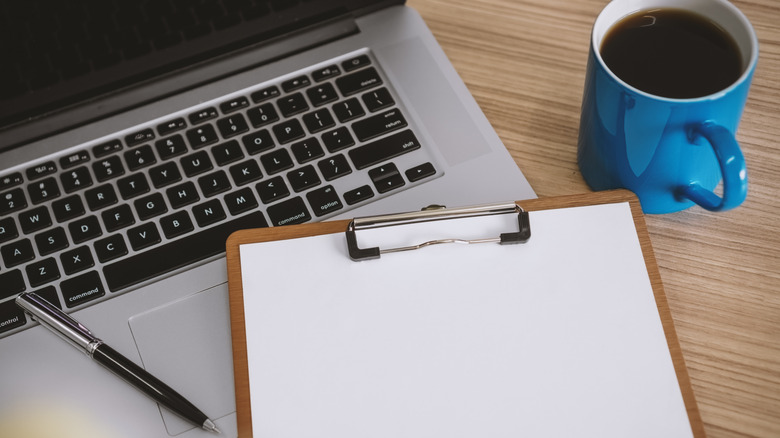
Use it as a tool in other crafts
Sometimes, you need an extra hand when you're crafting. Whether you're making bracelets, starting off a crocheted piece, or weaving material together, it can be beneficial to have a spot to clip down your craft while you work. Many people choose to use a piece of tape on a tabletop for this purpose, but a clipboard is a reusable and adhesive-free solution that's much more convenient. As an added bonus, it's completely portable, so you're free to sit back and relax on the couch or take your crafting project on the go.
Craft a convenient to-do list
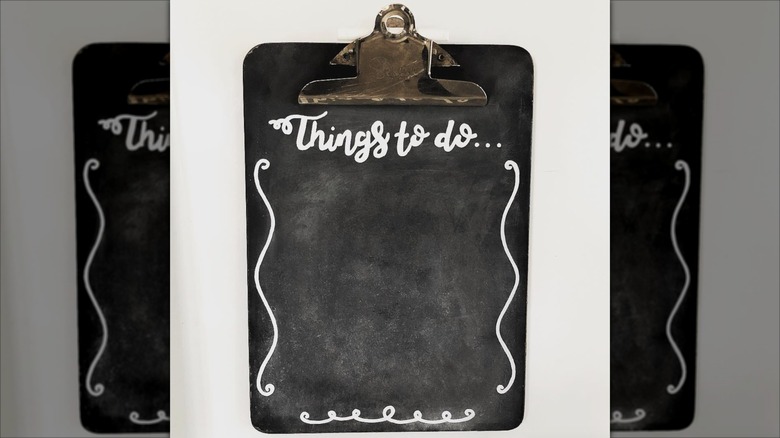
Keeping track of all of the tasks you need to accomplish throughout the day can be a struggle, but a to-do list can make things a lot simpler. DIY your own with a clipboard and some chalk paint. After your clipboard is painted, you'll be able to hang it on the wall, write on it with chalk, and erase once you check off a task. With the help of the clip along the top, you can also keep important documents or business cards accessible and visible so you're less likely to forget or lose them.
Transform a plain notebook
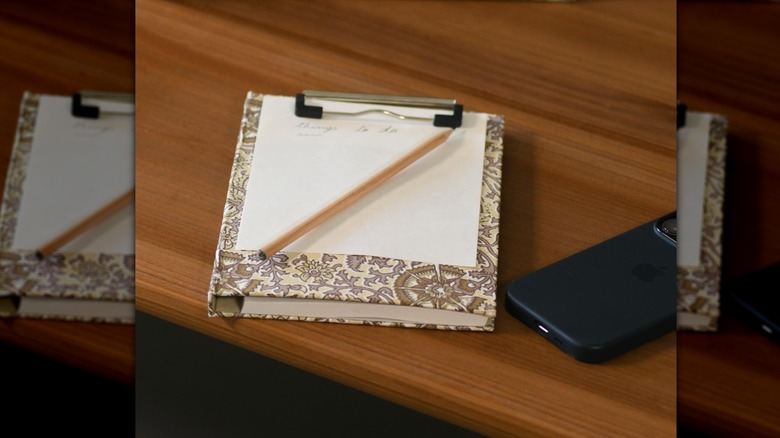
If your clipboard has seen better days but you don't want it to completely go to waste, consider removing the clip and using it for another purpose. A notebook with a sturdy cover makes a great base for a clip, especially if you have one that you use as a daily planner. Glue it on and use it to more securely hold on to things you collect throughout the day — business cards, notes, receipts — or as a spot to store your pen so it doesn't constantly end up floating around at the bottom of your bag.
DIY an easy-to-swap accent wall
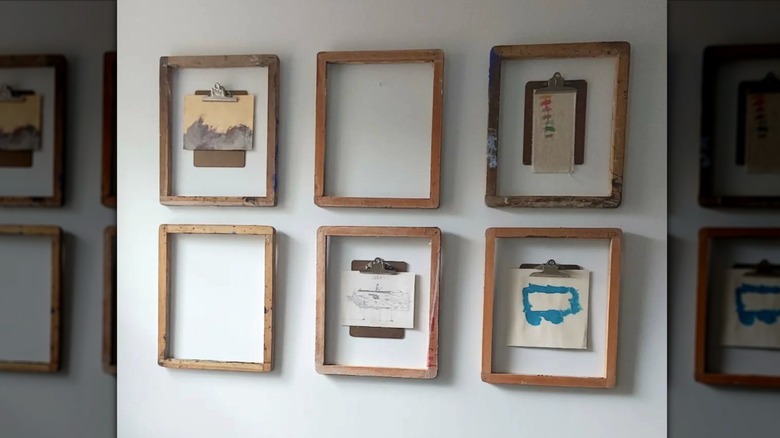
It's common to want to change your decor every now and then, but the process of removing it from the wall and swapping out the contents of a frame can get annoying. Give yourself more flexibility with this gallery wall DIY. You can hang clipboards on the wall, either alone or surrounded by decorative frames, and use them as spots to display decor. This is especially great if you have children who come home with tons of art — within a couple of seconds, you can swap out what's hanging with their newest piece.
Showcase art without damage

Looking for a more minimal accent rather than a full gallery wall? Hang a clipboard (or a few that match) on your wall to create a simple, changeable display. The clipboard border will create the look of a frame and help make what you're hanging look more structured and intentional, but it also comes with the added benefit of not causing any damage to the art, unlike pushpins. For a renter-friendly DIY decor piece, you can also secure your clipboard on the wall using a few adhesive strips.
Organize and display your jewelry
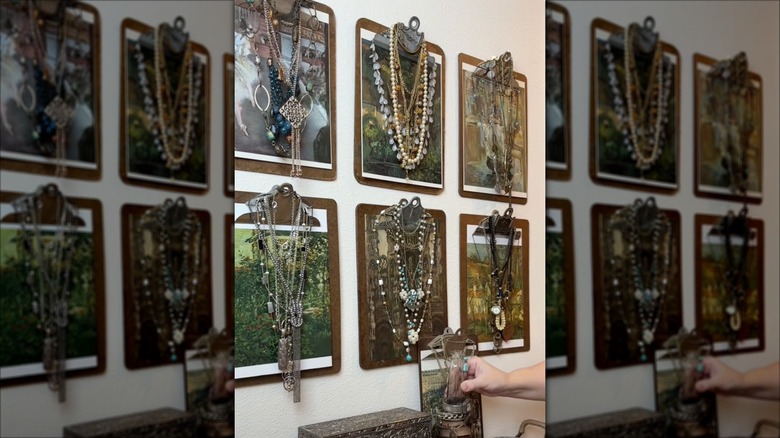
Decluttering and organizing jewelry can feel like a massive task, but this DIY makes it simple. Clipboards are great for clipping on to items, but the lip along the top of the clip also creates a convenient hook. Because of this, a clipboard on the wall can be the perfect spot to hang and display your favorite necklaces. Keep the clipboards as-is if they're in good shape and you want a more minimalist look, or clip on some printed art to amp up the display and cover any blemishes in the backing material.
Use a clipboard as a canvas
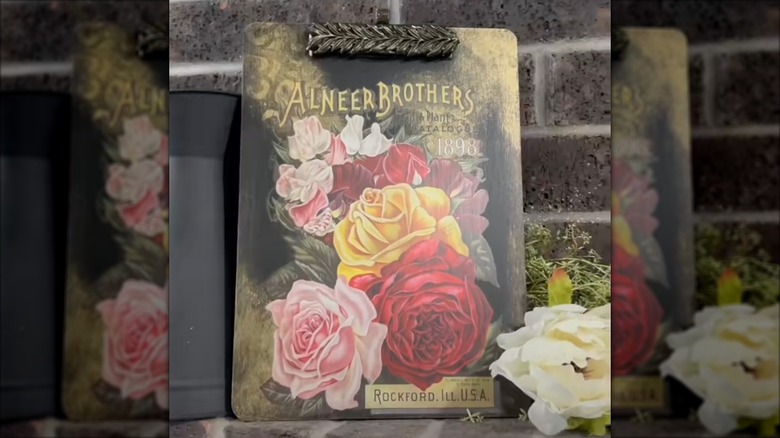
Clipboards have to be sturdy in order to serve their intended purpose, so the backing is typically made out of hardboard or plastic. Because of this, they also make a great canvas. Whether you want to try your hand at decoupage, enjoy scrapbooking, or want a more creative base for your next painting, a clipboard is a great option. Your exact steps will depend on your desired final product, but you can remove the clip for a more seamless look or keep it on if you still want it to look like a clipboard.
Make a miniature easel
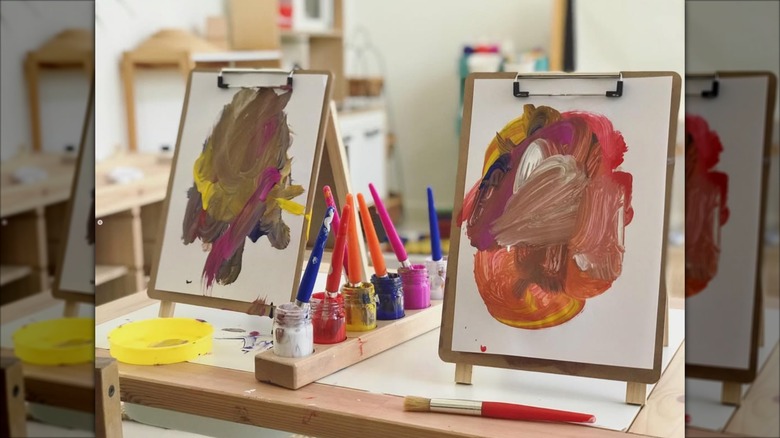
Art supplies can get pricy, but you can cut down your budget with this miniature easel DIY. To create a sturdy base for painting, you'll only need two items: a clipboard and a small A-frame chalkboard, like this BangQiao Freestanding Wooden A Frame Double Sided Chalkboard. Set up the chalkboard then glue the clipboard to one side to create a functional easel. You can use the clip on the chalkboard to hold on to paper as you paint or draw, and, once the art piece is done, you can easily remove the page and replace it.
Showcase your collectables
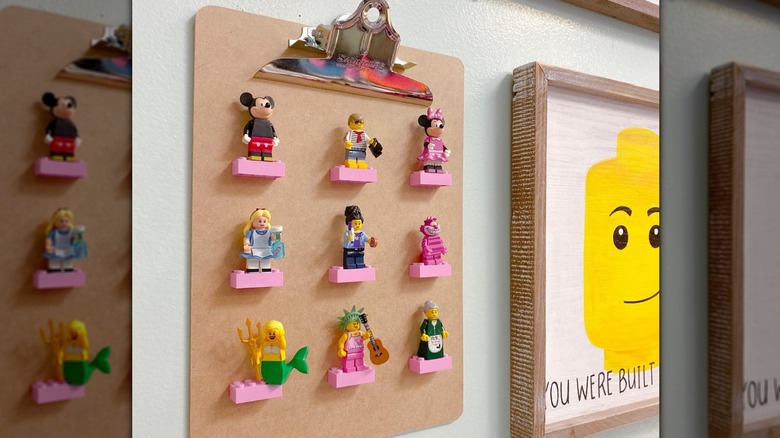
Even the tiniest of things can hold a big place in our hearts. If you want to give your small collectables a more visible display so they don't fade into the background, consider turning your old clipboard into a tiny shelf. This is especially easy to do with Lego — just glue a few 2 by 6 bricks onto the clipboard to create a spot for your mini figures — but just about any small, lightweight knickknacks can get the same treatment. Simply swap the Lego "shelves" for wood pieces, like these Unfinished Wooden Blocks for Crafts from Amazon.
Organize your time with a DIY calendar
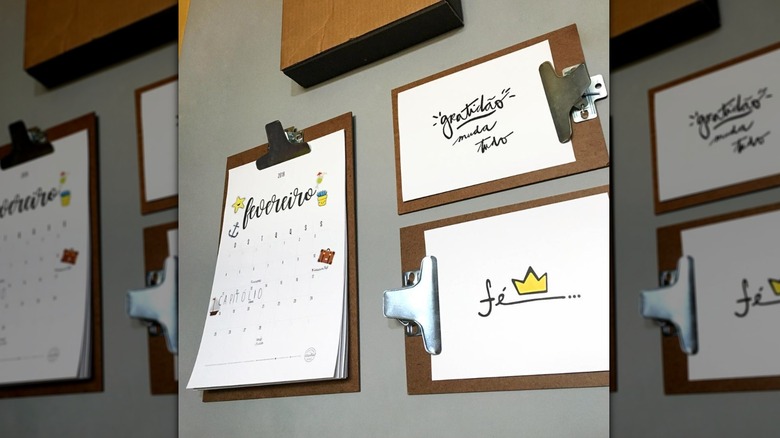
Increasing your organization and keep yourself on schedule doesn't have to cost money. With a few things you already have at home, you can make your own wall calendar. All you need to do is print out a calendar using a free template online (or draw one up yourself if you're going for a custom look) and attach it to your clipboard. You'll be able to write freely and keep track of important dates, and then, when the month is over, you can easily swap out the page for a new one.
Display dried flowers
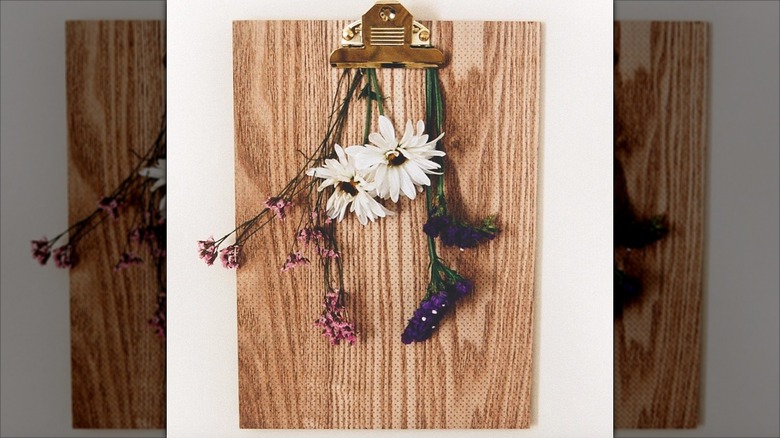
If you're looking for a unique way to dry and style your favorite flowers, consider trying out this clever DIY. You'll start out with some dried flowers — anything pressed or air dried that isn't brittle will work. Instead of framing them or putting them in a vase, flip them upside down and attach them to a clipboard using the clip. You likely won't be able to fit a full bouquet, but this is an easy way to show off a few of your favorite stems without having to take on a more complicated project.