A DIY Fire Bowl Is So Much More Affordable Than A Custom Fire Pit
We may receive a commission on purchases made from links.
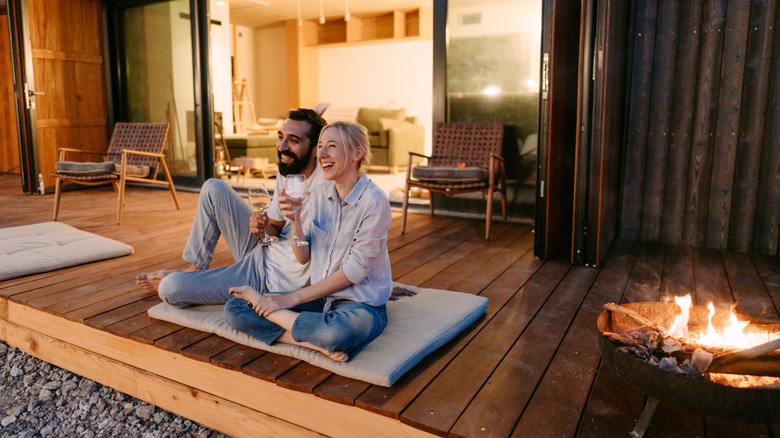
Who doesn't like a nice fire in the garden? Whether you use it for cooking, light, or warmth, a fire bowl or firepit has an undeniable charm that makes everyone feel welcome. There's plenty of choice, too, from building a tiny fire pit out of a terracotta pot to having something custom-made for you.
Most of us are probably somewhere in the middle. We want something big enough to make an impression and keep us cozy on chilly nights, but we may not have the budget for something that's handcrafted. So, why not make a DIY fire bowl? Using readily available materials, you can create something unique and attractive. It will also be way more affordable than custom fire pits that can easily cost several thousand dollars.
What's more, this is a beginner-level project, and the only tools you need are some pliers or wire cutters, plus a pair of garden gloves to protect your hands. The final price should be well under what you might pay for a custom fire pit, but the size of the fire bowl you want will have a considerable impact. So let's look at the details.
What you need to create a fabulous DIY fire bowl
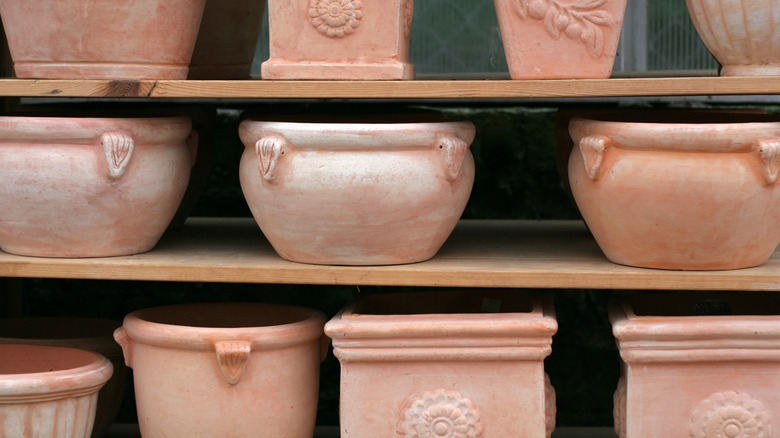
You need two bowls: a large one that has an instant impact and a smaller one to contain the flammable material. The outer bowl will be the biggest expense. A classic 36-inch terracotta planter could be $250, while a concrete one might top $500. As well as checking online, it's a good idea to shop locally to see if you can pick up a bargain. The inside bowl will be much cheaper. It will mostly be hidden, so a large stainless-steel dog bowl might do. Size isn't vital, but around one-third the diameter of the larger bowl works well.
The larger bowl should be ceramic, concrete, fiberglass, or terracotta. Any material that won't catch fire. While metal could be used, and it's possible to upcycle a washing machine into a firepit, it does rust after a while. We're going for something more sleek and high-end. The smaller bowl should be stainless steel because it is highly resistant to rust.
You'll also want some galvanized wire mesh (again, because of its rust resistance), enough sand to almost fill the large bowl, and some decorative slate, lava rocks, lava glass, or fire stones. Choosing the right type of rock is vital for safety. Ordinary pebbles and some types of porous rock might crack under the heat, or worse, could even explode. Finally, you'll need some cans of gel fuel. There are numerous options, but the Echo Valley EchoFlame is non-toxic, smoke- and ash-free, affordable, and a convenient size.
Assembling your stunning DIY fire bowl
The measurements here are approximate, and you might want to vary them depending on the bowls you buy. Fill the large bowl with sand to about six inches from the rim. Firm it down with your hand. Sit the smaller bowl in the middle and push it into the sand so you've got two or three inches sticking out. Cover the sand, up to the underside of the bowl, with your chosen stone.
Take the wire mesh, lay it over the rim of the large bowl, and cut it all around so you have a circular piece that fits neatly inside. Now cut a central hole for the gel fuel can, but make it a fraction larger so you will easily be able to get the can out (once it has cooled). Bend any cut wire ends underneath. Put the mesh in place, add the gel fuel can, then cover the whole area with more stone until the mesh is hidden and you're satisfied with the appearance.
So there you have it. Ready to light carefully and enjoy. A unique, stylish DIY fire bowl for perhaps half the price of a custom fire pit. Just remember to always follow those crucial safety tips when installing a fire pit on your deck or anywhere else it might potentially be a hazard. It doesn't have to be a bowl shape, of course. If you can find appropriate planters, it could be square or rectangular.