Reuse Corks In A Key-Hanger Shelf DIY For The Wine Lovers In Your Life
We may receive a commission on purchases made from links.
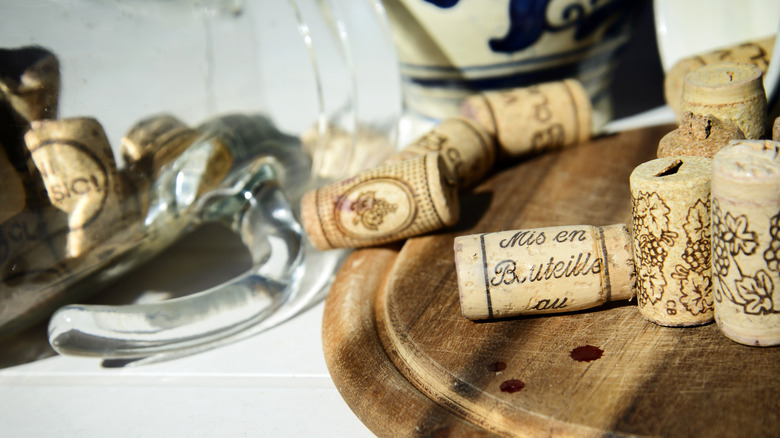
Are you constantly misplacing your keys? Maybe you shove them into your pocket at the end of every stressful day, more focused on winding down with a glass of wine than putting them in a dedicated spot. Car keys and a bottle of wine aren't usually a match made in heaven. But if you're a wine lover who relates to this predicament on a soul level, we have the perfect DIY solution for you courtesy of @diyskills on Instagram. To complete this project, you'll reuse leftover wine or champagne corks, a little bit of twine, and a piece of wood to create a DIY key-hanger shelf to keep keys neat and organized.
No liquid courage is required to complete this DIY shelf, because it couldn't be easier. This is a woodworking project even beginners can do, and you also don't need to be an experienced crafter. What you will need is a small collection of corks, preferably ones that have dried out but still have some pliability (if your corks are too old, they may split). You'll also need a roll of thin twine like the highly rated Vanhench Natural Jute Rope for Crafts, which comes in a variety of colors. These items will be combined to create fun keychains. To hold them, you'll also need a small piece of wood. We like the eye-catching grain in BeaverCraft Walnut Wooden Blocks, but you may already have a piece of scrap or salvaged wood in your collection that will work perfectly.
How to create a cork key-hanger shelf
The first step is preparing your keychains. Start by drilling a hole through several wine corks. It can be tricky to choose which drill bit to use for your project. Since cork is such a soft material, we recommend using a brad point bit like the ones in the Dewalt 6-Piece Drill Bit Set. After creating your holes, cut several six to eight inch lengths of twine. Temporarily wrap both ends together with Scotch tape to help guide them through the cork. Then, tie the ends of twine together before slipping the loop you've just created through your key ring. The weight of your keys will prevent the loop from sliding out of the cork, while the cork's low density will help your keys float if they ever fall into water.
The next step is to create the shelf itself. First, determine how many sets of keys you need to hold. Then, use a pencil to make even marks along your piece of wood. Use them as a guide to cut slots into the wood, being careful not to cut all the way through. @diyskills used a circular saw, but if you don't have one, there are other types of saws that will work. A jigsaw, backsaw, or specialty woodworking tool like the SUIZAN Ryoba Japanese Pullsaw are all good options. Finally, you'll need to hang your shelf. We recommend using heavy-duty mounting tape or Command Strips. This will help you create a floating shelf effect.
You can substitute wine corks for other decorative elements
This DIY project is a perfect way to repurpose old wine corks that would otherwise end up in the trash. Corks make ideal keychains because they are lightweight yet large enough to keep the twine loop from slipping through the slots on your key-hanger shelf. They also come in a variety of sizes, shapes and designs, which is ideal if you need to hang multiple sets of keys. But even if you're not much of a wine drinker, this DIY hack can still work for you and your family.
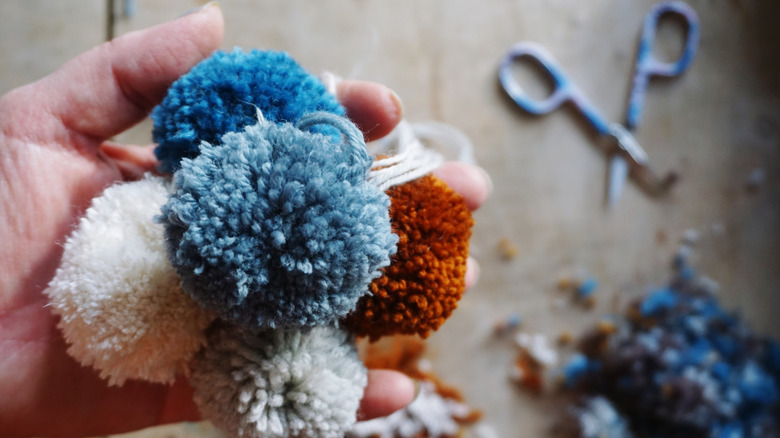
You can replace the corks with any item that is large yet lightweight enough to use as a stopper. Fluffy pom poms made of yarn wrapped around little cardboard donuts or fringed leather tassels made with a Cricut are two DIY projects that would be easy substitutes. You will simply need to tie the twine firmly around either one before slipping the loop end through your key rings. Whether you can't bear to part with your lucky rabbit's foot or you're particularly attached to another special keychain, you can substitute it for the corks used in this project, too — as long as it isn't so thin it will slip through the slot. You'll need to remove the decorative keychain element from the key ring before threading the twine through its hole and tying a secure knot in place. Then, attach the twine loop back on the key ring.