7 DIY Garage Door Insulation Methods To Heat And Cool Your Space
We may receive a commission on purchases made from links.
Whether you want to use your garage as a workspace or simply increase your energy efficiency, insulating your garage door is a must. If you only use the space for cars, insulation might not seem like a necessity. However, during very hot or cold months, you can easily upgrade your comfort with enhanced insulation. In fact, you can even lower the energy costs for your entire home by ensuring high heat or cold drafts don't escape through your garage entrance and into your kitchen or mudroom.
Insulating your garage doesn't have to break the bank. You can explore the best inexpensive products to lower your energy bills. From DIY insulation kits to materials from your local hardware store, there are tons of different options to consider depending on your budget and level of expertise. Plus, you don't need to hire a pro for the installation process. We've highlighted several successful DIY methods to insulate a garage from freezing winter temps without hiring any contractors. Simply choose the material that best suits your project and get started!
Cut and tape pieces of a Reflectix garage insulation roll
Reflectix Bubble Pack rolls can be one of the best hacks for your garage insulation. Not only will they keep the heat trapped inside during the winter, but they will also deflect 96% of the sun's heat during the summer, keeping it noticeably cooler. It does this by utilizing a highly reflective surface to minimize heat absorption or drafts leaking in.
Use a tape measure to determine the size of your reflective panels. Then, unroll the reflective insulation and use a utility knife to cut rectangular sections. Finally, adhere the panels with heavy-duty, double-sided tape. This Scotch Double-Sided Tape from P7yaumy is a highly-rated option. Keep in mind that Refletix is not effective if you cover it, so you may have to sacrifice aesthetics for this shiny hack. The reflective side should be facing outward to function properly.
Create a grid of pre-scored foam board panels
You can also cut insulation foam boards and pop them into your garage door grid to better insulate the space. Because they are so dense (especially when compared to fluffier materials, like fiberglass insulation), they do an excellent job of preventing heat or air from moving through the panel while also helping with humidity control. It's also a great choice if you are worried about moisture absorption, as it is a water-resistant material. One great brand to try out is R-Tech.
First, use a sharp blade to trim out each individual section. If they are measured correctly, you should be able to pop them into your door panels without any adhesive. However, if they don't fit perfectly, you can use spray foam to fill any gaps if necessary. This Matador Garage Door Insulation Kit is a great place to start. If you have a standard garage door, these panels may fit the framing without needing trimming.
Close gaps by installing a garage weather strip
Adding or replacing your weather strips is essential for keeping your garage door sealed and preventing drafts and moisture from getting through. You can nail weather strips to the outside wall, making sure they just graze your garage door on all sides. If you already have weather strips on your garage door, it's important to check whether they have deteriorated over time. You can buy the Alophoty Store Garage Door Seal Top And Sides or the Weather Defender Original kit for a super simple solution. This is one of the best ways to weather seal a garage door.
Glue polystyrene panels to your door
Consider an insulation kit with polystyrene panels. The material is thermal resistant and has millions of cells filled with air within its composition. The air inside will make it difficult for air to pass through, keeping the heat inside during the winter and outside during the summer. However, not all polystyrene panels are created equally. There is Expanded Polystyrene (EPS) or Extruded Polystyrene (XPS), with XPS being denser and a better insulator. The main difference between them is that EPS is made from polystyrene beads, whereas XPS is made from polystyrene crystals, making it twice as dense and giving it a higher R-value. This makes it more expensive than EPS — however, that doesn't mean it makes it the better pick.
While XPS has a higher initial R-value, it degrades over time. It starts off near an R-value of 5, but dips down to around 4.3 after 50 years. In comparison, EPS stays as high as 4.5, depending on which brand you get. Which one you choose depends on how extreme your weather is, your budget, and how long you plan to live in your house and use your garage. But generally, EPS is recommended since it's stabler and more budget-friendly. Once you get your chosen foam board, simply cut and glue it directly to your garage door.
Use a self-adhesive foil insulation roll for an easy fix
If you don't want to bother with glue or tape, opt for a roll of foil insulation that is self-adhesive. After you measure your sections, peel off the paper backing and stick the pieces directly to your garage door. Foil insulation uses reflective technology to keep your garage's temperature in check. Made from a base of polyethylene foam, this foam is layered with a sheet or two of aluminum on top, bouncing the heat off from the metallic material.
The Sxkjdm Self-Adhesive Foil Insulation includes 164' of reflective insulation, already prepared with a sticky backing. Just keep in mind that reviews note that the self-adhesive nature leaves little room for error, so it is important to decide exactly where you want to place your insulation before pressing down. Even if you can peel it off, adhesive backings typically don't re-stick as well the second time.
Install (mostly) pre-cut R-8 fiberglass panels
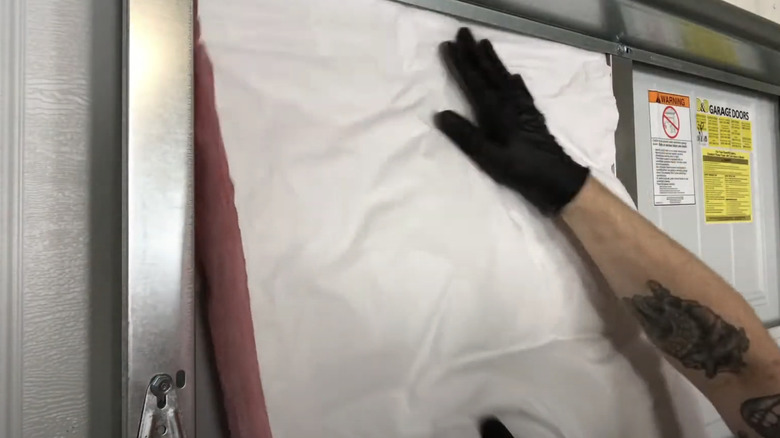
Fiberglass is another popular material that uses air pockets to trap hot air and prevent it from entering or leaving your space. Made from melted glass fibers that were wadded together, the material itself is extremely fluffy, trapping plenty of air between the layers. This will act as a thick barrier to heat.
Start with a garage door insulation kit that comes with pink, pre-cut fiberglass panels. You may need to adjust the size with a sharp razor blade knife. Don't forget to use gloves when handling the fiberglass. In fact, fiberglass-specific handling gloves are a smart choice to prevent minute pieces of glass from getting stuck beneath your skin. These Toolant ANSI A4 Cut Resistant Gloves are crafted just for this purpose. You can use strong Gorilla Tape as an ideal adhesive to keep your panels flush with your garage door grid.
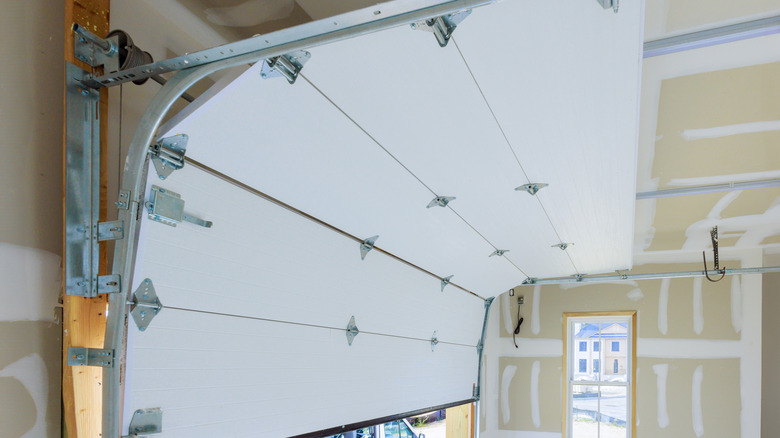
Insulate the area above your garage door
Even if your garage door is pre-insulated, the area above the garage door can be a culprit for allowing air in and out. This is because framing lumber has an R-value (the measurement of thermal resistance) of approximately 1 per inch – which is not ideal. One fix is to cut foam board to fit inside or over the wooden frame above, ensuring a tight fit without any visible gaps. This has an R-value between 3.2 and 6.5 per inch, depending on which brand and kind you get. If you can't get the foam board to fit snugly within the lumber frame and you still see an apparent opening, you can use spray foam specifically targeted to the uninsulated area.
Beyond the framing itself, if there are any small areas above or around your garage door that need to be filled and sealed, consider using a classic expanding foam sealant like this Kraken Bond Black Spray Waterfall variation. For your next garage project, explore the best DIY methods to get your garage door back on track.