Turn Old Hammers Into A Rustic Garage Rack For Extra Storage

We may receive a commission on purchases made from links.
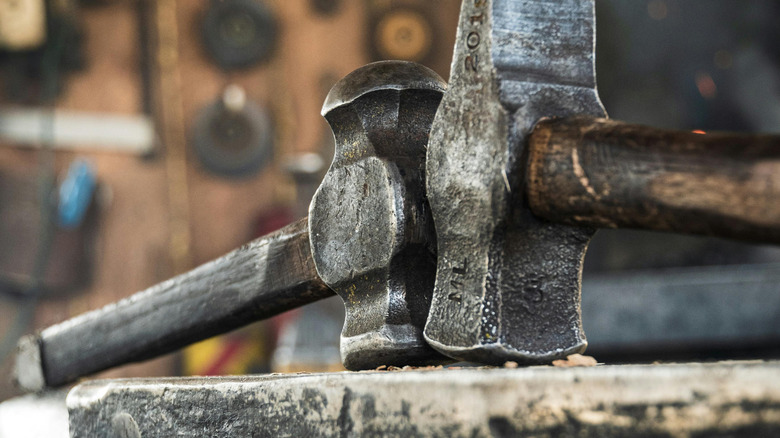
There's a saying that goes something like this: When you have a box of hammers, all problems become nails. However, we'd like to update this bit of wisdom by saying this: When you have a box of old hammers, you have the makings of a cool rustic garage hanging rack. While the latter saying probably won't be repeated in the hallowed halls of academia, it's likely to get a lot of play in home improvement circles where the option to upcycle garage-y type things is always welcomed. The materials for it are simple enough, starting with a handful of old hammers, which will become the hooks for the rack. The number of them will vary, depending on what you'll use the rack for. However, if you're looking for a more solid number, plan on using between four and eight hammers for the project.
The project also needs a mount board, enough nails or screws to mount the hammerheads onto the board, a bottle of wood glue, and some hooks to hang the board on. Because the rack uses just the hammerheads, plus about 4 to 6 inches of their handles, you may want to have your saw of choice on the ready. You may need to use it to trim the mount board, too, so make sure it's powerful enough to do the deed, or keep a second saw nearby just in case. You'll also need an electric drill to make holes for the screws and the hooks. Finally, you may need to mark the board, so have a pencil on hand, too.
How to make the hammerhead garage rack
To get started, you'll want to prep the hammers. Make a diagonal cut on the handles about 3 to 4 inches down from the head. Once they're cut, lay them out over the mount board to get a feel for the spacing you'll need between each hammerhead. If you're using different types of hammers (instead of just claw hammers), put the heaviest hammerhead in the middle to keep the board balanced visually and physically. Mark the board with their positions with a pencil. Once you mark the board with their positions, drill holes in the board for the screws and then add the screws to the holes. The handles of the hammerheads should also get holes to make it easier to mount the hammerhead hooks on the board.
When you're ready to mount the hammerheads on the board, squirt some wood glue into the holes in the handles of the hammerheads. This reinforces the strength of the hooks. Position the hammerheads over the holes you drilled and finish tightening the screws so that each hammerhead is mounted onto the board by both a screw and a spot of glue. One thing to note: The direction you position the hammerheads — claw up versus claw down — is up to you. Some DIYers also like to position the hooks at a slight angle, though some designs feature hammerhead hooks that sit straight out from the board perpendicularly. Finally, add the small hooks onto the back of the board. These should be sturdy enough to allow you to mount the piece on the wall without interfering with how the rack hangs.
An argument for different hammer types
If you're the everything-has-to-match kinda DIYer, then you'll probably want to buy all the hammers you'll need for this project, rather than try to scrape enough of them together from your wares. You can find cheap hammers at the Dollar Tree for less than $2. Wood-handled hammers, like the Olympia Tools Claw Hammer, are also available on online sites such as Amazon, though those may cost you a little more. However, if you'd like for this project to be truly rustic, there's an aesthetic argument for going the mix-and-match route. Before you buy any hammers, see if you can nab them from your own garage — you may have enough old ones to do the job. Keep in mind that different hammerheads can mean the difference between keeping something on the hook or not. For example, a hatchet hammer with a large, but dull hatchet head might be the best choice for hose storage. It's likely one of the only kinds of hammers, for example, that could provide a tall enough hook to keep your hose wound up and in place.
As for how many you'll need, here are some guidelines. Four to eight hooks are common for indoor coat racks. However, the hook requirement for a coat rack in the mud room can be higher to accommodate bulkier items, like backpacks. Since the demands on your garage rack will likely be greater, given that it'll hold tools, work aprons, and other items, you may want to take a hint from the mud room coat rack and lean toward more hooks rather than fewer.
Working with the mount board
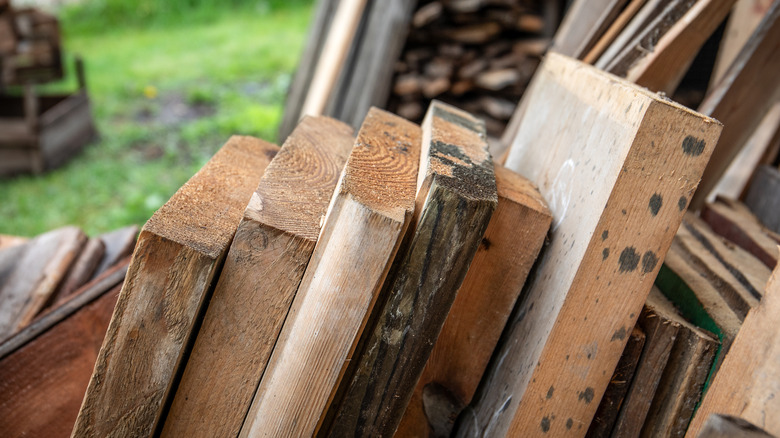
How thick the board is for this task largely depends on how you plan on using the rack. If you're hanging mostly short extension cords and work aprons on it, you may want something like a 1-by-4. That's sturdy enough for lighter items. However, heavier objects, like garden hoses, may require the sturdiness of a 2-by-4 to ensure that the nails or screws have enough board to hang on to once the heavy items are hung on the rack.
Additionally, after you've found the board, you'll want to mark it so that you know where you're going to mount the hammerhead hooks. The screws or nails go into the back of the rack and through the handles of the hammers. Make sure you use the right screw type and size. This ensures that the hammerhead hooks, which can be quite heavy, stay put. Finally, there's something to be said for going with a board that's a bit battered if rustic really is your thing. Beveling tools make the edges look nice and all. However, chips out of the corners of the wood and little "scars" in the surface of the wood, like the dents left in the board from one-too-many hammerheads hitting the surface of the wood, make your garage rack rustic through and through.