The Laundry Hanging Hack That Saves Space In A Small Home

When you've mastered the pro tips for air-drying your laundry, but you're fed up with the bulky drying racks taking up precious floor space, it's time for an eco-friendly upgrade that helps curb your utility bill. A ceiling-mounted laundry rack is the ultimate space-saving solution. It lets you dry your clothes efficiently without cluttering your home, making it a must-have for small spaces.
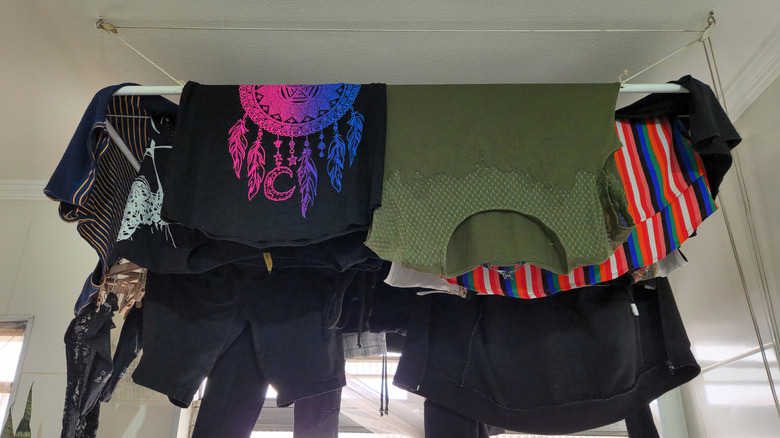
One simple yet brilliant setup uses a pulley system to suspend a drying rack from the ceiling. When laundry needs drying, you simply lower the rack to a reachable height, hang your garments, and then hoist them up to the ceiling again. After taking your air-dried clothes from the rack, a quick pull lifts everything back up, keeping your space neat and organized. Since heat rises, clothes often dry faster than on a clothesline or a standard rack, making it a practical choice even in winter. Plus, it works in nearly any room—above a bathtub, in a laundry nook, or even in a kitchen corner. Sounds like a no-brainer, right?
Beyond saving space, hanging racks add aesthetic appeal. Some airer designs offer a sleek, modern look with metal accents, while wooden-slat versions create a charming, rustic vibe. And, if you're handy, building one yourself is easier than you might think. Whether you buy or DIY, this clever solution keeps laundry out of sight, dries clothes efficiently, and maximizes small living spaces—all without the need for extra square footage.
How to build your own DIY hanging laundry rack
If you're interested in creating a functional laundry room, building your own ceiling-mounted drying rack can be a fun and budget-friendly project. For the frame, use wooden slats, dowels, plastic plumbing pipes, metal bars, or a combination. Then, you'll need strong rope or durable cord, ceiling hooks, pulleys (pre-made hanging bike pulleys can be easier to configure), a cleat or hook to secure the rope, wood screws, a drill, polyurethane (optional, for protecting wooden dowels), a measuring tape, and a saw.
Start with the frame. After determining the dimensions needed, measure and cut the wooden slats, dowels, or alternative material to size. Create a sturdy rectangle before inserting the inner wooden slats or dowels by screwing them to the frame. If using materials such as metal bars or plastic PVC piping, you can screw, solder, or weld them together or use another appropriate method. Now, protect your wooden material with a coat of polyurethane. Install the ceiling hooks by locating ceiling joists or beams to support the drying rack's weight. Or, if you're using a bike pulley system, follow the manufacturer's instructions. Afterward, attach the pulleys to the ceiling hooks before carefully feeding the rope through and attaching it to the drying rack frame, ensuring even weight distribution. Tie the rope to a cleat or wall hook that has been secured to the wall. Finally, don't forget to test the system to verify that it is stable and working smoothly. Easy, right?
Taking your hanging laundry rack to the next level
Once you've installed your hanging laundry rack, why not make it even smarter? The classic pulley system works great, but there are a few ways to enhance the design for better functionality and safety. If you're looking for easier movement, consider counterweights or counterbalance springs, which allow you to raise and lower the rack with less effort and greater control. These elements prevent the rack from falling too fast, ensuring safety when handling heavy or wet laundry.
If you're worried about safety, make sure that your ceiling hooks and pulleys are rated to carry the weight you intend to hang. Overloading can strain the system, so it's essential to choose hooks, ropes, and pulleys that are rated for laundry use. If you have children or pets at home, you might also want to install a locking mechanism on the rope to ensure the rack doesn't come down unexpectedly.
If you're on a budget, why not repurpose this baby furniture to create a DIY laundry drying rack? Baby cribs with drop sides are often made of strong, durable slats that are perfect for a drying rack frame. Not only will you have a functional and eco-friendly solution, but you'll also keep the frame's natural charm intact. All you need to do is remove the drop side, sand it down if necessary, and mount it to a ceiling pulley system for a stylish, cost-effective rack that looks great and works perfectly.