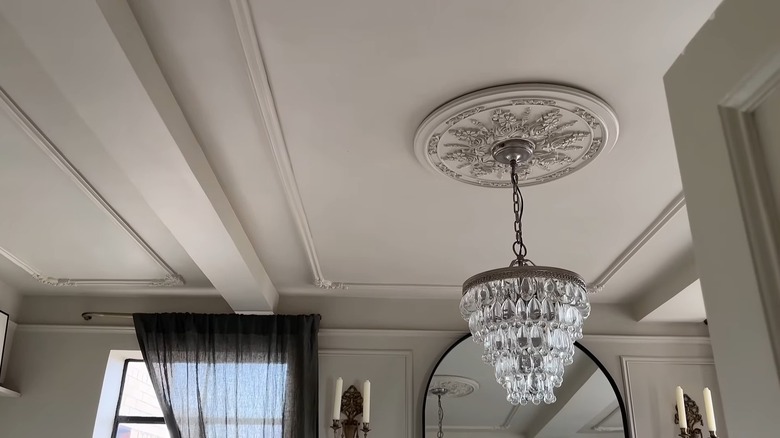
How To Add Dimension And Detail To Your Ceiling With Affordable Molding
Ceilings are often a boring and overlooked part of a room. They're flat, bland, and uninspired. But imagine if yours had the grandeur of Versailles or the old-school charm of a Haussmannian apartment in Paris? Well, with this easy hack, you don't need a palace-sized budget to add dimension and detail to your ceiling. With foam moldings and some careful planning, you can transform a plain ceiling into something more refined and stylish.
The idea is to use foam trim to get the look of fancy molding on your ceiling and add some depth. Original ceiling moldings were made of plaster or wood. Of course, this is still something that you can do, but it's a big undertaking. Sticking plaster or wood trims on your ceiling can easily cost thousands of dollars, and in some cases, it requires professional help. Instead, you can go with a more lightweight material like foam polyurethane or polystyrene. It's a fantastic way to instantly transform your ceiling on a budget.
For example, you can get these Ekena Millwork Oxford Corners for around $50 for four and pair them up with a pack of Ekena Millwork Panel Molding, sold for $62, to create the edges of your panel. Cut these as you wish to create the perfect shape and attach them using glue, nails, or even command strips. You can even paint over them and embrace some stylish European ceiling paint trends to complete the look.
How to DIY ceiling molding at home
To install the molding, you can use a ceiling laser light. This uses a laser beam to help you install things on the ceiling and ensure that your shape is perfectly even with sharp, clean angles and that your lines are straight. If you don't have one of these tools, you can use a tape measure and a chalk line instead. Once you have your shape planned out on the ceiling, cut the trims as needed so that they're the perfect length to create your design. To have really clean cut lines, you can use some Garton Multifunctional Miter Shears designed specifically to cut moldings and trims.
Now, it's time to attach your molding to the ceiling! If you own your home and are thinking long-term, you can do this with a nail gun. If you're a bit afraid of the commitment or simply don't have a nail gun on hand, you can reach for an instant grab adhesive instead. These work quickly, which is essential when sticking things to the ceiling so that you don't have to spend your whole afternoon holding each piece up for an hour at a time. If you're a renter who would like your security deposit back, you can try some Command Strips to secure the trim. Don't hesitate to cut the Command Strips to be thin enough to fit under the molding, but remember that it might not look as seamless as the other attachment options.
