DIY A Statement Accent Wall Using An Unexpected Flooring Alternative

Coordinating your home decor is some serious business. Every wall, floor, piece of furniture, and room has a hand in the final visual appeal. And nothing livens up your home quite like an accent wall. Accent walls are like an exclamation point in your home decor — they grab attention, add personality, and make a room feel complete. An accent wall can add contrast without necessarily overpowering your space. Whether it's a bold pop of color, a textured finish, or a unique material, there are so many accent wall ideas that allow you to add a personal touch to your space without breaking the bank. If your personal touch leans toward the unexpected, laminate flooring for your accent wall is an idea you should consider.
Now, you're probably wondering why we're suggesting laminate flooring for your wall. Well, why not? First, laminate flooring is incredibly versatile. It comes in a ton of styles, from rich wood grains to sleek stone finishes, so you can find something that perfectly matches your vibe. Second, it's durable and easy to maintain, making it a practical choice for high-traffic areas or rooms prone to moisture, like kitchens or bathrooms. These planks are also easy to install since laminate planks can click together and are lightweight, so they're perfect for a DIY. To top it off, laminate is pretty affordable. So, if you're looking for a high-impact, low-cost way to upgrade your space, laminate is the unconventional way to go.
Preparing to add a laminate accent wall to your space
You have to start by choosing the right accent wall. Choose one that naturally draws the eye, like the wall behind your bed, sofa, or TV. For the materials, you'll need laminate planks, brad nails, drywall screws, 100% silicon adhesive caulk, a circular- or hack saw, measuring tape, spirit level, painter's tape, spacers, and stud finder.
Starting with the wall prep, you need to check your wall with a spirit level to ensure it is vertical and flat, as sloping surfaces won't work here. The wall should also be checked for moisture damage because laminate doesn't do well on top of moisture. Remove all baseboards, switch covers, and trims before you start, and keep them in a safe spot as you'll be re-installing them after you're done. If you're working around power outlets, be sure to turn off the power supply before starting. Any wallpapers and panels on the wall should go as well because you need a primed and painted bare wall. Next, find the wall studs using your stud finder and mark vertical lines over them. Then, use painter's tape to extend those lines to the ceiling.
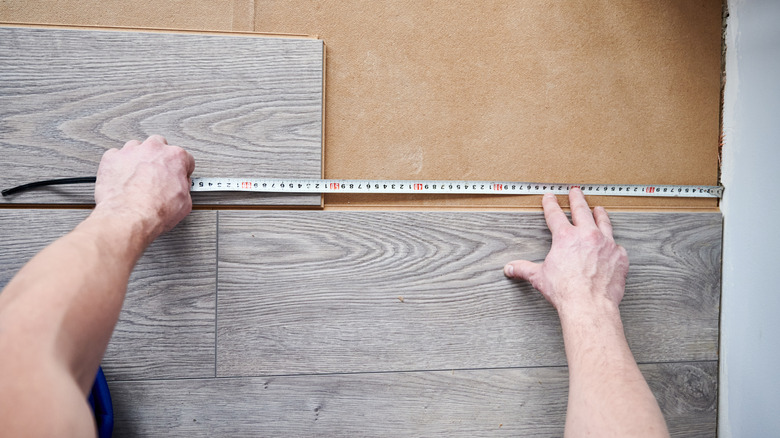
Find out how many square feet of flooring are needed by multiplying the length of your wall by its height (Pro tip: Add an extra 10% to accommodate wrong cuts). The maximum recommended wall area is 40 by 10 feet. After purchasing, place the unopened laminate in the room with the accent wall for two days to acclimate to humidity and moisture levels.
Installing your laminate accent wall
Start installing from the bottom up, from left to right. First, connect the planks needed for the first (bottom) row and measure the length needed to fit the wall, then cut to size. Ensure you leave a 3/16" gap between the end of each plank and the wall beside it for expansion. You also need to leave a half-inch gap between the bottom row and the floor for the same reason. Use spacers to maintain these gaps throughout your accent wall installation. Apply the silicon caulk on the back of each plank in an S pattern and carefully press against the wall with the tongue side facing the floor. Next, drive a brad nail through the groove at each marked wall stud to ensure stability. Follow this up by driving drywall screws into the wall studs at the bottom of the row. Ensure you drive each nail in completely, but be careful not to force it through the plank completely. Use a level to cross-check and make any needed adjustments.
On the second row, cut the first board by at least eight inches to give the wall a beautiful, staggered look. Apply the caulk and connect to the bottom row by angling the tongue and groove edges together. It's important to use a tapping block here to prevent gaps in each row. Drive the brad nail into the wall studs just like with the first row but not the drywall screws. Repeat this process for each row until you cover the entire accent wall area. Next, re-install your baseboard and trimmings, and your wall is done.