The Carpet To Tile Transition Methods That Give You Seamless Results
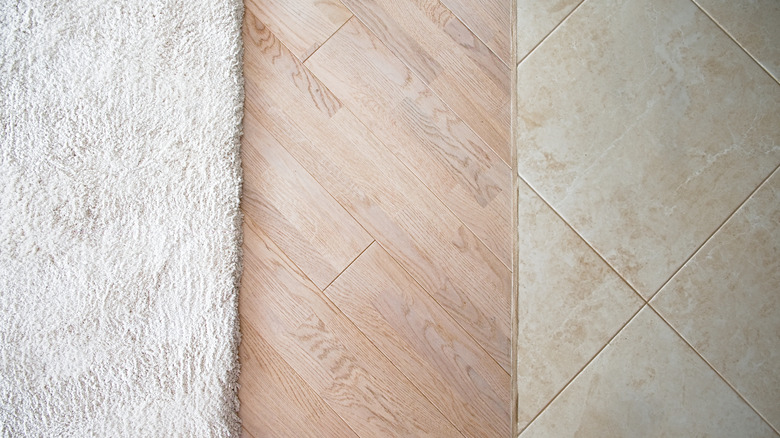
The awkward gap between your carpet and tiled flooring doesn't need to be a permanent feature around your home. It can make cleaning especially difficult, as dust and crumbs collect between the two surfaces. Additionally, flooring of different heights can be a pain to walk around, presenting a potential hazard for those unfamiliar with your home's layout. Whether you're installing a new carpet or addressing a pre-existing gap, there are a number of ways to work around this design headache. With three different methods, there is surely an effective means to seamlessly bridge the gap between your different flooring types.
There are three primary methods for transitioning between carpet and tiled flooring, each with its own set of advantages, providing several options to tackle even the most challenging transitional spaces. They range from the tuck-in method, the Z-bar, and a reducer or transition strip. The tuck-in method requires no additional tools or complicated hardware; instead, simply fold the carpet under your existing tile. It can be a simple yet effective means of addressing flooring that is roughly the same height. For trickier flooring, the other two methods might be more useful as they require the installation of a transitional strip made from metal, stone, or wood. These can be an effective way to blend between flooring types, but traditional strips often leave a space feeling bulky. On the other hand, the Z-bar method provides a sleek alternative using a slim piece of metal.
Employing the tuck-in method
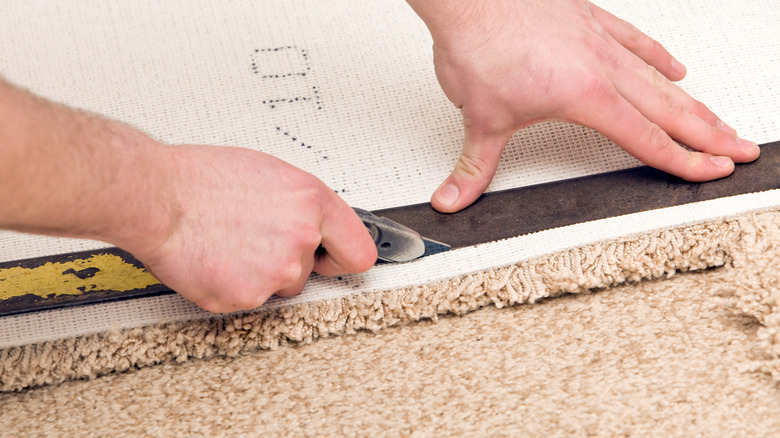
The most common method for addressing the gap between your carpet and tile flooring is the tuck-in method. As the name fittingly suggests, it involves tucking the edge of your carpet underneath your existing tile. This trick is perfect for homeowners who are replacing the carpet in a given space, allowing you to effectively transition between the two flooring materials. It is most effective when the tile is already laid, so keep that in mind before you employ this method. It also doesn't require purchasing special tools or transition strips, making it a budget-friendly carpeting hack. When using this trick, you want to ensure that the flooring is roughly the same height, as it won't mitigate significant differences between the flooring.
To get yourself started, you will want to secure the carpet around the space, letting it hang over the tile flooring. Once your carpet is in place, you can address the awkward gap between your carpet and tile. Using a carpet trimmer or a traditional utility knife, cut the overlapping carpet into thirds, perpendicular to the edge of your tile. Fold the edge of the carpet over to expose the underside, cutting exactly where the carpet meets the tile. Repeat this process for each third of the carpet. Grab a bottle of natural latex seam adhesive and apply a generous amount to the edge. Secure the carpet to the latex with a chisel, tucking the edge underneath the tile. Once you're finished, allow the latex to set, and enjoy the hassle-free seam between your carpet and tile.
Using the Z-bar transition method
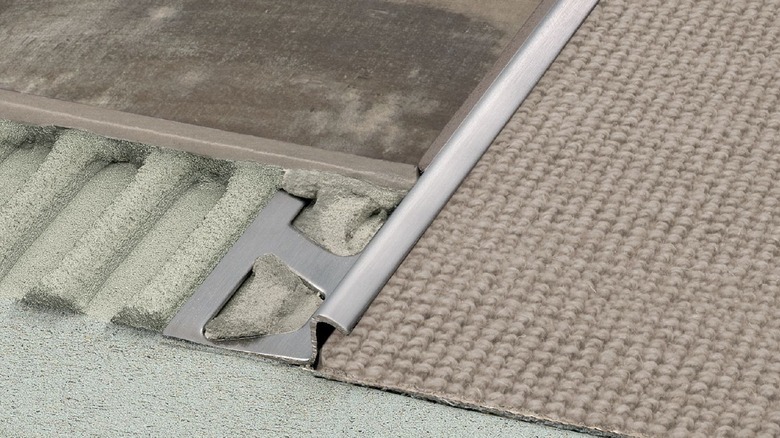
The Z-bar transition is one of the best methods to achieve a professional-looking transition between your carpet and tile. The Z-bar, appropriately named for the Z-shaped profile, is a sleek metal strip designed to hold the edge of the carpet securely while tucking it under the tiling. Unlike the other methods, the Z-bar also helps eliminate fraying on the edge of your carpet, protecting it under the metal strip. It helps to reduce wear and tear over time, making it the perfect carpet trick for high-traffic areas of your home. Plus, the overall low-profile aesthetic of the piece helps it blend seamlessly into any flooring type, especially when compared to other traditional bar types.
Installing a Z-bar strip requires a few essential steps but is equally as simple as the comparable installation methods. Start by measuring the width of your doorway or transition area and cut the Z-bar to size using a hacksaw. Position the Z-bar against the tile edge, making sure that the shorter part is facing up to grip the edge of the carpet. Secure your Z-bar to the subflooring using a nail or adhesive, depending on the surface. Stretch the carpet over the bar's raised edge and tuck it under the shorter side using a knee kicker. Press down to ensure a snug fit between the two spaces and cut any remaining excess carpet. Once everything is in place, run your hand over the edge of your transition space to ensure a smooth finish. With the Z-bar installed, you have successfully tackled the transition between your carpet and tile.
Utilizing transition and reducer strips
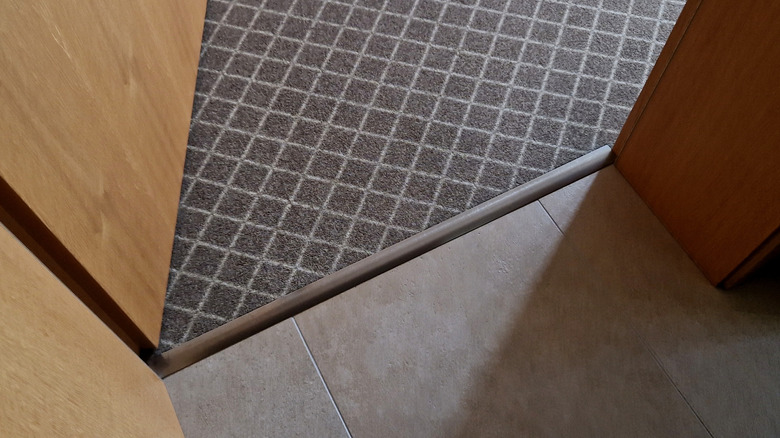
Designed to blend different flooring types into one another, transition strips come in a number of different materials, ranging from wood, stone, metal, and rubber. They create a smooth, gradual transition between the different surfaces, eliminating any safety hazards and tough cleaning spots in the process. There are also angled or sloped reduce strips that help meet two different flooring materials in your home, even with a significant height difference. They can be especially important in high-traffic areas of your home, like hallways and entryways, where flooring height differences can be a significant challenge around the house.
To install your transition strips, you'll want to remove any existing hardware that currently connects your carpet to your tile flooring. You can use this as an opportunity to clean up any dust or debris hiding in the transitional space. If there is already a carpet tack strip in place, you can leave it and repurpose it for your reducer strip. In spaces that don't already have one, cut a strip to size and hammer it into place. Using a carpet kicker, extend the edge of your carpet so that it hangs over your tiled flooring. Place your transition strip over the surface of the leading edge of your carpet. You will drill it into the floor, so you don't want it on the tile side of the flooring. Secure it into place with a few screws and check the edge of your carpet. If you're installing a reducer strip, you can use a rubber mallet to hammer the visible strip securely to the lower one.