Commonly Thrown Away Linens You Can Repurpose Instead Of Trashing

We may receive a commission on purchases made from links.
Over time, linens can become stained, worn, ripped, or severely faded. Styles also change from year to year, leaving previous patterns outdated. Unfortunately, many homeowners toss their well-loved, but no longer trendy, sheets, towels, and curtains without realizing that they can actually be repurposed and given new life. Of course, recycling old linens is also an excellent solution to reducing the amount of waste sent to landfills.
With a little creativity and spare time, you can get to work turning your linens into useful items that will serve your family well. For example, old comforters can be transformed into soft pet beds, while tablecloths work beautifully as reusable gift wrap for presenting birthday and Christmas presents in a unique way. Even fabric shower curtains can be upcycled into decorative wall art. So, before you toss out any more linens, consider implementing one of these budget-friendly solutions to get the most out of your household staples.
Use old bed sheets as picnic blankets or for protecting plants in winter

One of the best ways to repurpose old bed sheets is to use them as picnic blankets in the warm spring and summer months. This gives families a chance to enjoy the fresh air and sunshine, while catching up over a meal. Since typical picnic blankets measure 50 by 60 inches, you'll find a 72 by 102-inch twin sheet offers plenty of room. If you're picnicking with a larger group of people, however, consider going with a queen or king-size sheet. There's no need to alter the bed sheet in order to use it as a picnic blanket, but you can cut the sheet to match the dimensions of a traditional picnic blanket if you wish.
Another option is to take your outdated bed sheet and use it to protect outdoor plants — such as vegetables, annuals, and warm-weather plants — from the cold. It is best to keep the sheets from directly touching the plants using either wooden stakes, wire hoops, or any outdoor furniture that you may not need until spring. Ideally, you'll want to have the coverings in place when temperatures begin to dip to about 35 degrees Fahrenheit.
Turn comforters into hot or cold pack covers or repurpose them as dog beds
Perhaps you're searching for a genius way to repurpose an old comforter. In this case, you'll find the material used to make a comforter perfect for creating hot and cold pack covers. Cut out two 7 by 13-inch fabric rectangles from the comforter. Place the rectangles so that the corresponding sides are together and then sew along both long sides and one short side. Turn the fabric right side out. Slide a plastic bag filled with ice inside the cover if you need an ice pack. To create a heat pack, fill the cover with rice before sewing up the final short side to create a sort of rice-filled pillow that you can pop in the microwave to heat up.
If you have a canine at home, you can also use your old comforter to forge a soft and inviting dog bed. Cut two pieces of fabric each measuring one yard. Place the right sides of the fabric together and sew around three of the edges. Turn the fabric right side out. Cut a piece of your old comforter to stuff inside the fabric case. After you place the comforter inside the fabric cover, sew the final edge. The dog bed is now ready for your furry friend! Tip: If you choose two different fabric patterns, you can create a reversible dog bed.
Transform pillowcases into tote bags or basket liners
Pillowcases are another type of linen that eventually get replaced, sometimes due to changing up the look of one's bedroom. A clever way to repurpose unwanted pillowcases is to turn them into handy tote bags. This is especially helpful if you live in an area that encourages the use of reusable grocery bags. Simply cut the pillowcase in half. Take one half and place the open end on top. Fold and sew the edge to give the bag a more put together look. Cut two long rectangular pieces from the remaining half of the pillowcase and sew them on the tote bag to create handles. If you'd prefer your tote bag to have more stability, you can always add a lining using a combination of fusible fleece and extra fabric.
Alternatively, you can take your old pillowcase and use it as a basket liner, whether for an existing basket or if you want to create one using an old cardboard box. Next, you'll simply set the pillowcase inside the basket and then fold the open end of the pillowcase up and over the outside edge of the box. If the basket has handles, you'll need to add a slit on each side in order to slide that part over the handles. For a more decorative touch, consider cutting slits in the pillowcase where the fabric lines up with each of the four corners of the basket or box. Poke a hole on both the left and ride slit and then thread a ribbon through the holes. Tie the ribbon into a cute bow, and now your basket is even more stylish.
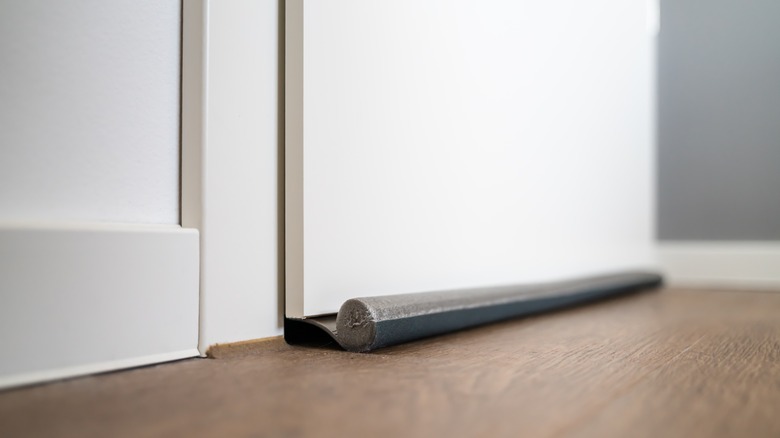
Use old curtains to create memo boards or to make draft stoppers
Curtains may become faded or out of style over time, leading homeowners to swap them out for a new set. One smart way to repurpose your old curtains is to use the fabric to create a memo board. Memo boards can be used to post to-do lists, display photos of friends and family, or to arrange mementos, such as a collection of Broadway tickets. To make your memo board, glue a sheet of cork board over a thin piece of wood. Cut a section of the curtain to fit over the homemade cork board. It should be long enough that you can wrap it around and staple it in place along the back of the wood. You can use the memo board as is, attaching items with push pins, or you can decorate the board with strips of thin ribbon.
Homes that experience drafts in the winter may want to use their old curtains to put together a few draft stoppers instead. These are easy to create, and you can begin by measuring the length of your door. Add 2 inches to this measurement to get the total length of fabric. Use 8 inches as your width. Cut the old curtain to match your measurements and then fold the fabric so that the right sides are together. Sew down the sides and along the bottom. Fold the fabric right side in and fill it with either sand, rice, or cat litter. A funnel will help make this task easier if you have one. Sew across the open edge and your draft stopper is now ready for use.
Give tablecloths new life as gift wrapping or decorative napkins
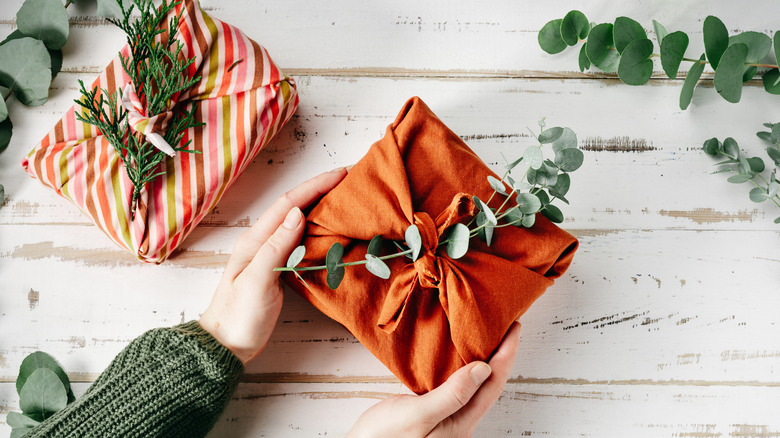
Unwanted tablecloths provide plenty of material for a whole host of upcycling projects. One option includes replacing traditional gift wrap with tablecloth fabric. This eco-friendly gift wrap can even be used over and over again, making it a budget-friendly choice as well. Place your gift on the old tablecloth and cut out enough fabric to wrap the present (basically the same way you would if you were cutting store-bought wrapping paper). Wrap the gift and secure it with a shiny piece of ribbon or a thick piece of twine.
Not interested in creating gift wrap? You could also transform decorative tablecloths into stylish napkins. Determine whether you're looking for small or large napkins to adorn your table. To make a set of small napkins, cut 17 by 17-inch squares. Larger napkins would require 24 by 24-inch squares. Once you've cut out all of your squares, you'll want to fold and sew the edges of each square to give the DIY napkins a hemmed, finished look. Add color-coordinating napkin rings to the place settings for a more fashionable appearance and you're ready for your next dinner party.
Convert cloth napkins into fridge handle covers or a set of potholders
When it comes to creative ways to repurpose old cloth napkins, a fridge handle cover should be at the top of your list. These handy covers keep fingerprints off the fridge, while also adding a layer of comfort for when you need to open and close the frequently used appliance. To make the handle covers, cut an old fabric napkin in half. Each half can become its own cover, allowing you to have a clean cover on hand when the dirty one needs washing. Wrap the napkin half around the fridge handle and take note of where the fabric overlaps. Sew snaps or Velcro where the fabric overlaps, so you can quickly place the cover over the handle. Repeat with the second piece and you're all set!
Another way to give your old napkins new life is to turn them into potholders. You'll need one 8-inch square for the top of the potholder and one 10-inch square of the bottom. Once you have those cut, prepare two 8-inch squares of cotton batting and place them in between the top and bottom pieces of fabric. Sew diagonally from the top left corner to the bottom right corner, and then from the top right corner to the bottom left corner. This is called a quilting pattern, and it will hold your potholder together when placed in a washer and dryer. Fold the edges of the bottom square in so they line up, or overlap, with the smaller top square. Sew for a finished look, and your potholder is ready to use.
Repurpose hand towels as reusable Swiffer pads or a toiletry carrier
Constantly replacing disposable Swiffer pads becomes quite expensive over time, so the first thing you'll want to do with your old hand towels is repurpose them as reusable Swiffer cleaning pads. Set your Swiffer base over the center of the hand towel. Fold the edges up and over the base, pressing them into the holes in each of the four corners. If the towel is too long, you can always cut it to fit with a pair of fabric scissors. It's that simple!
If you do a lot of traveling, you'll also find old hand towels are perfect for creating toiletry carriers. Lay the hand towel out lengthwise and fold the bottom up about 1/3 of the way. Set the items you need to carry across the bottom pocket. Space them out and then pin the edges and in between each item. Remove the items and sew lines where you had the pins. You now have little pockets for your toothbrush, toothpaste, razor, etc. When you're ready to hit the road, simply roll the towel from left to right and pop the homemade carrier in your suitcase.
Use bath towels to create either cleaning mitts or a hammock for your cat

Since bath towels are made to be absorbent, they can be transformed into a pair of cleaning mitts. Cut your old bath towel in half and use each half to craft a mitt. Take the half bath towel and fold that piece in half. Place your hand over the towel with your fingers together and your thumb out. Trace the mitt shape using a permanent marker. Cut along the marker and then sew the two pieces together, leaving an opening at the bottom to slide your hand inside the mitt. Repeat with the second piece of towel and you'll have a matching pair. You can use the cleaning mitts to dry dust, or with a cleaning product to wipe up baseboards and other areas that are hard to tackle with a mop.
For homes with adorable felines, there's a second option for repurposing old towels. Use the bath towels to create a cat hammock, so your kitty can nap in comfort. Start by cutting a hole in each of the four corners of the bath towel. Thread a piece of rope or thick twine through each hole and tie a knot. Use the opposite ends to attach the hammock to a structure. For example, you could set the hammock up under a table, fixing the ropes to the table legs. Should you have an outdoor cat, you may find a spot between a few trees, allowing you to tie the ropes around the tree trunks.
Use fabric shower curtains to create wall art or a set of stylish pillows
Fabric shower curtains often feature cute patterns and designs that make them a shame to toss out even when old. Fortunately, you don't have to, as the material can be reused to create stylish wall art. Place a frame over the portion of the fabric shower curtain that you'd like to display on your wall and trace around the outer edge. Cut along the traced edges and then remove the backing from the frame. Wrap the fabric around the backing, securing it in the rear with either a hot glue gun or staples. Place the art inside the frame and hang on the wall of your choice.
Leftover shower curtain fabric can then be used to create a set of decorative throw pillows. Cut two 16 by 16-inch squares of fabric for each throw pillow you'd like to make. Place the right sides together and sew around three of the sides. Turn the fabric right side in and stuff with cotton. Sew up the final side and repeat for the second throw pillow. If you're looking for a no-sew project, you can use Dritz Stitch Wizardry instead of pulling out your thread and needle. This product will fuse the sides together using the heat from a steam iron.
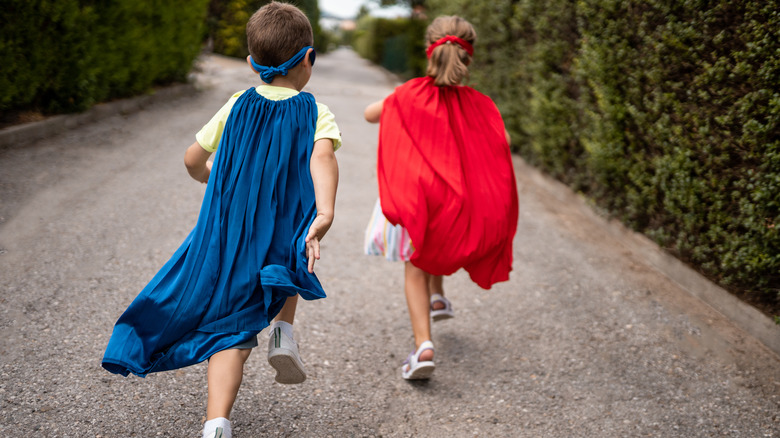
Modify baby blankets and swaddles into quilts and superhero capes
Once your newborn outgrows his or her baby blanket or swaddle, you'll find the fabric can be cut and used to make a quilt. The quilt not only provides the growing toddler with warmth, but it also serves as a memory of the baby's first months. To make the quilt, cut the old blankets into equal-sized fabric squares. Stitch the pieces together to form the top of the quilt. You'll need a large piece of fabric for the quilt's bottom and a layer of batting to place in between the quilt's top and bottom layer. Add binding around the quilt's edges and sew to complete.
Toddlers are known for their love of dressing up as their favorite characters. Old swaddles can actually be used to encourage this type of pretend play, as they can quickly be converted into superhero capes. Bring the old swaddle behind your child and tie the edges into a knot at the front of their neck, making sure the cape is loose and not too tight. If you want to step it up a notch, use some fabric paint — such as from the Shuffle Art Fabric Paint set — to add a superhero logo to the back of the cape.
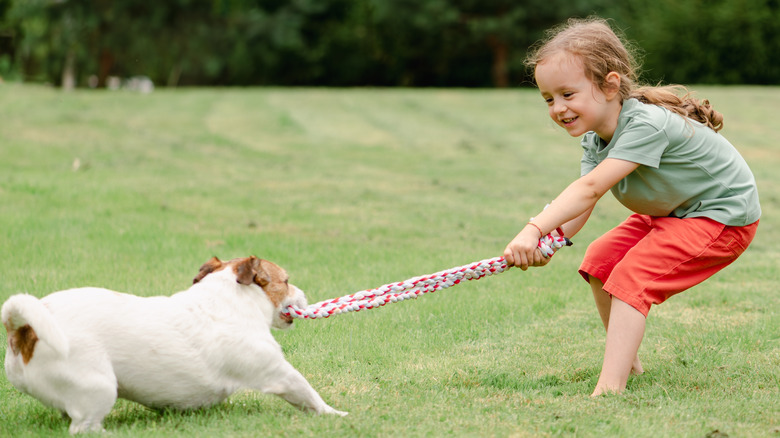
Use dog beds to create knee pads for gardening or to make braided dog toys
Before you toss your old dog bed, consider using the material to save your knees the next time you work in the garden. The cushioning inside the dog bed provides comfort when kneeling over a vegetable or flower garden to pull weeds. To make a garden knee pad, cut a large rectangle out of the base of your dog bed. It needs to be big enough to fit both of your knees. Make sure you are cutting the top layer, middle cotton layer, and the bottom layer. Once you're done, simply sew around the edges and your DIY knee pad is ready for use.
Crafty pet owners can also turn their old dog beds into dog toys. The material used to construct the dog bed can be braided to form a tug-of-war toy. This particular toy costs around $10 on online, but you'll be making yours for free! Cut three long strips of fabric from your old dog bed. Tie a knot at one end and begin braiding the fabric until you reach the other end. Tie a second knot and the toy is ready for use. Tip: Some of the store-bought tug-of-war toys contain a few additional knots in the center of the toy, so you may also want to stop every 12 inches or so and create a new knot, but this is entirely optional.