Make DIY Floor Vents For Your Hardwood Floors

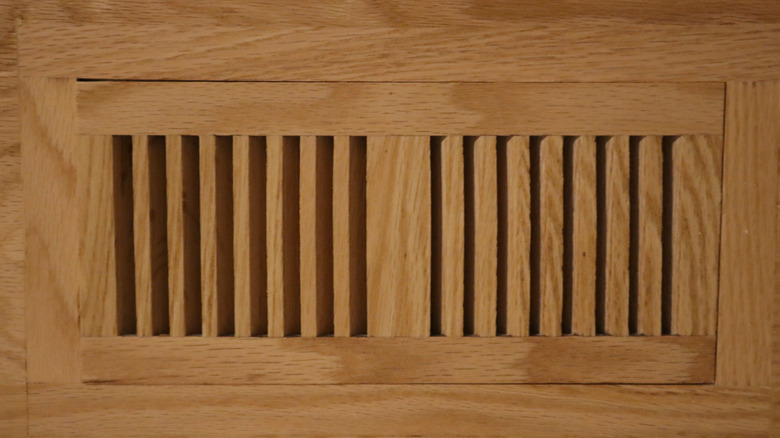
Are you looking for vent covers that won't clash with your hardwood floors? To avoid this problem, you can create sophisticated wooden DIY floor vents that blend in seamlessly with the hardwood around them. House Digest's home improvement expert, Ron Baker, explained exactly how to complete this project yourself. You'll need to create a wooden grid that fits into a surrounding frame, and install it over your vent in your hardwood flooring. Ensure it is the exact same height as the surrounding flooring.
According to Baker, this decorative wooden vent cover will help you escape the aged look of traditional vent covers. "Sometimes store-bought, raised vent covers can look a little dated," he said while speaking exclusively to House Digest. "You might end up with a midcentury modern feel, or you might end up with what I think of as a 1970s library vibe — you know, bookshelves with rounded corners and that sort of thing." The expert shared that flush-mounting wooden DIY floor vent covers help to create a more modern look. However, if you do not have the skills to pull this project off on your own, you can opt for a store-bought flush-mount wooden vent cover to upgrade your air vents on a budget.
How to create your own covers for vents in hardwood floors
While speaking exclusively to House Digest, Ron Baker broke down the steps you need to take to craft your own vent covers that won't clash with your hardwood floors. First, you'll need to ensure your wood is the same thickness as your flooring. "A thickness planer is useful here for getting it just right," Baker shared. "Any difference in floor height will be an annoyance, and even a moderately substantial difference will become a tripping hazard."
Next, you'll need to size your vent cover frame appropriately to really upgrade the look of your vents. "It's good if the frame is wide enough so that the grid, which should overlap the frame, gets some support from the subfloor," Baker advised. From there, you'll then need to make a basic mitered frame. According to Baker, you can use a glued butt joint for this step since your frame will be supported by the subfloor underneath it. The expert also recommended adding a spline to strengthen the joint if needed.
"Your goal is basically to make a wood grid that interlocks with the frame. Because these pieces will basically become part of the floor, you can't simply cut the pieces and glue them into the pattern you're aiming for," Baker said. Instead, the expert recommends drawing out the pieces you need on paper or via software such as SketchUp. According to Baker, the overlapping grid pieces you create lock together with half-lap joints. "Where they overlap, you remove half of the material from each, forming a notch the other fits perfectly into." he added.
The final steps of the process
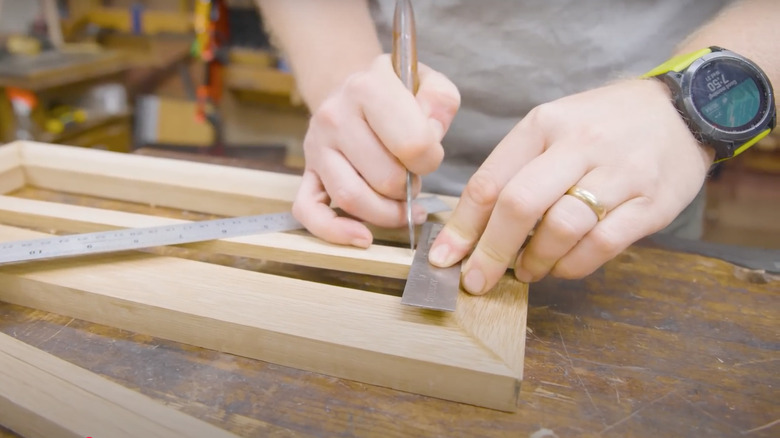
According to Ron Baker, you should also make sure each piece of the grid you create overlaps the frame itself. He went on to share some guidance on how to cut your wood. "Make the half-lap cuts using a router and router table if you can," Baker explained while speaking exclusively to House Digest. "It can be done on a table saw, and if you get very mathematical with it you can even make a jig to speed things up." He added that using a straight router bit of the same width as your wooden grid pieces might be easier, and that you'll want to cut the pieces from one board and then break that board down into singular slats.
Baker also provided a few tips to help you create a sturdy grid. "Cut your half-lap joints so that the shorter slats support the longer ones from beneath," he recommended "This should give your grid at least a little extra strength." The expert advises against creating a complex geometrical grid pattern since it won't be as sturdy. After you create your vent cover, you are ready to move on to cutting an appropriately sized hole into the floor for installation. To do this, Baker recommends placing your vent cover over your vent with double-sided tape. You can then use a pencil to trace around it. Cut along the line with an oscillating saw to remove the flooring from that section off spot, and install your new vent cover.