Beautiful DIY Drawer Pulls That Cost Less Than A Dollar To Make

We may receive a commission on purchases made from links.
Attention, penny-pinching DIYers in need of stylish cabinet pulls: For the price of one premade modern black drawer pull, you can make more than 10 nearly identical handles out of EMT conduit and CPVC pipe. If you have access to a well-stocked home workshop that's not gotten enough use lately, these custom black cabinet handles/drawer pulls could be worth powering up the tools. While the equipment used might not be part of most people's tool chests, this is not a high-skill DIY. Plus, it makes jumping on the oversized hardware trend much cheaper.
To pull off these drawer pulls, some pretty specialized tools like a drill press, table saw, and spindle sander are necessary. If you have all of these items at your disposal, proceed as planned. However, we also have a version that requires less intimidating and expensive machinery.
For the handles, purchase ½-inch EMT electrical conduit and ½-inch CPVC pipe; the EMT is for the handle, and small cuts of CPVC pipe will be the standoffs (the pieces that leave space between the handle and the door/drawer front). Also gather up a pipe cutter, a tape measure, black (or any other color) spray paint, a 11/16 hole saw, a drill with No. 29 bit, and two No. 8-32 by 2-inch long machine screws per pull. Purchase black end caps like these PATIKIL ½-inch Plastic Tubing Ends Caps for each end of the handle. To make a jig to hold the pipes for drilling, you'll need a table saw, hold-down clamp, and roughly 1-foot of 2-inch by 4-inch lumber.
Put together some pulls
Make the pulls as long as you need; a comfortable size for drawer pulls leaves about 3 to 6½ inches between the screw holes. Measure the EMT to your desired length, and cut the pieces with pipe cutters. Sand off any burrs with the spindle sander.
To make the jig for your standoffs, cut a v-channel at 45-degree angles into the 2-by-4 piece that runs the length of the wood piece. Clamp the jig to your drill press table, and fit your drill press with the hole saw. Place your CPVC pipe into the channel, and screw the hold-down clamp to the 2-by-4. Clamp the pipe into the jig, and use the hole saw to make a cut that's 1⅜-inches away from the end of the pipe. This curved cut will be the end of the standoff that sits flush against the handle. Cut another identical piece from the CPVC pipe so that you have two standoffs with curved ends. Clamp down the handle EMT piece, and drill two holes 2.5 to 3 inches (or the length to match pre existing holes in your drawer or cabinet) from each end with the No. 29 bit.
Paint the handle and the two standoffs. Once dry, send a machine screw through the back of the hole in the drawer or cabinet face. Place a standoff over each screw so that the curved edges face out. Tap the plastic end caps into place on the handles, and tighten the screws into the handle's holes.
A simplified version
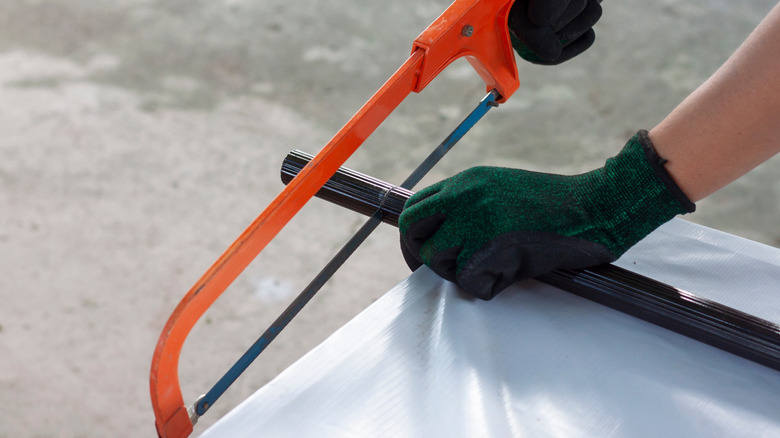
No well-stocked home workshop? No problem! This option eliminates the need for a drill press, pipe cutter, spindle sander, table saw, and jig. You'll still need some specialized equipment, but these are much less costly and bulky than standing tools.
Trade those tools out for a hacksaw, a rotary tool with a sanding disk, and a drill guide like a Milescraft 1318 DrillMate Portable Drilling Guide. This gadget holds pipes in place while guiding a drill bit just to the right spot, and at about $40, it won't set you back a whole paycheck. Use it with a cordless power drill, one of the tools every homeowner should have. Any other supplies, measurements, and techniques will stay the same.
Following the same measurements as before, measure pieces of both the EMT and CPVC. Hold each piece of pipe in place with the drilling guide, and cut with your hacksaw. Also use the drilling guide to drill screw holes in the EMT and hold the CPVC while you use a hand drill-mounted hole saw to make the curved ends of the standoffs. Smooth away roughness from the cut ends with the rotary tool and sanding disk. Paint the pipe cuts. Once they're dry, pop the end caps into the handle ends. Send the screws through the wood and the standoffs, and tighten them into the handle's holes.