9 Types Of Gardening Methods: How To Choose The Best One For You

We may receive a commission on purchases made from links.
It's common for would-be gardeners to get discouraged from starting a garden for a variety of reasons, ending up staring wistfully at endless swaths of grass or bare patios. Maybe you have a yard, but the soil is heavy clay, highly compacted, or contains building rubble. Maybe you have no yard at all, or don't even have access to outdoor space. Mobility issues and busy schedules, too, can turn garden dreams into thoughts of "well, maybe someday..."
Gardens are amazing, but not all gardeners are alike. Chances are, there's a gardening style that will work for your exact situation. Poor soil and no time? Let us introduce you to several methods that will save your gardening aspirations. No soil at all? We've got you. It just means you'll have to think outside the box. Or, think outside of the traditional garden bed, maybe.
Compacted or poor soil? Build a raised bed garden
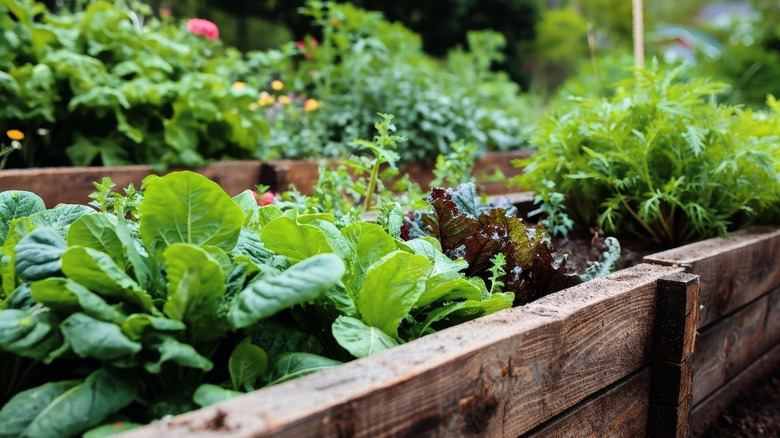
Raised bed gardening is a popular method that works for a wide range of gardeners and situations. It's helpful for those with poor soil quality, since it allows you to fill a bed with the ideal growing medium. Raised beds are also excellent for gardeners with limited space since they can be adapted to fit any size yard or even a patio. They can be a great option for gardeners with certain types of mobility issues, as the raised beds reduce the need to bend or crouch excessively. You can customize a raised bed to a desired height, within reason. Plus, they can provide better drainage and warmer soil temperatures, extending the growing season.
Starting a raised bed garden is pretty straightforward. First, pick a spot that gets at least six to eight hours of sunlight and is easily accessible to work in and water. Build your raised bed to your desired dimensions. It's best not to make the bed wider than 4 feet, since this makes it possible to reach all the way into the middle without having to step on the soil. Raised beds should be at least 6 to 8 inches deep for most plants, though if you plan on growing root crops like carrots or potatoes, something closer to 12 inches is ideal.
Fill the bed with a high-quality growing mix, such as a combination of topsoil, compost, and other organic matter. To maintain a raised bed, water regularly and amend the soil with compost or fertilizer as needed. Raised beds are the basis for several other gardening methods.
Want to maximize a small space? Try square-foot gardening
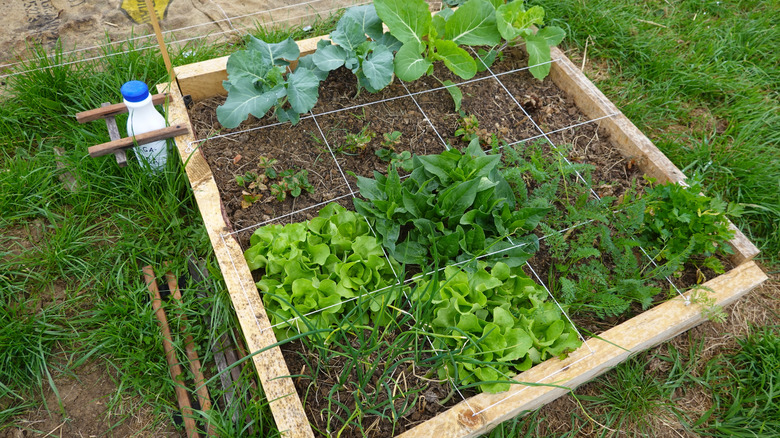
Square-foot gardening can help keep plants flourishing and is a simple, space-saving method perfect for beginners, those with limited space, poor soil, or mobility issues (since it uses the same basic structure as a raised bed). It's perfect for small yards, patios, or even balconies. This technique involves creating a grid of small squares, one foot by one foot, in a raised bed or other container. Each square is dedicated to a specific type of plant, allowing for intensive planting and easy maintenance. It's a great way to grow vegetables, herbs, and flowers in a small space.
To make a square-foot garden, you'll need a raised bed or container and a quality growing mix. Construct your bed to your desired size and depth (following the same depth principles as outlined above, for raised beds). Divide the bed into a grid of 1-foot squares. To plant a square-foot garden, check your seed packet or plant labels. These provide information about the space needed between rows, as well as the space required between the plants in a row. Don't worry too much about the row spacing, and instead just plant your seeds at the recommended spacing between plants; this lets you pack more plants into your small garden!
In addition to enabling you to plant more in your space, this method also reduces the amount of weeding you'll need to do. Since the plants are spaced close together, they shade the soil more, discouraging weed seeds from sprouting. You'll need to water and fertilize regularly, stay on top of harvesting, and sow fresh seeds throughout the season to replace any squares you've harvested.
Give lasagna gardening a try to compost and garden at the same time
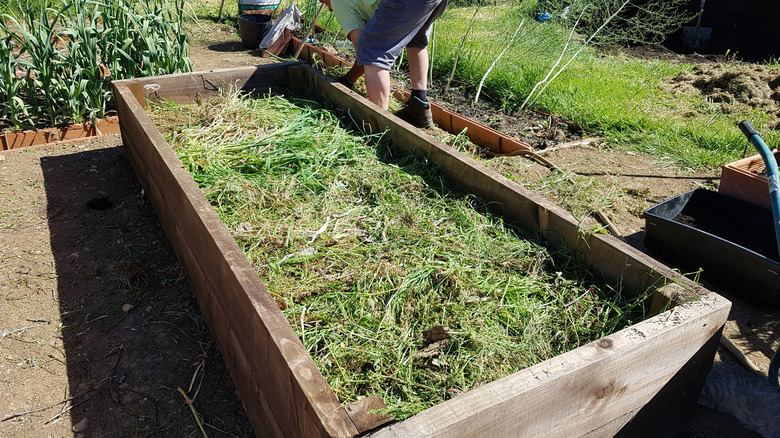
Lasagna gardening is perfect for gardeners looking for an especially eco-friendly method that uses compost as a base. It's great for those with poor soil quality or limited mobility (as it will use a raised bed and eliminates the need for tilling or digging). This method involves layering organic materials like cardboard, leaves, and grass clippings to create a "lasagna" of nutrient-rich soil right on top of your existing lawn or garden bed. Over time, the layers decompose, creating fertile soil. It's useful for building new garden beds, improving existing soil, or suppressing weeds.
To create a new planting bed with lasagna gardening, start by layering cardboard or newspaper on top of the area you wish to garden, wetting it thoroughly. Then, alternate layers of "brown" materials (like dried leaves, straw, or shredded paper) and "green" materials (like grass clippings, kitchen scraps, and other green waste from your yard). Keep layering until you reach a depth of at least 18 inches. The top should be a thick layer of compost or topsoil. While it's best to let the bed "cook" for several months, you can plant directly into the top layer of compost if you want to use the bed immediately.
The best time to make a lasagna garden is in the fall. The organic materials have all winter to decompose, potentially leaving you with crumbly, fertile soil just in time for spring planting. So, while you can technically plant into that top layer of soil right away, the real magic happens when the ingredients beneath it have had a chance to break down.
Want to maximize your output? Try biointensive gardening
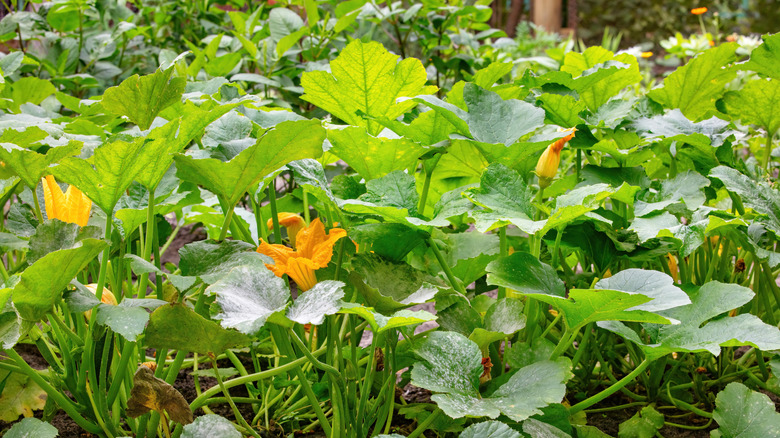
Biointensive gardening is all about maximizing yields in a small space while minimizing resource use. It's perfect for gardeners concerned with sustainability, self-sufficiency, and high productivity. This technique emphasizes soil health, composting, and close spacing of plants to create a productive, balanced mini-ecosystem. It's ideal for those able to invest time and effort in soil preparation and ongoing maintenance, since it requires more intensive work than some other methods we've mentioned.
To create a biointensive garden, start by double-digging your beds to a depth of two feet, which improves drainage and aeration. Incorporate large amounts of compost to build soil fertility. Plant your crops in closely spaced, raised beds. This method incorporates a technique called "calorie farming" — which means growing crops that provide high caloric value — but it works well for sustainably growing other plants too. Companion planting and crop rotation are also essential aspects of biointensive gardening, helping to maximize yields and minimize pest and disease problems.
Biointensive gardening aims to be a "closed loop" system, the idea being that while you're growing food, you're also growing material to add back into the beds to sustain that nutrient-rich soil. This means growing plants that produce a lot of organic matter and composting all garden waste and returning it to the soil. Ideally, you won't have to use any fertilizers for a biointensive bed, but it takes patience and time to get that perfect, nutrient-rich soil.
Want to repair your poor-quality soil? Try hügelkultur
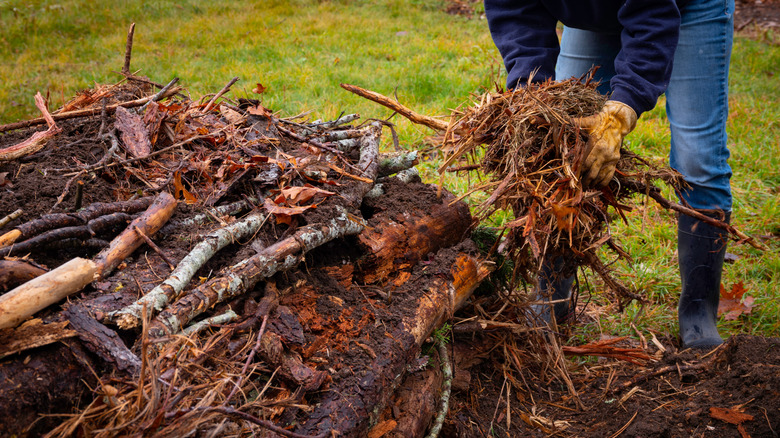
Hügelkultur (pronounced "hoo-gul-culture") is a gardening method that uses buried or layered logs and woody debris to create raised beds. It's an excellent technique for gardeners looking to build fertile, water-stalling beds inexpensively, especially in areas with poor soil, dry climates, or lots of storm water runoff. It's well-suited for larger gardens or homesteads due to the space required for the beds and the availability of woody materials.
To create a hügelkultur bed, dig a slight trench or simply build a mound right on the ground surface. Layer logs, branches, and other woody debris in the trench or on the soil surface to create a mound, starting with the largest pieces at the bottom and gradually decreasing in size as you build upwards. Top the wood with layers of green materials (like grass clippings or kitchen scraps), compost, and soil. If placed on contour on a slope, these beds can catch water runoff and act like a sponge, retaining moisture and slowly releasing nutrients to the plants. However, you will still need to water during dry periods. Plant directly into the soil layer on top of the mound. Over time, the woody core will keep breaking down, enriching the soil and creating a self-fertilizing and water-efficient bed.
No yard? No time? Mobility issues? Try container gardening
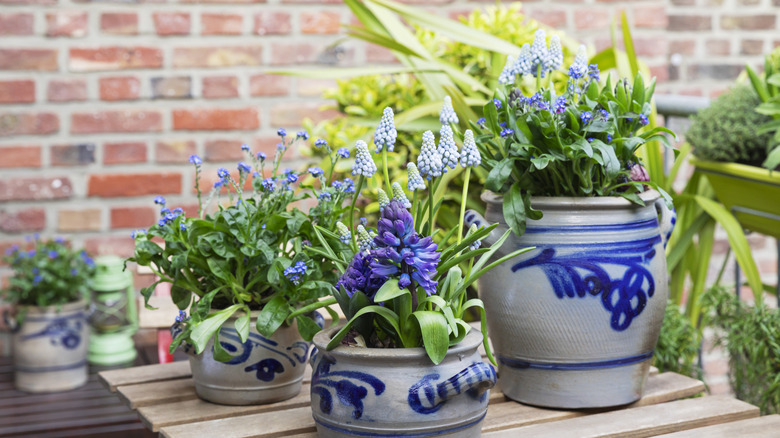
Container gardening is a versatile method perfect for gardeners with limited space, such as those living in apartments, condos, or with small yards. It's also ideal for those wanting to control their soil conditions or create portable gardens, or who simply don't have the time or energy to maintain a large garden. Container gardening allows you to grow a wide variety of plants, from herbs and vegetables to flowers and even small trees, in pots, planters, and other containers.
To start container gardening, choose containers with drainage holes that are appropriate for the sizes and types of plants you want to grow. Use a good-quality potting mix, as garden soil is often too dense for containers. The biggest container gardening mistake people make is choosing the wrong plants. Select plants suited to container growing and your local climate. Consider factors like sunlight, watering needs, and mature plant size when choosing your plants and container locations. Since containers tend to dry out faster than in-ground bed, you'll need to monitor your garden's moisture levels and typically water more often. Fertilize as needed, since nutrients can leach out of containers over time.
No soil? Try aquaponics
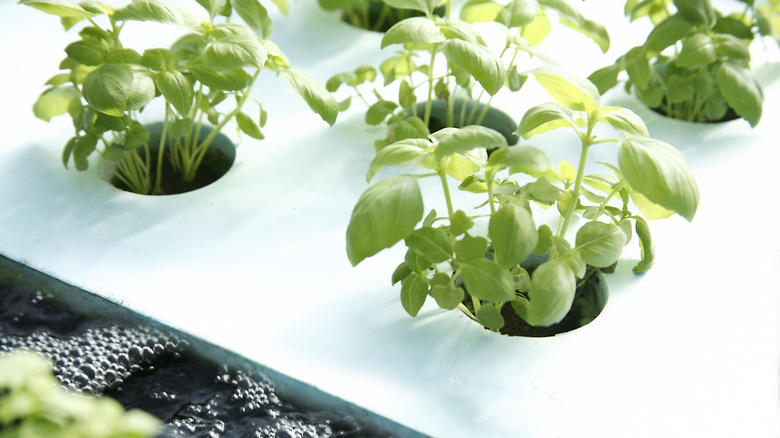
Aquaponic gardening is a fun, unique, and sustainable way to grow fresh food, no land needed. This method combines aquaculture (raising aquatic animals) with hydroponics (growing plants without soil). In an aquaponic system, the fish waste provides nutrients for the plants, and the plants, in turn, filter the water for the fish. This creates a closed-loop ecosystem where both the fish and plants thrive. Aquaponics can be practiced at various scales, from small indoor setups to larger, more complicated systems, and offers a way to produce fresh food while minimizing water and resource use.
For beginners, a small-scale, indoor aquaponic system is an excellent way to get started. A common setup involves a fish tank and a planting tray filled with a growing medium like gravel or clay pebbles. Water from the fish tank is pumped to the grow bed, where the plants' roots absorb the nutrients. The cleaned water then flows back into the fish tank. Lettuce, herbs, and other leafy greens are well-suited for aquaponic systems. While large-scale setups focus on keeping fish you can harvest for food as well, a home setup might use regular aquarium fish: pets that help you grow food!
This method of course isn't for everyone. Maybe you don't want to deal with raising fish. In that case, a simple hydroponics setup, even something small like a countertop hydroponics solution (such as the Uruq Hydroponics Growing System from Amazon), will allow you to grow food or herbs, even if you have no outdoor space at all.
Want to grow outside without soil? Try straw bale gardening
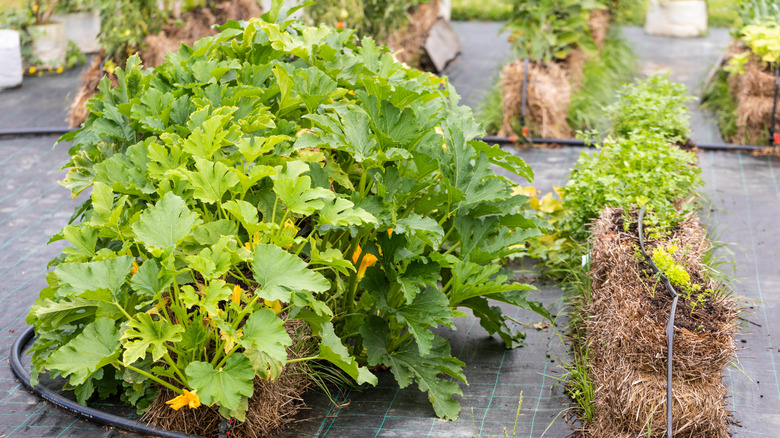
Straw bale gardening is a unique method that uses straw bales as the growing medium. It's a great option for gardeners with poor soil, limited space, or those looking for a low-maintenance outdoor garden, especially on a deck or patio. It's well-suited for growing vegetables, herbs, and flowers. This straw bale method is also great for gardeners who want to avoid digging or tilling. They offer good drainage and aeration, and the decomposing straw provides nutrients to the plants. It's a creative and easy way to create a garden almost anywhere.
To make a straw bale garden, first, choose straw bales (not hay bales, which will be loaded with seeds that will sprout all season, creating extra work). Place the bales in a spot that gets at least 8 hours of sunlight. "Condition" the bales by watering them thoroughly and sprinkling daily with ½ cup of bone meal or compost over a week to start the decomposition process. This process is crucial for breaking down the straw and making it suitable for planting.
After the conditioning period, make planting holes or pockets in the bales. Fill these with a good quality potting mix or compost. Then, plant your seeds or seedlings as you would in a traditional garden. Water regularly, since straw bales tend to dry out faster than in-ground gardens. As the straw decomposes further, it will continue to enrich the growing medium, making a garden that helps maintain itself.
Dealing with rain runoff from your roof or driveway? Make a rain garden
Rain gardens are shallow, depressed areas in the landscape designed to capture and filter rainwater runoff from roofs, driveways, and other surfaces. They're great for homeowners trying to manage storm water runoff and reduce erosion. They also create attractive garden features that can draw beneficial insects and wildlife, so if you're into the idea of wildlife gardening, this could be an ideal feature for your yard.
To make a rain garden, first, identify a suitable location. You're looking for a spot that receives runoff after a rain, but is not constantly waterlogged (the water must be able to wick away after accumulating). The size and depth of the rain garden will depend on the amount of runoff you need to manage. Dig a shallow depression with gently sloping sides. Improve the soil by adding compost or other organic matter to increase drainage during rainy periods and offer water retention in dry times.
Choose plants for your rain garden that are native to your area and tolerant of both wet and dry conditions. Plant them in the rain garden, focusing on the bottom and sides. Mulch the area to help retain moisture and suppress weeds. River stones or pebbles make ideal mulch for a rain garden. Direct the runoff from your roof or driveway towards the rain garden by digging shallow trenches. Regularly maintain the rain garden by removing debris and adding mulch as needed.