The Surprising Way You Can Reuse Old Beach Mats For Added Outdoor Shade
We may receive a commission on purchases made from links.
Whether you have a trellised patio, glass-roofed garden room, or condo balcony, there's one thing you'll be battling at some point in the day, no matter the season — the sun. Even on a chilly winter day, no one enjoys sunlight beaming directly into their eyes. What you need is some DIY outdoor blinds for your patio to counter bright sunlight at any time of year. As a bonus, a well-crafted sunshade can also help with backyard privacy for homeowners in tightly packed suburbs. You can craft outdoor shades from one or more rattan beach mats, some basic tools, and a few inexpensive supplies. At its simplest, this hack involves hanging the mats from the ceiling or wall of your outdoor entertaining space using dowels or screw hooks, although there are some variations that can make it even more functional.
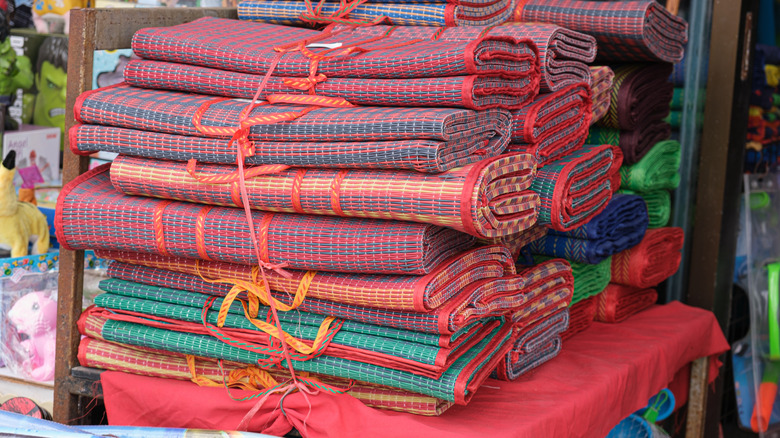
Of course, this project won't be as effective if your mats are in bad shape. You can always hunt down secondhand mats in good condition at thrift stores or on Facebook marketplace. If you can't find anything pre-loved, there are fairly cheap options for buying new. A pack of four 5 by 2 ¾-foot Qunclay Waterproof Non-Slip Straw Beach Mats goes for about $35 on Amazon, for example. You could also use bamboo fencing if you want a higher-end look; you can pick up a 3 by 6 ½-foot length of KOIUEYW Bamboo Reed Fencing for about $35. As ways to shade your patio go, this one offers plenty of opportunities to get creative no matter your budget.
How to hang your DIY patio shades across a ceiling
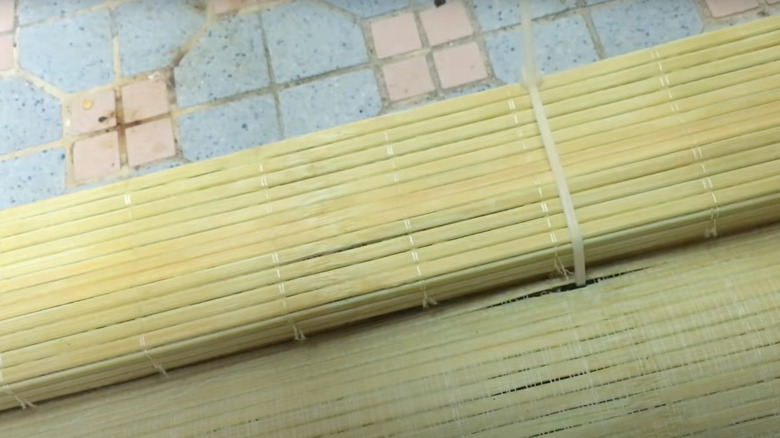
If you decide these are the stylish and functional outdoor blinds your busy patio needs, start by measuring the ceiling or wall to which you want to add your shades. If needed, you can sew or glue two or more mats together end to end. If you need to shorten a mat, carefully cut it using sharp scissors. Cut ends will fray, so you'll need to add a hem. Cut a strip from a light pliable cotton fabric in your preferred pattern, fold the strip in half, and iron the fold crisp. Fold the fabric over the rough edges of your mat and glue or stitch it in place — if you're doing the former, use clothespins to keep the fabric in place while the glue dries. This is also a great way to cover the ragged edges of bamboo fencing if you're using that instead of a mat.
Once you have shades in the length you need, it's time to hang them. To block overhead sunlight for a patio or garden room, attach two wooden dowels a little longer than the width of your shade to opposite sides of the wall or roof beam, right under the ceiling. Loop curtain rings with clips, like these Ivilon Drapery Curtain Clip Rings, over the dowel. Clip the shade onto each side so it runs across the ceiling. Repeat this process as many times as you need to create as much shade as you wish.
Hang your beach mat shades vertically to counter late-day glare
To create vertical shades, roll the top of the mat around a thin timber plank and secure it with cable ties. Attach two eye screws to the top of the plank and hang these from hooks screwed into the patio beams. (If you're a renter, you may want to use waterproof sticky hooks like these FACURY Large Adhesive Stainless Steel Wall Hooks.) Alternatively, nail the plank and shade to the rafter, then fold the top of the blind over to hide the wood. If you're using lightweight mats, push pins may be enough to keep the shades in place.
Roll the mats up when not in use, especially if they're exposed to the elements — after all, they're made for beach trips, not everyday outdoor use, and they could fray or discolor over time. Some beach mats come with ties, or you could repurpose shoelaces or an old belt. If you want a cleaner look, you could follow the procedure in this video posted by YouTuber Bob Bee. Add two eye screws on the front side of the timber plank you mounted your shade to, two more to the top, and a fifth to the far right side of the plank. Tie a length of cord to the left-hand top eye, loop it underneath the rolled-up blind, and repeat on the right side before threading it through the eye on the side. Control the movement of the blind by pulling on the free end on the right-hand side.