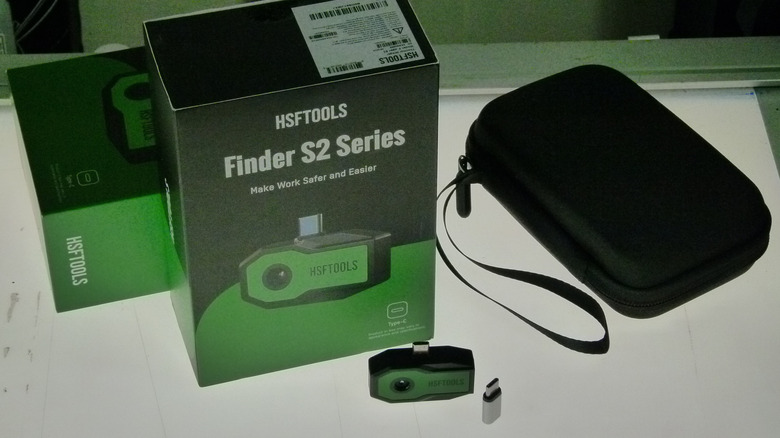
The HSFTools Finder S1 And Finder S2 Put Your Need For A Thermal Camera In Sharp Focus
Sponsored Content. We may receive a commission on purchases made from links.
I've become a big fan of prosumer thermal imaging. I once would have had trouble saying that sentence to my punk-rock college friends, my race car-building family members, or my hunting and farming neighbors. That turns out to be pretty silly, because I can now easily think of beneficial things all those people can do with a thermal camera. But until recently, it would have been a hard sell because of the price of these devices. Reasonable quality and a full feature set was hard to come by in consumer imagers, and the price of professional/industrial cameras would make you see red. Or, you know, not see red. HSFTools seems to be on a mission to change all that, and it starts with their Finder Series of thermal imagers.
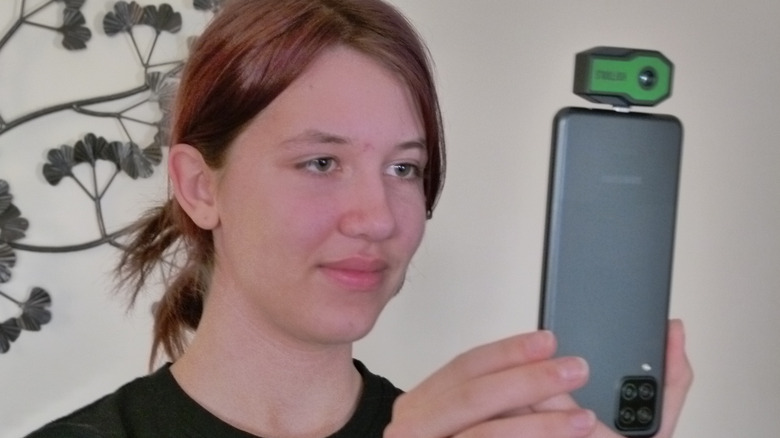
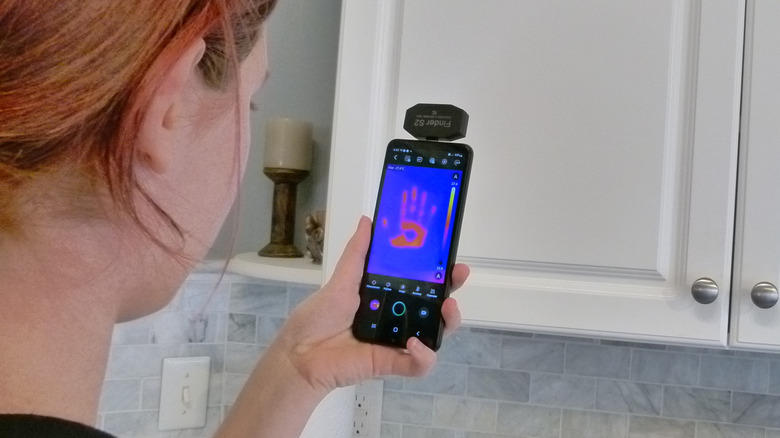
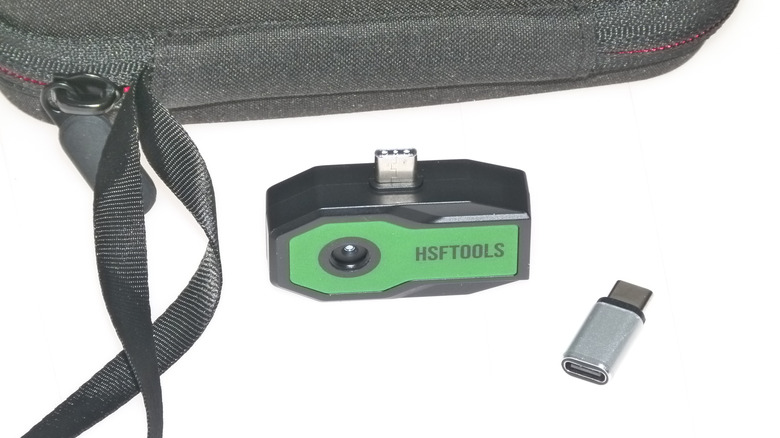
These are little USB-C attachments for your Android phone or tablet. Their size calls to mind those terrible speakers that attach to your phone and make your friends and family think you've somehow trapped Yoko Ono in an alarm-clock radio. But the Finder S1 and Finder S2 cameras have the opposite effect, transforming your phone into a professional-level imaging device. You've probably seen hand-held thermal cameras and might be wondering what the point of a little phone attachment could possibly be. Good question.
Why this style of thermal camera exists
To see what's great about these phone-attached thermal cameras, you only have to look at what's missing from them. Unlike HSFTools' HF96V and HP96, Finder S1 and S2 cameras is battery-free so you'll never need to charge it up or find a charger cable. It's powered by your phone, designed to run on very little power to maximize your mobile device run time, and ready whenever you are.
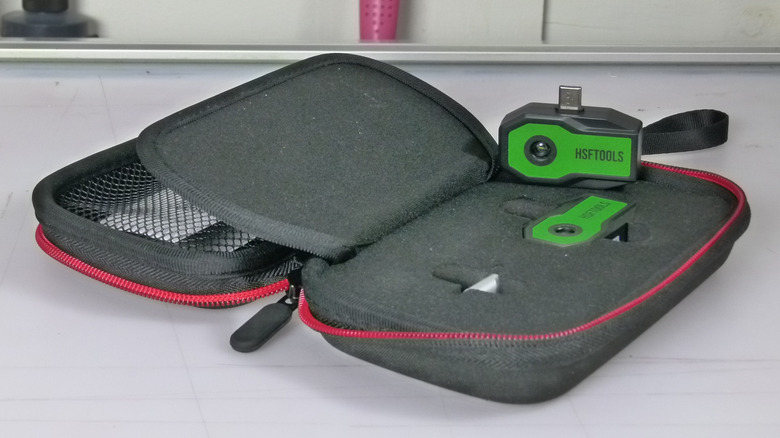
The small size of these devices is also a key to their appeal. They fit into spaces you would have trouble maneuvering a hand-held camera, like a server rack or a watch pocket. That's why my initial reaction to the large carrying cases that come with the Finder series was that they were ridiculously large. But if you've ever dealt with camera equipment of any sort, you know this is just my misunderstanding of the situation. Photography and video gear expands to fill the available space.
Differences between the Finder S1 and Finder S2
At this point, it's fair to wonder what the reason is for making both the Finder S1 and Finder S2 models. In terms of specs and appearance, the S1 and S2 are virtually identical, except for their lenses. They have the same interface, materials, refresh rate, size, weight, drop-test rating, and IP40 rating. The sensors themselves have similarities as well: the same temperature range, precision, and detectable temperature difference.
The sensor differences are small, but important. The S1 has a shorter focal length at 1.35 mm, resulting in a slightly wider vertical field of view, versus the S2's 3.5 mm. The S1 has a minimum focusing distance of .1 m, while the S2's is .2 m. And the S1 has a very slightly smaller power consumption level at .31 watts versus .36 watts. The NETD thermal sensitivity of the S1 is rated at an extremely good 50 mK, while the S2 boasts an even better 40 mK. But really, for most users, the difference comes down to resolution.
You say you want resolution
The Finder S1 has a thermal resolution of 96x96, while the Finder S2 has a notably better resolution of 256x192. Digital camera devotees, used to resolutions between 12 and 24 megapixels, probably find this odd at first, but this is how thermal cameras work. In fact, multi-megapixel thermal sensors are less sensitive to infrared light, have less dynamic range, and require more processing power to maintain a reasonable refresh rate. They're also more expensive.
The Finder S2 introduces a professional-level thermal, sub-megapixel sensor to the same form factor as the S1. Yes, there's a big resolution jump from the Finder S1 to the S2, but HSFTools' "Super Resolution" enhancement algorithm does a great job of resampling and enlarging images from both cameras so that the enhanced, higher-res output versions (720x720 for the S1 and 720x960 for the S2) are sharp and detailed without significantly degrading the thermal data the images contain.
HSFTOOLS app overview
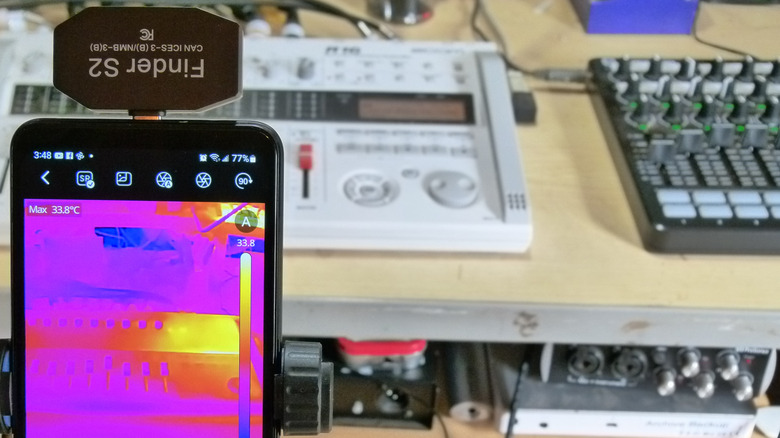
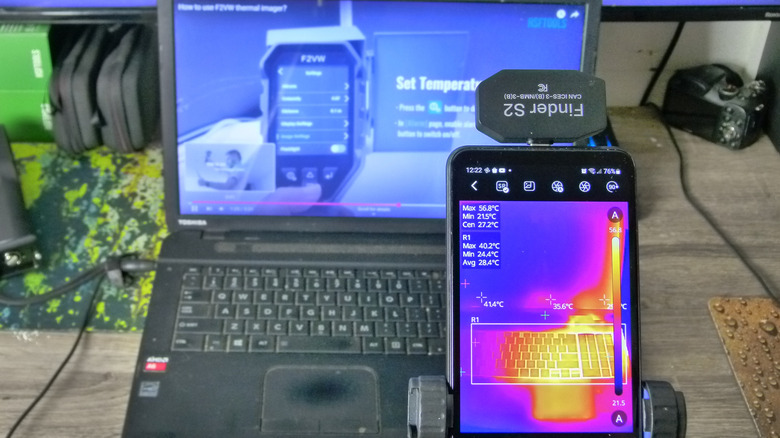
Since the HSFTools Android app is the human interface for the Finder thermal cameras, the company clearly has a lot riding on the app's capabilities and quality. Fortunately, the app acquits itself well. You can configure your phone to launch the app whenever the camera is attached, and it takes you directly into the thermal imaging screen. Here's where the main work of using a Finder series camera happens. You can take pictures or videos, and determine if various parameters are displayed in those images and videos. You can, for example, configure the camera to display temperature readings at the hottest spot on the image, the coldest spot, the center of the image, and up to three points that you select on-the-fly. You can also measure minimum, maximum, and average temperatures along a line or within up to three rectangles that you draw on-screen.
The camera's accuracy can be improved by specifying the emissivity of the surface you're viewing and by letting the app know how far away that surface is. Select among 15 preset palettes for visualizing your thermal camera's image, or create your own palette by specifying up to four custom colors. You can also calibrate the display so that the current palette spans the temperature range that's currently on-screen, or have this calibration happen automatically.
Where your images and videos go
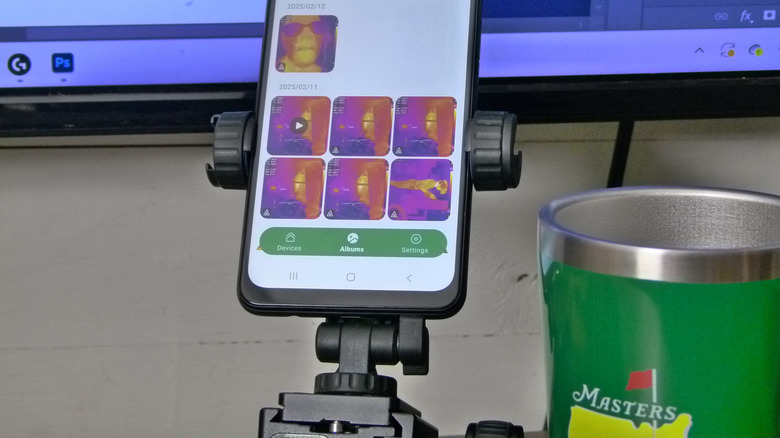
One of the settings in the app's menu allows you to save images directly to your phone's internal storage. Images are also written to the camera's internal storage within the Albums menu. The Play Store app description mentions streaming video and remote access, but I didn't find any reference to either within the app. My guess is that this functionality is either only available on a different set of HSFTools cameras or perhaps is enabled by phone-level streaming and sharing instead of within the app, or both.
Speaking of other cameras, the app has a menu listing all cameras that have been connected to it. The app supports HSFTools plug-in thermal imagers like the Finder S1 and S2 connected via USB-C, hand-held cameras via Wi-Fi, and possibly others.
Suitability for homeowners
So what's a homeowner or DIYer to do with a thermal imager like the Finder series? Given these cameras' abilities, there aren't a lot of limitations. Both cameras are precise to within 2%, and both can detect temperature differences less than .05 C. Both the Finder S1 and Finder S2 have a temperature range of -4 F to 752 F, which covers just about anything you want to point it at in an average home. You might want to point it at suspect circuit breakers, leaky door seals, refrigerator door gaskets, insulation of all sorts, water heaters, or anything else you suspect is leaky. They're particularly useful for tracking down water leaks inside walls and ceilings.
Think of it as an ability to spot temperature differences, not necessarily temperature extremes. If one spot on your wall is consistently colder in winter or warmer in summer than the rest of the wall, you have reason to suspect an insulation problem or some kind of thermal bridging, or perhaps leaky ductwork. Location and other context clues might suggest the cooler patch you found is actually a water leak instead, a whole different category of urgency. An outlet that's significantly hotter than others might also mean trouble, and a family of mice can hide everything except their body heat in your walls. But don't rein yourself in too much. As we'll see below, I can find endless things to do profitably with a thermal camera. And you can, too.
Suitability for professionals
These cameras, and particularly the Finder S2, hold their own for professional use in the construction, HVAC, plumbing, electrical, and inspection fields for residential homebuilding and repair. The cameras' 3.3-foot drop test performance and IP40 ingress protection rating make it a good fit for a dry job site. (The IP40 standard doesn't promise any waterproofness but does suggest reasonable protection against solid objects like tools and wires with a diameter of 2.5 mm or more.)
Pros might use a Finder S1 orS2 for a wide variety of purposes, including finding hotspots and faults in an electrical circuit; locating water leaks within walls, floors, and ceilings; evaluating the performance of HVAC or refrigerator compressors and condensers; spotting leaky ductwork; inspecting plumbing installations; and evaluating mechanical systems like engines and motors for temperature irregularities.
Pro features of the HSFTools app

When you insert the camera in your phone's USB-C port and the HSFTools app pops up, most people will have everything they need right in front of them. Swing the rig around and see what you can see ... which is a lot. But professionals have a few additional layers of need to deal with, particularly precision and communication. The app addresses precision and communication in a number of ways that might be interesting to the average home DIYer. You can improve the camera's accuracy by using the app's emissivity setting to adjust readings for the target surface's ability to emit infrared energy. (Aluminum foil has an emissivity of .04, for example, while asphalt's emissivity is .93.) You can similarly adjust for your distance from the target.
On-screen measurements, in addition to those I mentioned above, include the ability to take measurements along a line you draw on the screen and to take measurements within rectangular regions of interest (you can draw as many as three at a time). Still images will show these features and their results, as will videos that can be shared with a coworker, contractor, or client. There's also a facility for insetting a shot from your phone's still camera in your thermal image, which might help an image's viewer figure out exactly what area they're looking at.
The customizable reporting mechanism
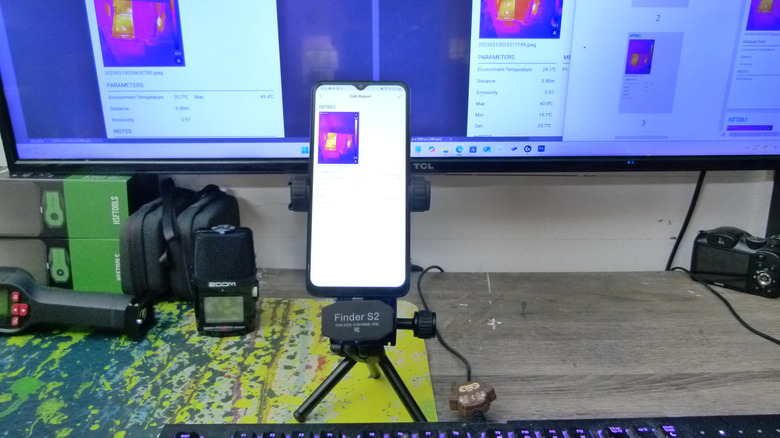
The report-building functionality deserves a shout-out for the pros out there. Using the images you select, it builds a nice-looking PDF document with a customizable cover page and one thermal image per page. The report pages include each image (including whatever on-screen data you selected when you took it), the image's file name, parameters including environment temperature, distance, emissivity, and any of min, max, and center that you had turned on. It also includes measurement data for any of three points you selected, any of three rectangles (regions of interest) you drew (reporting min, max, and average temperatures for each zone), and notes for each image.
This reporting function is surely a killer app for professional users of these cameras. I can come up with endless purposes to which a pro might put these reports: home inspectors demonstrating things wrong or not wrong, contractors demonstrating before and after conditions, other contractors supporting a quote with concrete evidence, and tons of others. I can also think of a few uses for individual homeowners, as well. For example, if you were to use a Finder camera to spot inconsistencies after having insulation installed, you could quickly generate a very thorough (and somewhat intimidating) report for your contractor detailing the issues.
Some hands-on experiences with the Finder S1 and S2
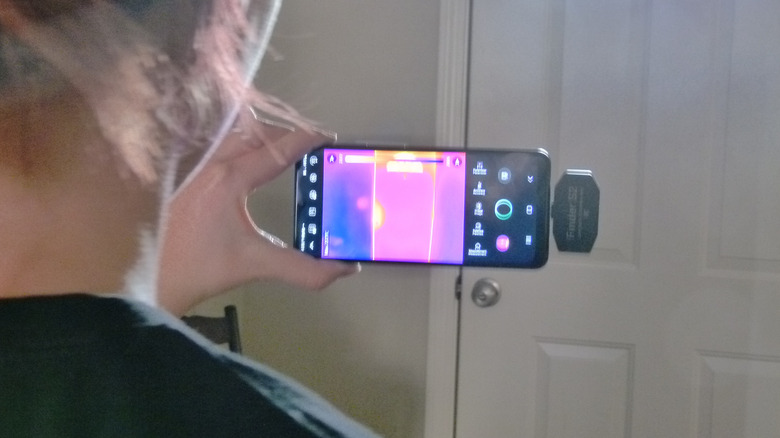
Having previously run through all the usual homeowner and auto owner scenarios while testing the hand-held HF96V, I only did a few ordinary things with the Finder cameras before delving into more uncommon uses for the devices. I checked for leaky weather seals around every door in sight. I was curious about how an indoor-rated propane space heater occasionally used during power outages affects the adjacent vinyl tile and birch plywood. The materials surrounding the heater stayed surprisingly cool.
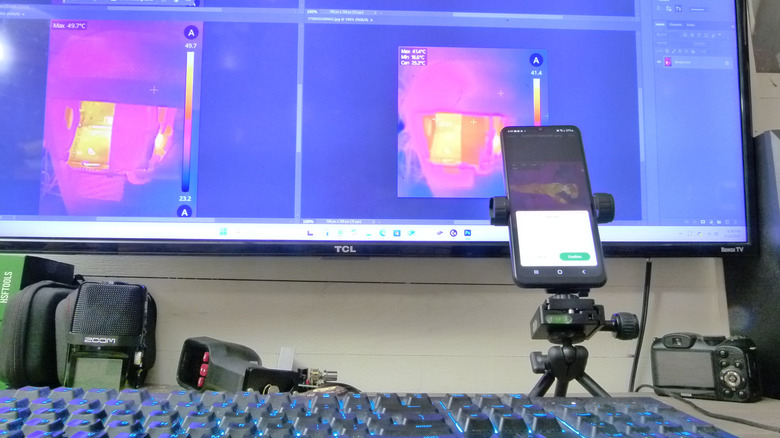
I have an older laptop that shuts down periodically, I suspect because its aging fan needs a ventilator of its own. I plugged it in on my desk and tracked the temperature all morning. Higher temperatures clearly built up around the exhaust fan.
Out of curiosity (and a healthy fear of lithium batteries), I also imaged a few things while they charged. First was a cell phone, which I charged at 1 and 3 amps, with no noticeable change in temperature. Then I watched the temperature climb on a couple of older 18650 lithium batteries. Thermal runaway can cause lithium batteries to catch fire spectacularly, and I wondered whether to trash these older batteries in spite of the fact that they still seem to perform well. The battery I tested never got above 78.1 degrees Fahrenheit, and the charger itself never topped 84.7 degrees.
Getting creative with your thermal camera
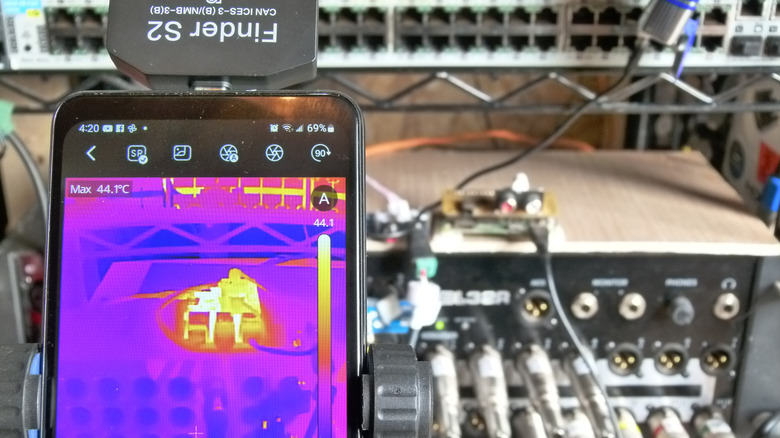
Those are all fairly predictable uses for a thermal camera, but I didn't stop there. I've been thinking of building a second recording studio area (for drums and live recordings) into a former workshop space in my house and have considered integrating a stage box mixer into a nearby network/server rack. I was curious to know if the Mackie DL32R I have would produce enough heat to add meaningfully to the already-blazing and difficult-to-manage inferno of the rack, and the camera showed me that it doesn't. It produces significantly less heat than the tiny Raspberry Pi computer I have mounted above it for live effects processing.
The DL32R has been a bit erratic on certain channels, and I wondered if the problem might be reflected in any heat emissions from the relevant inputs, mic preamps, or cables within the enclosure. The camera didn't turn anything up, so I'm still in search of a solution there. But the camera eliminated some possible causes, even if I'm not quite sure what they are.
During all of this testing, the only real challenge I experienced was properly holding the phone itself stationary. The trouble with the two tripod-mountable phone holders I have were annoyances, but not insurmountable problems. One holder tended to press the buttons on the side of the phone, turning it off occasionally. The other covered the phone's built-in camera when I used the Finder in my preferred position (phone inverted so the thermal camera is on top), making it impossible to use the picture-in-picture mode. These are, of course, no fault of the Finder cameras.
Conclusion and recommendations
My challenge here is not whether to recommend either of these thermal cameras, but which to recommend the most. It's obvious to me that a homeowner or DIYer on a budget will get by just fine with the $119 Finder S1. Because the S1 works in the same HSFTools app that handles all the functionality for both cameras identically, and given that most people don't need precision beyond the S1's 96x96 resolution, I wonder if a professional inspector or tradesperson might not also be just fine with the lower-spec model. I found myself using the Finder S2 more often, mostly because the images simply look better, but in my case the better-looking images didn't improve the camera's usefulness. I can certainly imagine circumstances in which the higher resolution might prove helpful ... diagnosing problems with tiny PCB-mounted electronic components, for example. And, no doubt, construction and other professionals will always benefit from the higher resolution, to make a better impression on clients if nothing else.
If you're in the market for a thermal camera — and you are, whether you know it or not — you'll be perfectly happy with either model. If price is a concern, go with the Finder S1or look for the S2 on sale. If the $199 price for the Finder S2 doesn't trouble you (it's a great price for this spec, after all), you might want to go with the better sensor. It'll end up costing you more time than money, after all, because you'll be constantly looking for things to peer at through the thermal imager, because it's as enjoyable as it is useful.