The Importance Of Outdoor Step Lights And How To DIY Them

When it comes to navigating your outdoor spaces, plenty of light is essential for just about any nightly task, whether it's a brisk spring stroll or a trip to take out the garbage. If your home has a deck or patio, these unlit areas can be a hazard for any homeowner or guest, especially during the winter. Outdoor step lights offer more than an atmospheric boost around your space; they provide sufficient nighttime lighting that allows you to safely traverse your stairs. With a simple installation process, you can quickly transform your dangerous deck stairs into a sleek, yet functional area of your home using a few outdoor lights.
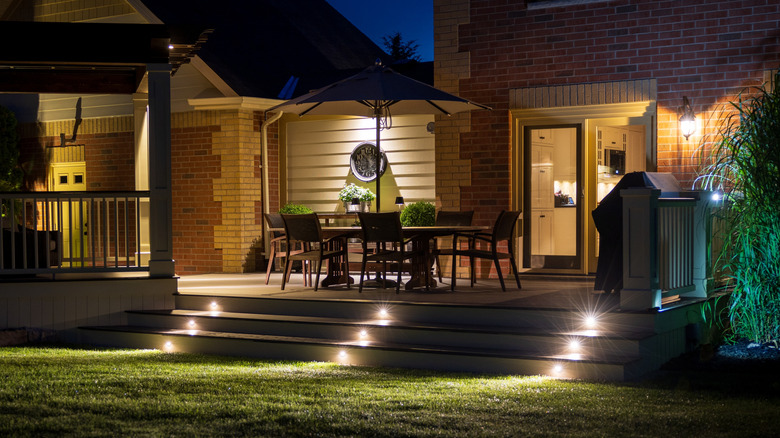
The primary appeal of outdoor step lights is the enhanced safety of your outdoor space, especially on patio stairs. Without the lights, these areas can be extremely hard to see at night, potentially leading to hazardous situations for children, the elderly, and guests who are unfamiliar with your deck's layout and the distance between stairs. Even homeowners themselves can fall victim to these unsafe conditions, leading to potentially serious injuries. These small outdoor lights can add a bit of ambiance and safety to your home, offering mood lighting that is bright enough to light your path without being too harsh on your outdoor sitting areas. Stair lights can be directly attached to the posts on your deck, offering an alternative to bright spotlights or motion sensors. With an extensive list of benefits, it's no wonder that stair lighting seems to be a top pick for outdoor spaces. But how do you choose the right outdoor stair lights for your patio?
Types of outdoor step lights
When it comes to choosing the right outdoor step lighting, there are a number of beautiful DIYS that will light up your back patio. One of the most popular choices for deck and patio lighting is a solar-powered option. These lights don't require any hardwiring or electrical work, as they provide their own with a small solar panel on the top. They are an eco-friendly solution that brings a bit of light to your deck space without the need for a complicated installation. Solar-powered deck lights offer bright, consistent lighting during the night that come in various styles to fit any home's exterior. Other popular picks include motion-sensored step lighting that activates when someone walks past and recessed lighting that illuminates each stair from below. While these options each offer their own benefits, they leave little creativity in their installation process, merely requiring a simple mount to stairs, railings, or fence posts.
Wall-mounted step lights, like the Hampton Bay Black Integrated LED Outdoor Landscape Path Light, can be the perfect addition to any outdoor space. They offer a sleek, modern feel with a recessed lighting design that keeps your staircase clear of any bulkier lighting fixtures. They can be mounted directly to any wall, deck post, or flat surface, offering a number of possibilities for their integration into your outdoor space. Their installation requires a bit of electrical work, and the addition of a small transformer for power that is built to last in an outdoor environment. Unlike solar powered options, these little lights aren't reliant on the sun for their performance, instead drawing power directly from an outdoor outlet.
How to DIY your own step lights

The first step to installing your own step lights involves mounting an outdoor transformer and laying the main line that will connect each light. Depending on the number of lights and their distance from the transformer, you will need to secure a 12-volt wire to the underside of your deck so that it reaches each light. Run the wire up each post where you will be mounting your light. With a hole saw drill bit, cut a rounded hole into your deck posts. Lead the wire of your light through the newly created opening. If your posts have removable caps, you can simply lead the wire through the top of your fence posts. With solid wooden posts, you can drill a 1/4 inch to connect the lighting wire to the main line that you previously laid. Check the connection of your wiring to ensure a consistent electrical flow to each light. Finish the project by screwing the lights into place.
If you're installing overhanging step lights, the process is equally as simple. Use a similar process to lay a line from the transformer to your lighting. If your stair lacks an overhang, simply attach a 2 inch by 2 inch board over the stair. Secure your light fixture to the newly installed overhang with treads. Using the same 1/4 inch drill bit, create a hole to pass the wire through underneath your stairs. Connect the wire to your main line and repeat the process for each step. Remember that these lights aren't about maximizing security through outdoor lighting, and instead provide a subtle means of lighting pathways and stairs.