DIY Stunning Vintage Pearl-Inspired Door Decor Using Dollar Tree Items

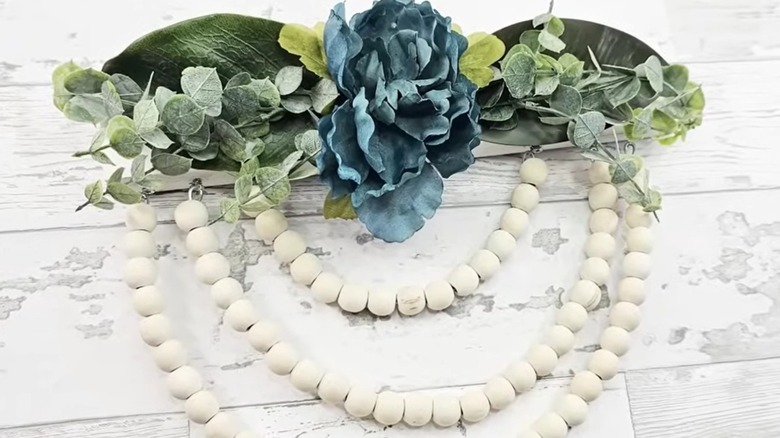
Crafts made with Dollar Tree products inspire some of the most adventurous DIYs. Heck, even if your final product is a complete disaster, you're only out a few bucks. Plus, chances are that you can still salvage your unfortunate project with one of the many ways to repurpose Dollar Tree finds. So many items from the 'Tree spark ideas for wall decor. Take inspiration like we did from crafter Lianep's YouTube channel DIY Beauty on Purpose for a wooden bead-adorned floral plaque. The prize-winning feature of this wall hanging are three concentric festoons made from loops of wooden beads dangling from a wooden sign.
Lianep's design is topped with faux flowers and foliage, but the wooden plaque's face is really a blank slate ready for whatever strikes your fancy. No matter what your final product will look like, you'll need a few of the same things. From Dollar Tree, grab two Crafter's Square Wooden Bead Wreaths and a rectangular sign like this Valentine's Day-Themed Horizontal Sentiment Sign. If you're leaning toward a leafy floral look, pick up some greenery and faux flowers from the floral aisle. Gather up a drill, six small eye screws, sandpaper, rags, wire cutting pliers, a glue gun, and paint in your choice of color along with some brushes. If you want the beads to hang from the sign, also purchase some hammer-in wall hangers like these Rlecs Sawtooth Hangers from Amazon. However, with a few tweaks, you can also hang the sign from the largest ring of beads.
Draw a bead on your wall hanging
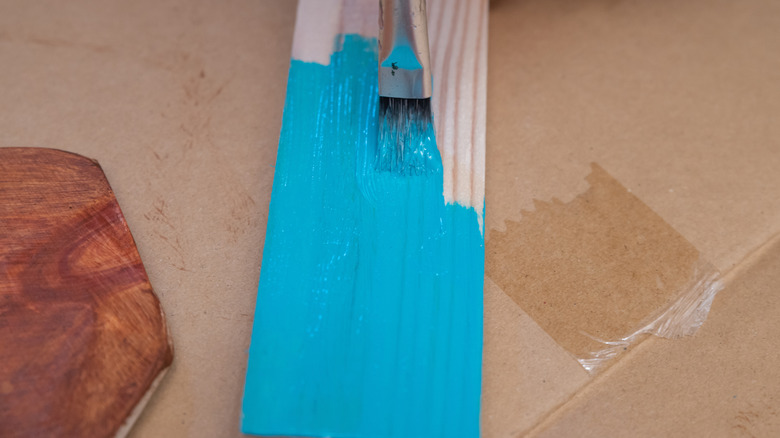
Scrub up the surface of your rectangular sign with sandpaper. Try to remove as much of the decorative facing as possible, and wipe away the dust. Coat the face and the sides of the sign with paint. White is a classic choice, but any color will do. This could be a fun way to use the Pantone color of the year or just a particularly vibrant color you've had your eye on. You can paint the beads, as well, either in the same color or a complementary or contrasting one.
With your wire cutters, trim three wreath sections containing 15, 25, and 33 beads. Make sure to leave enough excess wire to curl into a loop for hanging with the pliers. Arrange them in concentric arches, and lay them with their ends touching the top edge of the sign. Mark the endpoints of each arch. Pre-drill holes with a small bit to avoid splitting the wood, and add the eye screws.
If you're using sawtooth hangers, hammer two horizontally into the back of the sign before decorating the face. Mock up your arrangement of imitation leaves and flowers along the sign's face before committing to glue. Larger leaves as background overlaid with flowers and smaller greenery is hard to beat, but a simple row of three to five flower heads spaced along the sign will look striking, as well. Hook the ends of the beaded wires through the eye screws in order from smallest to largest. Give your creation a new home on a door, a wall, or a covered patio.
Variations on a theme
If heading down your own creative path is more appealing than recreating this adorable DIY, there are infinite possibilities you can choose from. The beaded arches can contribute to form and function. Invert the wall hanging, use a bit of clear monofilament to hold the three beaded rows together, and hang the piece from the topmost row of beads. This will work best if you've used lightweight adornments in your design, since accessories that are too heavy may deform the wire's curve.
Swap plain paint for the chalkboard variety to hold evolving messages or stencil on permanent ones. Stencil on address numbers or a child's name. Decoupage the sign with paper in a vintage floral, old book pages, or leftover wallpaper. Attach candle holders with wire to fill with plant cuttings, fresh flowers, or LED tea lights. Hung from the beads and equipped with hooks, you have a key rack or jewelry holder.
You can zhuzh up the beads themselves with some ribbon. This detail takes a bit more effort and time, but the effect is charming. Choose a ribbon that's about as wide as the beads' diameter. Remove the beads from each cut section of wire. Poke a hole in the end of a strip of ribbon, and slide the wire through. Replace one bead, wrap the ribbon toward the top of the bead, and make another hole in the ribbon. Slide the wire through the hole, and replace another bead. Repeat this back-and-forth pattern until you've slid all of the beads back onto the wire pieces. Curl the wires' ends through the eye screws, and admire the effect.