Add Extra Countertop Storage Anywhere You Need It With A Chic Dollar Tree DIY

We may receive a commission on purchases made from links.
Are your countertops a jumble of jars, spices, and other assorted items you use daily but don't have room to store in your cabinets? For many of us, countertop space is at a premium. If you've already tried the extension hack that adds extra space to your small kitchen and still find yourself frustrated trying to find a chic spot for your favorite coffee mug or fresh fruit, it's time to think vertically. Sure, you could hang a decorative storage solution like a Fox Run Copper Kitchen Hanging Basket from the ceiling. But if you aren't thrilled at the idea of drilling holes above your head, or what you really need is more flat space at your fingertips, there's a tiered wooden shelf hack you can complete using a few inexpensive items from Dollar Tree to add extra countertop storage anywhere you need it.
Don't worry if you're a whiz in the kitchen but don't have any woodworking experience. You don't need any advanced skills to complete this project, and the materials needed cost far less than a gourmet meal. Start by heading to your local Dollar Tree for some of its craft wood supplies. Pick up three Crafter's Square 2 x 18 in. Wood Planks, two Regular Wooden Crate with Handles, and three 17.75 in. Square Wood Hanging Decor Planks, each of which costs $1.25. You'll also need a jar of heavy-duty wood glue, some clamps, and small finishing nails to assemble your shelf.
Seal your shelf with paint or stain before you start building
Building this shelf is a simple way to create extra counter space in your kitchen. After you've gathered your materials, you have an important decision to make: What color shelf will look best? Although you can leave it unfinished, craft wood can easily be painted or stained with a quick-drying product like Minwax Early American Finish Penetrating Oil-Based Wood Stain from Amazon. Because your shelf is likely to be exposed to moisture from splashes or the occasional cooking mishap, it's a good idea to protect it with some kind of barrier. If you have your heart set on a bare wood look, seal each piece with a product like the bestselling Thirteen Chefs Food Grade Mineral Oil. Make sure to remove any tags or labels before you get started, and remove the nylon cord from the hanging decor since it isn't needed for this project.
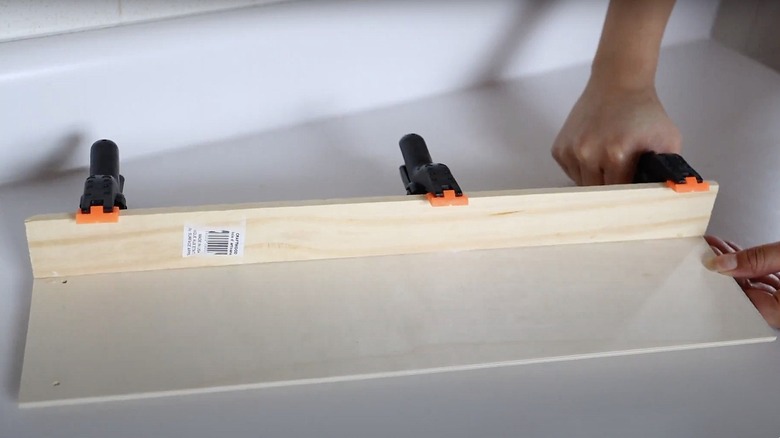
After allowing your paint or stain to dry thoroughly, it's time to start building. First, apply a liberal amount of wood glue along the entire length of a hanging wood decor plank. Make sure to do this on the non-stained side. Then, carefully place one of the wood planks perpendicularly onto the glue. Hold the pieces firmly in place with small wood clamps like the Romeda 3.5 inch Small Heavy Duty Plastic Spring Clamps from Amazon until the glue has dried completely.
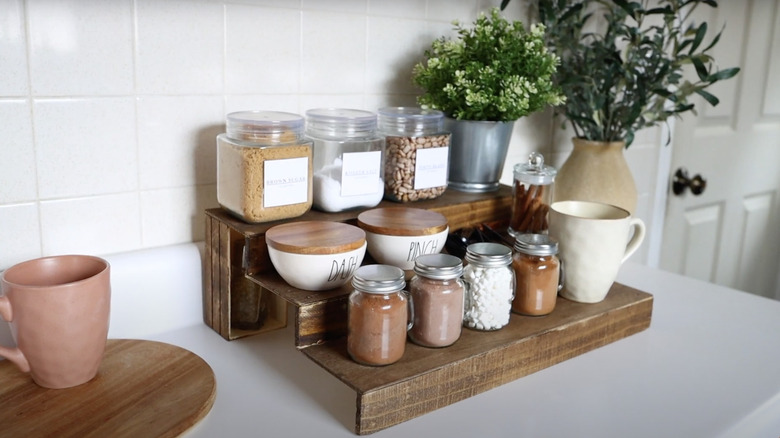
Use crates or cookbooks to support your DIY countertop shelves
To gain height for your shelf, you will continue to glue your wood planks and hanging decor together in a stair-stepped fashion. To do this, apply a liberal amount of wood glue to the length of your wood plank before laying another hanging wood decor plank on top of it perpendicularly. Use cookbooks or other flat items pushed against the first "step" to support the plank from underneath while it dries. Then, repeat the process to add a third row.
Once they have dried completely, you'll need to add some support under your shelves to keep them upright on your countertop. Although Dollar Tree's wooden crates are an inexpensive way to do this, you can add more visual interest by repurposing the fruit crates you have on hand. You could also use a stack of vintage cookbooks. Either way, the process is easy. Simply flip the crates onto their shortest side, apply more wood glue to the tops, and press the top shelf firmly against them. For maximum support, it's a good idea to use one wooden crate on each side of your shelf and to use a small finishing nail in each corner. Consider setting your shelf on a small non-slip surface like the Gorilla Grip Non-Adhesive Breathable Mat to hold it in place. Set heavier items on the top or bottom shelves to avoid any bowing of the middle row. And for even more storage, use additional wooden crates on each shelf to keep fruits or other items separate from each other.