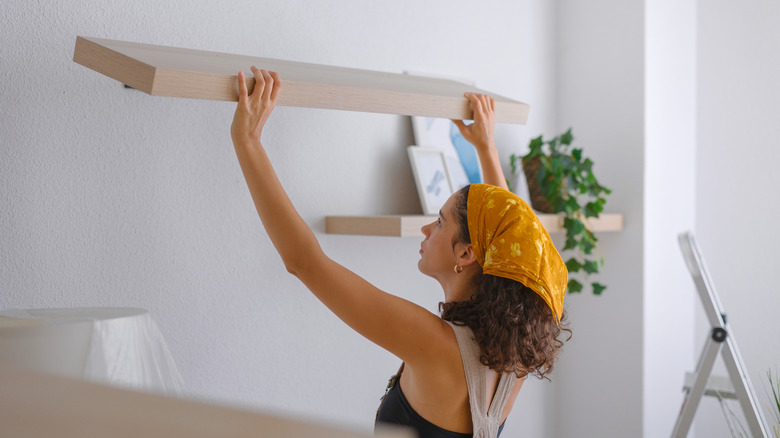
How To Mount A Shelf On A Crooked Wall With Ease
We may receive a commission on purchases made from links.
Scribing is a weirdly counterintuitive process. The idea is that you cut material away from your workpiece in order for it to fit tightly against some irregular surface (like most walls). But, perhaps because there's something downright odd about putting up a shelf, cabinet front, or mantel that isn't rectangular, some DIYers haven't learned this simple but critical skill. All that's required is that you mark your workpiece — let's call it a shelf — by tracing the irregularities of the wall (or whatever surface) it's supposed to fit against. The key is to hold your pencil a fixed distance from the wall as you mark, which will naturally give you the contours of the wall.
YouTuber Dmitri Ivanov demonstrates this process of scribing a shelf to a wall using nothing more than a common pencil and a flat washer. It's such an elegant solution that you might be tempted to just go scribe something to see how it goes. And you should, but first we have a few refinements to work out. After all, as simple as this process is, there are always ways to make any process more complicated ... and better. Note that scribing in general won't work on some types of floating shelves, depending on whether metal hardware is embedded in the shelf.
The brilliant simplicity of scribing with a washer
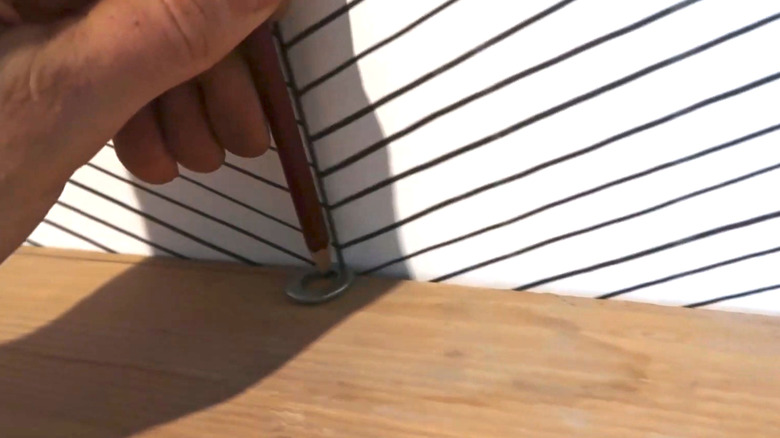
You know you need to do some scribing when you put a board against a wall and it touches in some areas but there are gaps in others. They key requirement for the washer scribing trick is that the bearing surface on one side of the washer (that is, the surface of the washer from the edge of the hole to the outer edge) must be at least as wide as the largest gap between the board and the wall. The YouTuber's wall is wavy to a relatively normal degree, so they're able to scribe using a small washer, plentiful on any work site and in any junk drawer. While holding your workpiece against the wall, place the washer flat on the board, at one end of the workpiece and against the wall.
Using a pencil (the YouTuber recommends a dull pencil for an open-grained wood like oak, or any pencil for a closed-grained wood like pine), push the washer gently but firmly against the wall while moving it along the length of the board and making a pencil mark through the washer's hole. This is where the brilliance of using a washer really shines: Because it's a disc, it will roll along the wall smoothly, and because its hole is a circle parallel to the outer edge of the washer, it will hold your pencil a fixed distance from the wall. The result is a perfectly scribed line. Then simply sand to or cut along the line with the tool of your choice — jigsaw, bandsaw, coping saw, or another.
A deep dive into pencils and washers for scribing
There are a few ways to make this process even better, if in somewhat minor ways. Pencil selection plays a role, as mentioned. With open-grained wood, a sharp pencil will tend to follow the gain's grooves and wander away from the proper scribed line location.
Let's take a closer look at pencil choices for scribing. Many carpentry pencils are made using a medium-soft lead with the hardness grade HB, the same as a common American #2 pencil. Some carpenters and woodworkers prefer an even softer lead (2B, for example), but for this particular task, the lack of strength of soft graphite is a concern. If you're one of those carpenters who uses a mechanical pencil, consider using a thicker lead when scribing. A 2-milimeter lead will hold up far better than a 0.7-milimeter one. Or consider using a tungsten carbide scribing tool, like this Vixavi model, which works on wood and metal.
In some circumstances, it also might matter which side of the washer you place against your workpiece. You might not have ever noticed, but common flat washers usually have a side with smoother corners and one with slightly sharper corners. The smooth side is the punch entry side of the washer, where the punch used to stamp the washer from a sheet of steel (or whatever) enters the metal. It usually makes sense to keep the smooth side of the washer against the workpiece so it moves a little more easily and is slightly less likely to get caught on a protrusion.
Alternatives to washer scribing
The only problem with the washer method, really, is that the round shape forces the scribed line to be fairly low-resolution; it can't show a lot of detail for certain contour shapes. A standard woodworking compass, like the General Tools 8-inch pencil compass and scriber, will always have better accuracy, though it might be a little more difficult to master. And there are many dedicated scribing tools of various designs available online, including marking gauges and designs like the Saker multi-function scribing tool. For shorter scribing tasks, it's even simpler to use a contour gauge, like the Saker 10-inch contour gauge, which is full of great and useful features.
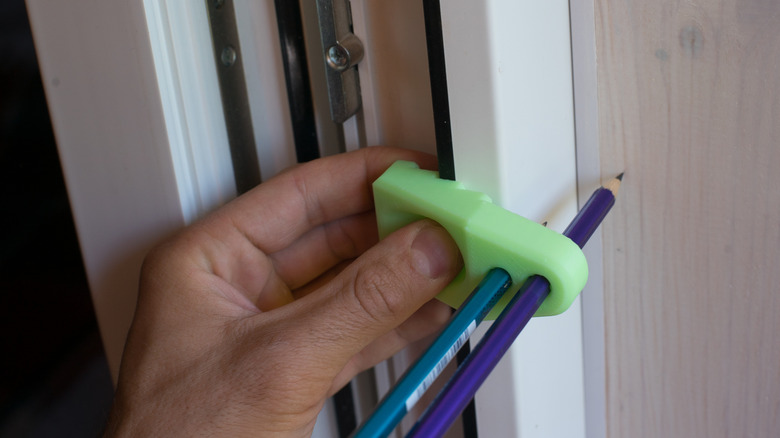
If you find yourself in a pinch and needing to scribe a line with no washers available, there are a few other impromptu approaches you can try. The most common for smaller gaps is to simply hold a pencil against the wall and move along the workpiece while marking the contour. This assumes the gap will be less than half the width of the pencil, but you can increase the gap coverage by affixing a piece of wood of even thickness to the edge of the pencil.
If for some reason you have dividers but no compass, you can use the dividers to scratch a scribe line, or tape a pencil or marker to one of the legs to make a compass on the fly. We've even seen scribing done with an old CD on a wood floor, as well as a TikTok hack using scrap wood to scribe a line to fit laminate flooring in even the curviest corners.