Save Your Old Tape Rolls To DIY A Stylish Storage Solution That Doubles As Decor
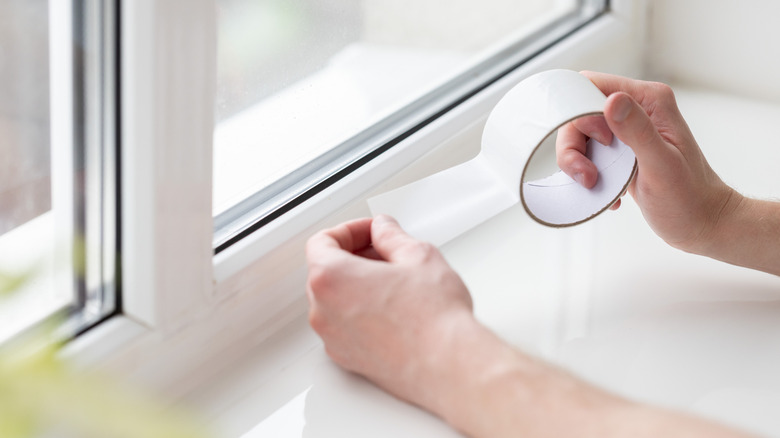
With so many ways to repurpose common household items, it was only a matter of time before a clever craft to repurpose tape rolls around the house came about. They're versatile, so it's worth keeping them. Plus, this DIY turns empty rolls into the most stylish storage to help you save money and decorate in a sustainable way. You just need a few supplies. To complete this DIY, get some cardboard, fabric, canvas, rattan, or any other material that can cover the outer tape roll. Additionally, find some wood, metal, clay, or fabric embellishments for the lid. By covering the top and bottom portions and wrapping the tube in decorative fabric, you can create simple storage out of recycled supplies that will rival a store-bought organizer or jewelry box.
You don't have to be an expert craftsperson for this DIY. To begin, make sure all the tape is finished on the roll. If you plan to paint the cardboard tube, apply a few coats and allow it to dry before adding the wrapping material. If not, you can cut out a length of fabric, rattan, or whatever material you want to cover the outside of the entire roll in and set it aside. Take a piece of cardboard or foam board and trace one end of the tube onto the surface, twice, before cutting them out. These will become the top and bottom covering of your pots.
Decorate the tape roll and cover its top and bottom for a stylish storage solution
Glue the material you chose to the exterior of the ring and trim away any excess. Make sure to seal the edges and pull the fabric taut so it's smooth all the way around. Next, you can glue one of the poster or foam board circles to the bottom of the pot. Allow this to dry fully. If you want to decorate the bottom covering, paint it before attaching it or glue more fabric on. If you prefer a softer aesthetic, consider wrapping the tape roll in yarn and fashioning eye-catching designs with the material.
To really elevate the repurposed tape roll, use a thinner string to cover the entire thing. Start by securing one end of the string with glue, then begin to wrap it around the outside of your tape roll, making sure you don't leave any gaps. Secure the other end of the string, then take some thicker yarn and use a hot glue gun to add on florals, geometric patterns, or simple wavy designs. You can also use fabric to cover the exterior, then accessorize with tassels, pom poms, or yarn over the top to create your own custom patterns.
Add a decorative lid for style
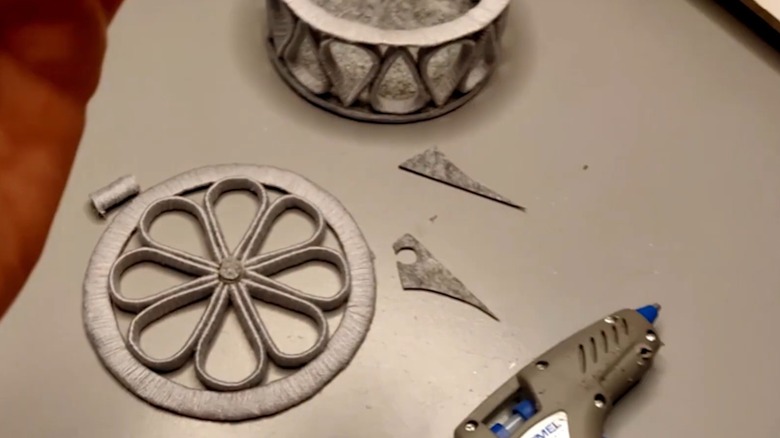
Your last step is the top. You can keep this simple by decorating with the materials you used on the bottom covering of the pot, or you can make your design more complex with this clever idea. To create an open lid , cut up construction or scrapbook paper into strips. Fold them vertically a few times until you have a very thin strip, and glue down the interior folds as you go. From here, take both ends of your strip and glue them together to make a circle or tear drop shape. Create as many shapes as you want, then wrap each one in string or fabric that matches your tape roll base.
Draw a border around the inside of your cardboard lid around 1 centimeter wide. Cut the smaller circle out and cover the leftover cardboard border with matching string or fabric. Now, for the fun part: sticking the circles or other shapes inside the border. This decorative design will give you a slightly open pot lid, allowing you to see whatever's inside. Once this has dried, you can use a small wooden ball, wood cube, stone, decorative pearl, jewel, or any other small item you have on hand to act as the lid's handle. Glue this down and you can use your sustainable, stylish pot to declutter and organize jewelry, trinkets, keys, or any other small items around your home.