The Demo-Free Way To Upgrade Your Baseboards

We may receive a commission on purchases made from links.
Despite being down by your feet, baseboards add as much to the home's aesthetic as any decor element. You can't leave them behind if you want a harmonious look when you change your interior style to stay up-to-date on design trends. But before you get to the fun of installing new baseboards and fresh paint, you have to pry out the old pieces, remove the nails, and clean up any caulking or wall damage. Add in all these extra steps, and it may feel too time-consuming to take on yourself.
If you're stuck at that point, know that many DIYers have found ingenious ways to skip the demo step, cutting the process in half without sacrificing quality! What's the secret? Rather than remove your baseboards, simply cover them with new baseboards! Although they get pretty pricey, products like Orac Decor Baseboard Moulding fit neatly over existing baseboards. Similar options come in various designs to supply any desired style. Pick a quick and easy way to clean your baseboards before installing the covers, but don't worry about fixing scratches, dings, or dents, as the cover will hide them. You only have to address significant damage that might affect the baseboard cover installation. Cut the baseboard covers to length, and install them on the wall with brad nails, construction adhesive, or screws. It's a simple operation with professional results, but if covering your wall trim isn't up your alley, you can also use existing baseboards in a simple yet stunning transformation.
Alternative ways to upgrade baseboards with height and style
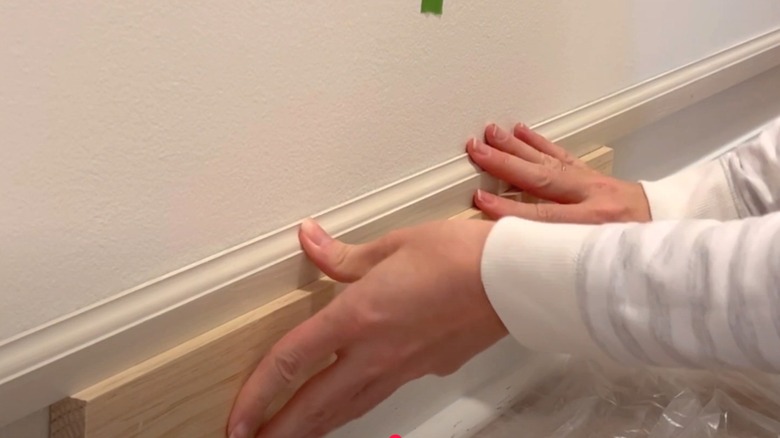
One of the smartest ways to change your current wall trim is to extend it upward. Taller baseboards add drama and elegance to a room's design, and with a clever use of added wall molding, you can save a ton of money and time on a baseboard upgrade. For this update, you can use different types of molding or trim, such as cap molding or chair rail molding, above the existing baseboard, creating a new top edge for it. You can then paint the molding, the baseboard, and the wall between them the same color to create an illusion of one-piece wall trim.
Lay a lumber spacer along the baseboard, holding the board firmly against the wall. Put the new molding in position on the wall by laying it on the spacer, which will ensure the molding and baseboard keep a consistent gap and stay parallel around the wall. Fix the molding to the wall with nails or construction adhesive, and smooth paintable caulk into any gaps and holes. You can then prime and paint the new molding and everything underneath. As if this couldn't get any easier, there's also peel-and-stick molding like Hungbak Peel and Stick Lightweight TPE Chair Rail. Using this, there's no nailing or sawing required. Plus, the low cost makes it a low-risk investment. Even renters can upgrade their baseboards without risking their deposit with this easy-on/easy-off solution. With so many fashionable, user-friendly options, anyone can consider what a baseboard update could do for their space.