Upcycle Old Cardboard Boxes Into A Stylish Decorative Side Table
We may receive a commission on purchases made from links.
In today's digital shopping age where it's all too easy to order something with the click of a button, cardboard boxes can pile up incredibly quickly. Millions and millions of packages are shipped and delivered every single day, to say nothing of products packaged in cardboard that you actually buy from stores. While it's prudent to recycle them, there are also plenty of creative and smart ways to repurpose cardboard boxes around the home. For example, you can transform cardboard boxes into a DIY ottoman on a budget. Another unique way to upcycle boxes is to turn them into stylish side tables. Not only will this save you money on buying new furniture, but it'll save your packing material from the landfill.
Essentially, this upcycle involves reforming cardboard into a column or rectangular-shaped table and then decorating it with materials that mask the surfaces. There are lots of fun variations on this project, and you don't need to buy many materials to get started. You will need a hot glue gun, scissors, tape, the boxes themselves, and materials to cover the surfaces of the boxes. Depending on the look you're going for, you can use twine, paint, or even decorative adhesive that will give the cardboard the appearance of wood, like this Arthome Blue Rustic Peel-And-Stick Wood Paper.
Using boxes to create a unique side table is surprisingly easy
To create a beautiful multi-shelf table out of cardboard like the one in the video featured above, start by cutting out the walls and shelves of the table. In the video, they cut nine cardboard rectangles into 14-by-16-inch pieces. You can either follow those measurements or opt for different ones to make your table larger or smaller. Once you've cut the pieces, start assembling the table by laying one piece of cardboard flat. Hot glue pieces vertically on three sides, then one on the top, to essentially create a box that is open at the front. After the glue dries, attach an additional piece of cardboard directly above the back of the box, followed by another piece that runs perpendicular to that piece, bisecting it and creating two distinct shelves. Finally, on top of those intersecting pieces of cardboard, glue on the last two rectangles, stacked and glued together for extra support.
Now that you've finished assembling the table, it's time to get decorating! Start by covering the whole table with contact paper. If you want the table to mimic the look of wood, consider using this COSNIGHT Wood Grain Contact Paper. If you want to have a bit more fun with it, cover it in a more colorful or decorative contact paper. Finish off the look by giving the table legs. You can use a quartered cardboard tube or build mini rectangular boxes out of excess cardboard and attach them to the bottom using hot glue.
Alternative ways to create your stylish side table
Turning an old cardboard box into an affordable DIY side table doesn't have to be complicated. A simple option is to tape the box shut, cover it in stylish adhesive paper, toss in sandbags or other weights so it doesn't tip over, and then start using it. However, there are other opportunities to get more creative. One method involves taking a flattened piece of cardboard, rolling it tightly together into a cylinder, and taping it together. Then, you can wrap the cylinder in twine to give it a boho look and attach a wooden tray or a circular piece of cardboard to function as the tabletop. (If you're using cardboard for the tabletop, you should tape or glue a few pieces together so that it's sturdy.)
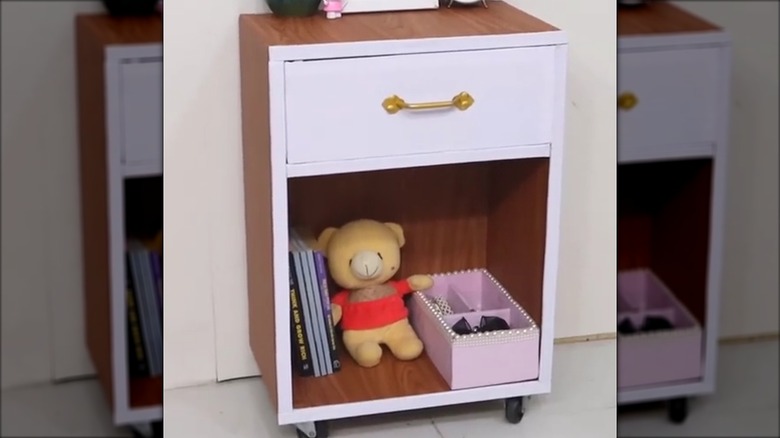
Another method is to take a cardboard box that's already a good size for a table and cut off the flaps so it's open, leaving you with a good base to build a side table with shelves and drawers. You'll need to turn it vertically and reinforce each side of the box by gluing on additional cardboard. To incorporate a drawer, add a piece of cardboard to the inside to support it like a shelf. Then, glue together a cardboard drawer and set it snugly on top of the shelf. After building the frame of your table, style it with paint or contact paper to disguise the cardboard. To further jazz it up, don't be afraid to add hardware like wheels and drawer handles. You can also incorporate thin plywood or another lightweight material for the tabletop.