The Trendy Round DIY Serving Tray You Can Make On A Dollar Tree Budget

Nothing elevates a shared dining experience with friends and family quite like a beautifully-set table. Curating your spread with elegant dishes and serving trays like this easy and affordable Dollar Tree DIY will add a rustic touch to your home. It's an easy project made with tumbling blocks and a wood base, and a quick trip to Dollar Tree will easily get you everything you need for under $10 (depending on how you design your tray, of course). There are lots of ways to personalize this project from how you lay out your blocks to adding stain and paint (you could even experiment with decoupage).
The round option of the Crafter's Square Assorted Plywood Hanging DIY Signs with the hanging string removed would be an ideal option for crafting a round tray. However, there are lots of other sizes and options online, so have a look and go with what speaks to you. The sides of your tray will be built by gluing Dollar Tree blocks from a Tumbling Tower Game onto the base, so the only other essential elements to manifest this creation are a hot glue gun and a plan.
No matter how you style it, this Dollar Tree DIY tray will elevate any surface in your home. In fact, it will be useful for so much more than adding aesthetic value to your tablescape. Use it for a catch-all by the door or a decorative candle tray, too.
How to creatively design your own serving tray
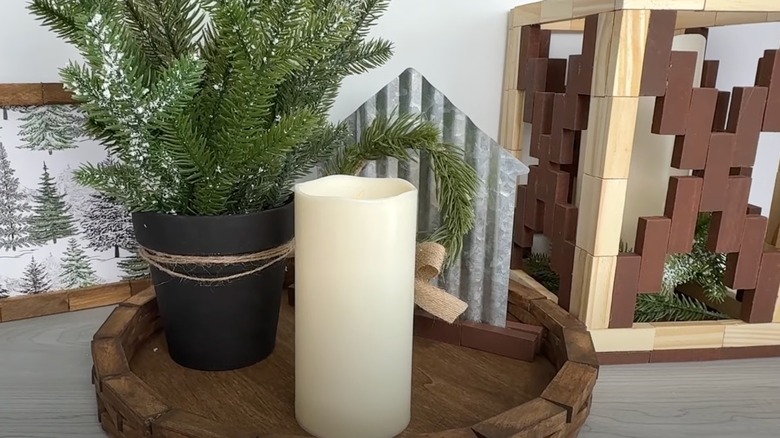
Begin by getting a sense of the pattern you'd like to create. You could lay one row of evenly-spaced blocks, then place the next row with the centers along the seams between them, and then a final row that matches the base layer. Use hot glue to attach the tumbling blocks around the edge of the tray in your chosen pattern. Finally, stain or paint the tray to match your décor, or add decoupage with Mod Podge and a patterned napkin. Bear in mind that if you plan to use your DIY tray to serve food, it would be best to seal it with a food-safe sealant. Mineral oil, linseed oil, and carnauba wax are all good options to protect your tray.
To create a unique look, play with the height of your tray's sides by adjusting the number of layers or varying the layers. You could also cut some blocks into smaller pieces and alternate them. First a long piece; then a square, end piece; then a long piece, and so on. Or, skip the brick-laying versions all together and line the blocks up vertically. Turn each one at an angle so the corners connect for a playful twist. With vertical versions, glue the bottoms and sides of the blocks to ensure good rigidity. And, if you like this project, check out another serving tray you could make from Dollar Tree items.