Create Endless Outdoor Possibilities With An Inexpensive Wood Accent Wall

Wood, as a natural material, can add endless warmth and texture to any space. Wood accent walls are a rising trend in homes, whether they're comprised of wood accents added to existing walls or are entirely wooden walls that serve as room dividers built to define spaces and provide visual interest. These accent walls are equally great for the outdoors, where their roles can be visual, functional, or both. Their natural design look blends very well with the surrounding landscape and can be easily matched to other outdoor elements like patio furniture. While custom-built walls are always a luxe option for outdoor spaces, you can actually DIY a beautiful wooden accent wall for a very budget-friendly price tag with the help of some inexpensive cuts of lumber.
These accent walls can provide both utility and style in your outdoor living space, including blocking views from neighbors or the street. They can also cover up things you don't want to see, like clunky A/C units or unattractive exterior walls. Wooden accent walls can be used to provide a focal point or give you hanging space for lighting accents décor pieces, or plants. They can also be used to visually define outdoor spaces when placed around specific features like fire pits, seating areas, and dining tables, giving them a cozy feeling not unlike indoor rooms.
Building a wood accent wall
To create a simple wooden accent wall for an outdoor space, you will need multiple 1-by-2-inch planks. How many will depend on the height of your wall and how densely you want them spaced. You will also need four larger pieces of lumber, like 1-by-4s or 2-by-4s, to create the wall's frame. If you want the back of the wall to look the same as the front, double the number of slender planks. Cut all pieces to size to match the desired dimensions of your wall, using 2-inch nails to assemble a square frame with the wider boards, then place an additional board down the middle for extra support.
The slats will be attached over these boards with 2-inch nails. Employing another piece of wood as a spacer to help create even spaces between, place the slats as close or far apart as you like to meet your aesthetic or coverage needs. For a weightier wall, you could also use thicker boards going across for more coverage with smaller widths of open space between.
Customizing your wood accent wall
Once built, paint or stain the wall with a color or wood stain that matches your outdoor décor. Because the wall is outdoors, you will want to make sure to use treated wood that won't deteriorate when exposed to moisture. You should also seal any paint or stain with a weather-resistant sealant to keep it looking good. There are a number of ways to secure the wall in a standing position, including attaching it to an existing exterior wall or fence. You could also create brackets behind to hold it upright and prevent tipping, or attach it to the floor of your outdoor space with bolts. If you are building it on the ground, frame the wall with fence posts sunk into the ground and stabilized with concrete.
This wooden wall can instantly provide a cozy room-like feel to larger, open outdoor spaces. Decorate the accent wall as you would an indoor one, complete with mounted planters, artwork, or mirrors. You can also add outdoor-use twinkle lights wound through the slats, attach strip LEDs to light it from behind, add some sconces to it for additional lighting, or create shelves made from 1-by-6-inch planks supported by L-brackets.
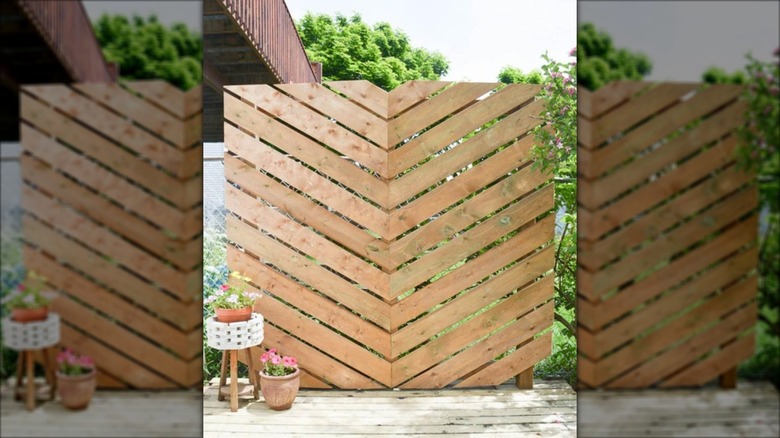
While the most common version of this gorgeous DIY patio idea involves orienting the slats horizontally, try your hand at creating a diagonal, herringbone, or vertical alignment for a distinctly modern look. You can also opt for interesting cuts of raw lumber, driftwood, or upcycled wood pallets to customize the look and potentially lower your cost of materials. The possibilities are endless, so don't be afraid to get creative.