Elevate The Look Of Your Boring Staircase With A Simple, Budget-Friendly Addition
We may receive a commission on purchases made from links.
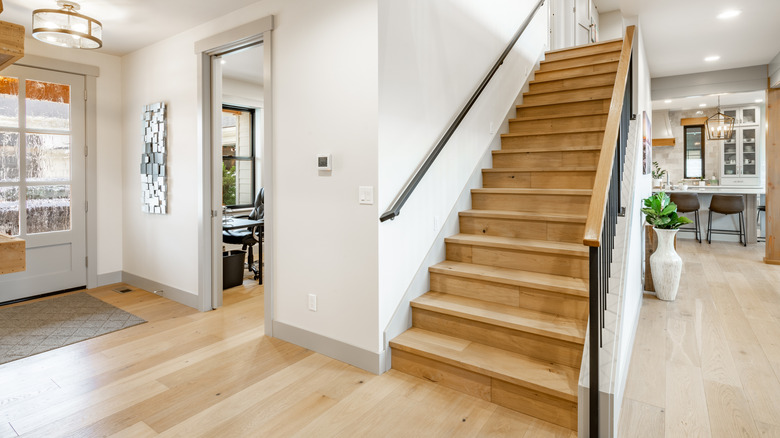
Staircases are one of the most overlooked parts of the home. Sure, they help us get from one floor to another, but they don't have to be just practical — they can be beautiful, too. If your staircase looks plain, lifeless, or flat-out boring, it's time to spruce it up. You don't need a huge budget or a complete staircase renovation. The secret is simple: stair brackets, also known as tread brackets. These small but mighty additions are a fantastic way to update your staircase, and they can completely transform it from dull to delightful without breaking the bank.
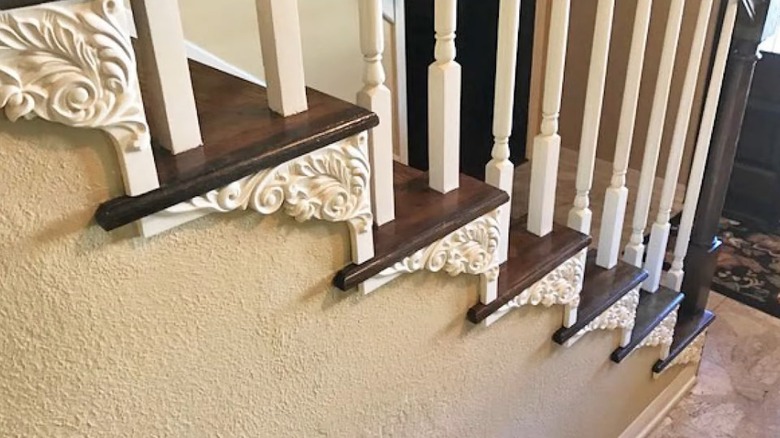
Stair brackets are decorative pieces installed at the points where the stair treads meet the wall (or the "stringer," which is the board that connects the stair treads to the risers). Think of them as the finishing touch, like putting on a necklace to complete an outfit — while they may be small, their impact is anything but. Stair brackets come in various styles, materials, and finishes, making it easy to find the perfect fit for your home's aesthetic.
Tips on choosing the right stair brackets for your home
To get started with this budget-friendly staircase makeover, you'll want to check out the available options to pick the perfect brackets for your home. The most common materials you'll find are polyurethane and wood. Polyurethane brackets are a smart choice for families or homes with heavy foot traffic. They are lightweight, resistant to moisture and insects, and durable. Plus, polyurethane brackets like the Ekena Millwork Flower Stair Brackets can mimic the look of more expensive materials and offer a ton of design options.
Wooden brackets are your best bet if you're aiming for a traditional or rustic look. They add warmth and character and can be stained or painted to match your décor. For a cozy modern farmhouse-style look, go for wooden brackets with carvings or a distressed finish like these traditional Birch Stair Brackets. The goal is to create a cohesive look that enhances your home's character rather than clashing with it. Also, pay attention to the size and proportion of your stair brackets. Oversized brackets can overwhelm a small staircase, while tiny ones might look out of place on a grand staircase. Take measurements and consider the proportions of your stairs before making a purchase. The right-sized brackets will look intentional and balanced, creating a polished finish.
Installing stair brackets is quick and easy
In addition to being aesthetically pleasing and easy on your wallet, stair brackets are simple to install. TikTok user vivianshayhome detailed a typical installation in the video above. Begin by measuring the length of the molding and the height of each riser — this will guide you in determining the placement of your brackets and whether any trimming will be required. Next, clean the stringer surface thoroughly to ensure the adhesive will bond properly. After marking the bracket positions, use a miter saw to trim them according to your measurements if necessary, and you may also want to cut the top leg at a 45-degree angle to match the molding for a seamless look.
Apply adhesive to the back of each bracket and press it firmly into place. Secure the bracket with brad nails along the top, bottom, and edge. Once the brackets are set, caulk all the seams and fill your nail holes with wood filler. Let these dry, then if desired you can finish by sanding, priming, and painting the brackets for a smooth, polished result.