Common Household Appliances You've Been Using Wrong And Didn't Know It
You can learn something new every day, like the fact that most of us have probably been using our microwaves the wrong way ever since we bought them. That little line in your washer's detergent dispenser likely doesn't mean what you think it does, and your KitchenAid mixer has a secret adjustment that can make life so, so much easer. These are just a few examples of the common household appliances you might have been using wrong without even realizing it.
There are probably also features on your appliances you don't know how to use – but below, you'll discover ways you may be using an entire appliance incorrectly or at least not to its full potential. Don't feel bad, because as you'll see on this list, these are common user oversights. So common in fact, that what were meant as standard operating procedures for these appliances are borderline internet hacks. Some of these "hacks" are straightforward, and some require a little DIY skill to complete, but every single one has been myth-busted before its inclusion. You might have come across a video on social media and think that there's no way it works. However, if you see it here, it really does. Each tip for improving your appliance experience has been cross-checked with the manufacturers' recommendations — or at least completed successfully on video. We're all learning together, and these are some important appliance usage tips to know.
You can adjust your KitchenAid mixer arm with a screwdriver
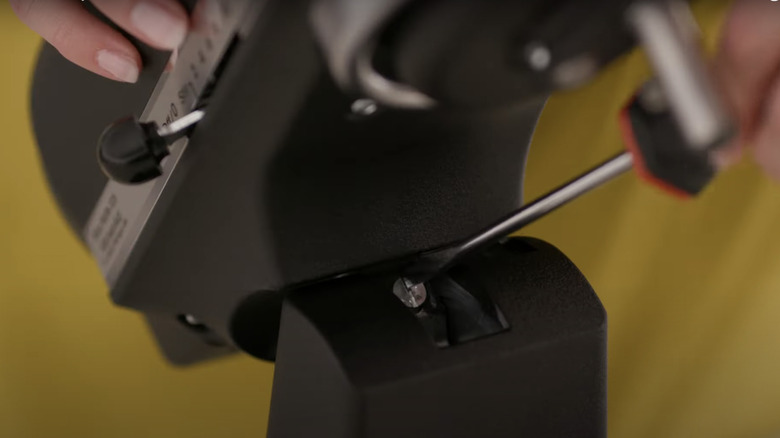
One of the most annoying things about using a KitchenAid mixer is having to stop to manually unstick batter from the mixing bowl because the paddle doesn't reach. For an appliance that's typically a godsend, this problem is a frustrating one. TikTok user working.for.tacos pointed out an easy way to check if your paddle is at the correct height. "Apparently, you put a dime in your bowl with your flat paddle," she told followers. "If it doesn't reach the dime, then it is too high." If, after completing this test, you find that your paddle is too high, don't worry.
You can easily adjust the mixer's arm with a screwdriver. "You take a flathead screwdriver and adjust it to the right to make it lower or to the left to make it higher," she continued. "Anyways, if you have a stand mixer, there's an adjustment." And luckily enough, this isn't just a hearsay hack from social media. It's backed up by official KitchenAid channels, too. Simply remove the paddle and tilt the head of the mixer back. You should see a screw near the middle of its neck. Use a screwdriver to make minor adjustments, redo the dime test, and repeat until your mixer is at just the right height.
Microwaves have different power levels — using the highest isn't always the solution
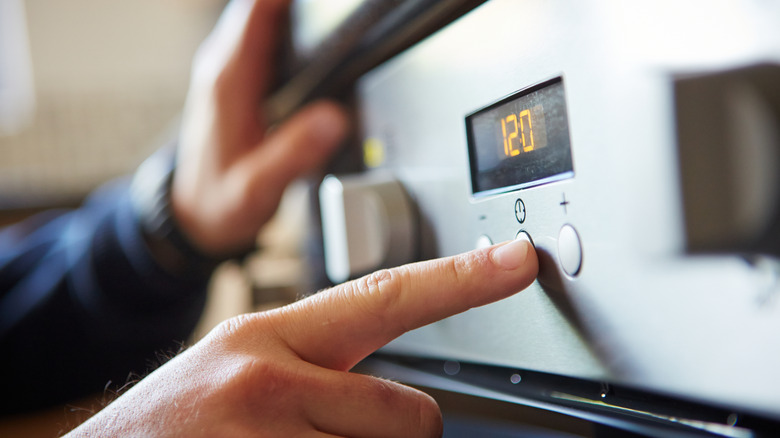
If you think heating up food just means adding thirty seconds to the cooking time until it's a good temperature, you're using your microwave wrong. Instead, you should become more familiar with the settings of your particular machine and fine-tune them a bit. "Many people don't realize that they can adjust the power levels of their microwaves, so they simply default to always using 'high' power levels," Daryl Williams, executive director of global specialty products for GE Appliances told Consumer Reports.
Instead, have a look at your microwave's manual (it should be easy to find online if you threw the paper one away!) for the way to lower the power to medium, or even low. "A high power level might be fine when you're heating up liquids like coffee or soups," Williams continued. "But when it comes to cooking, reheating, and defrosting or melting food, lower power levels will often yield amazing results." In fact, Louis Nieves, senior product engineer at Panasonic Consumer Electronics told the outlet that always using the microwave on high can actually end up ruining your food. "If you're gunning it at high power every time, you risk drying out your food," he said.
Instead, manufacturers recommend using medium-high power (about 70% to 80%) for casseroles, pasta, and single-serving dishes. If you want to braise or cook chicken or ham, keep it at about 50% power. And, if you're trying to quickly thaw frozen foods, a low or defrost setting with about 30% power will help to evenly defrost items. Finally, if you're looking to soften butter or warm up bread, dropping the power level to 10% should give you just the right amount of gentle heat.
You only need 1½ ounces of laundry detergent instead of filling it up to the line

Do you have a modern, high-efficiency washing machine? Some smart laundry tip and tricks can help you run it even more effectively. New machines use less water than older models and tend to work best with high-efficiency detergent. When a detergent, either powder or liquid, is high-efficiency it often means that it is highly concentrated, so you don't need a lot of it to do a good job. You might have noticed the fill line on your machine's detergent dispenser and assumed this was the amount of product to put in. However, that line just shows how much detergent you can put in without overflowing the machine. It has no relation to the best amount for a good clean.
Instead, simply add about 1½ ounces of product for a normal load of laundry. You can use a measuring spoon from your kitchen, or even a shot glass to make things easier as they tend to be around the right size. Of course, if you are dealing with rank clothes from a day of heavy lawn work, or a particularly large load of laundry, you can increase the measurement to about 3 ounces. Either way, never add clothes to the drum until they reach the brim. Instead, leave a few inches at the top so the load can move freely. That way, the machine can thoroughly clean and rinse the soap from your clothes.
You can likely change your dryer's door to open in a better direction
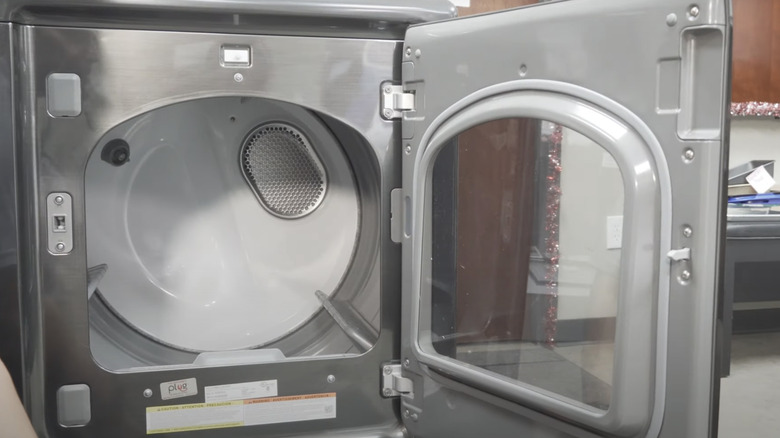
Does your dryer door open the wrong way, making laundry day harder? To boost the functionality and maximize every square inch in a small laundry room, you might be able to simply switch the door on the machine to the other side. This way, there's no more lugging clothes around an awkwardly positioned door. "Most dryers are reversible, not all washers are reversible," Keith Anderson, a technician with Appliance Factory and Mattress Kingdom, said on YouTube.
To ascertain if your dryer door is reversible, you just need to check for an extra set of screws around the machine's opening "The easiest way to tell is, do I have the same set of screws on both sides?" Anderson continued. "You see how these two are hanging out here doing basically nothing? That tells me that this door is reversible. So I can, instead of opening this way, I can move it to turn over this way."
If you find that you can move your door, it's an easy enough DIY. You likely need to remove the door, and then separate the door panels if needed to gain access to the hinges. Then, remove the hinges and attach them to the opposite side of the door. However, best practices differ by model, so try looking for your machine's specifics on YouTube for a step-by-step tutorial.
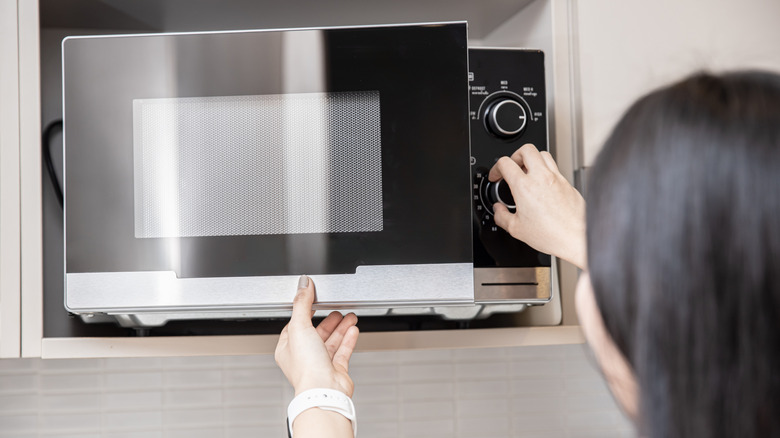
Think of your Keurig as a hot water machine, not just a coffee maker
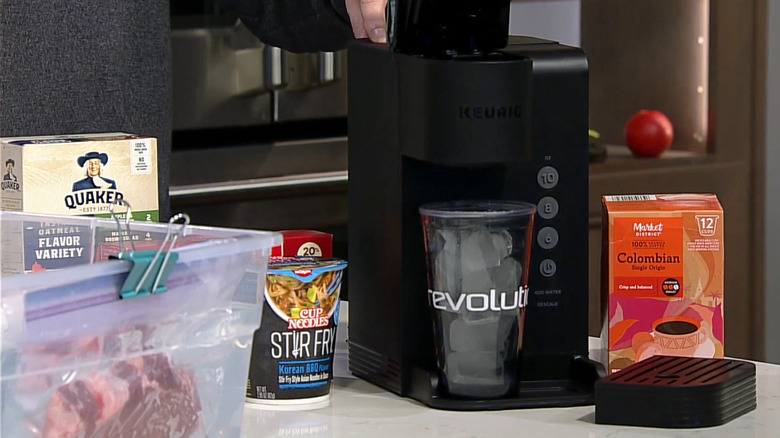
Keurigs are a convenient way to make your morning cup of joe, but you're really limiting yourself if you're just using it for that purpose. "We want to think about this brewer not just for coffee," blogger and foodie Doug Heilman told CBS Pittsburgh on YouTube. "It's a hot water machine. So think about your instant oatmeal, your cocoa, your, like, cup of noodles — that's a whole other way to use that." Failing to take advantage of your Keurig machine in this way isn't necessarily a mistake, but it's definitely a missed opportunity. Why? Because Keurig coffee makers can heat up a cup of water in (literally) less than a minute, making them a convenient appliance to use if you need a single cup of hot water pretty much instantly.
For the best results, Heilman suggests making sure there isn't a stray coffee pod inside as well as rinsing out the pod chamber, as you don't want your ramen to taste like an espresso. Leaving old pods in a Keurig and failing to run rinse cycles are some of the mistakes that can shorten your Keurig's lifespan – so even if you aren't using your unit to brew up plain hot water, these are good habits to get into. Heilman also reminds viewers that you can even use your Keurig to make an iced coffee or tea. Simply pop the cup with ice underneath the spot and select the "small brew" button. This makes the coffee a little stronger, so when the ice starts to melt, the whole cup still tastes good. While this hack hasn't been officially confirmed by Keurig, you can test it yourself if you aren't sure. Don't have one yet? The Keurig K-Mini is a great place to start.
You can use your air fryer to bake, not just fry

If you have an air fryer, you might think you can only cook things like fries and tater tots in this appliance. After all, it's right there in the name "fryer," right? However, if you are only frying things, you're missing a big opportunity! The machine is actually a great stand-in for most other cooking appliances. It even works well in smaller kitchens without a traditional oven or in place of a broken one. You can toast, reheat, and even bake with an air fryer. "For baking, you can make dishes like cookies, muffins, and even cakes," Andreas Hansen, founder of air fryer brand Fritaire, told Daily Meal in an exclusive interview. "An air fryer's heat distribution helps achieve a golden-brown finish similar to conventional baking."
The reason this all still works is because of the Maillard reaction. This is a chemical reaction named after a French chemist. When amino acids and reducing sugars are cooked above 285°F, they bond together and browning occurs — which makes things taste better. So many foods that you might make in a traditional oven, or even in a toaster, can be air-fried, too.
Remember to remove the interior plastic on most air filters
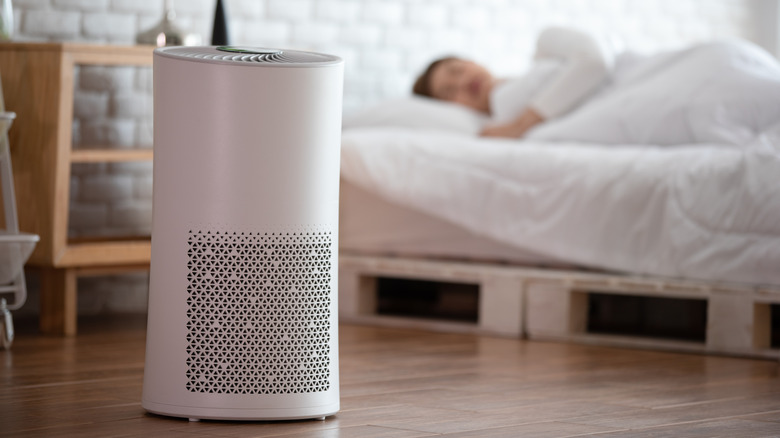
Air filters, like the Levoit Air Purifier, are a great way to keep your home fresh. With a HEPA-grade filter, you can use them to pull dust and other allergens from the air. They can capture pet dander to help reduce odors and even combat wildfire smoke at home to make it easier to breathe inside. However, you might be using your air filter wrong and not even know it. You must remember to remove the interior plastic on most air filters before using it.
This might seem silly, but TikTok is filled with videos of people who plugged in their machines and just turned them on without checking. Then, once they've been running the filter for months, they finally check and realize. These machines won't work if the interior parts are covered in plastic! To check your own unit, see if it has an outer shell that pops off like many brands. Then, check for the covered-in-plastic filter in the second layer.
You can adjust the top rack of the dishwasher
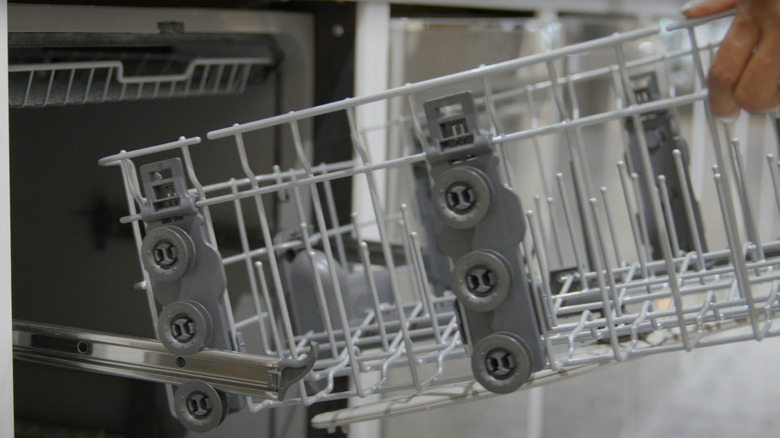
Having to wash dishes by hand is annoying. It's even more so if you have a perfectly good dishwasher, but it's just the wrong size for a few of your dishes. However, a little-known hack that many on social media swear by is adjusting the top rack of the dishwasher to make more room. Pull out the top rack and have a look at each side. There should be small clips located on the hinge of the sliding track. You can push them in and then pull the rack either up or down, depending on where you need the room.
You may need to move it down to accommodate long-stemmed glasses up top or shift it up to make sure your grandma's prized casserole dish fits down below without running into the sprayer arm. And this isn't just a TikTok hack, either. For example, on the GE appliance website, you can actually search just for dishwashers that have this specific feature, as it is that important to consumers.
You can put fabric softener in the cap on the agitator of your washer
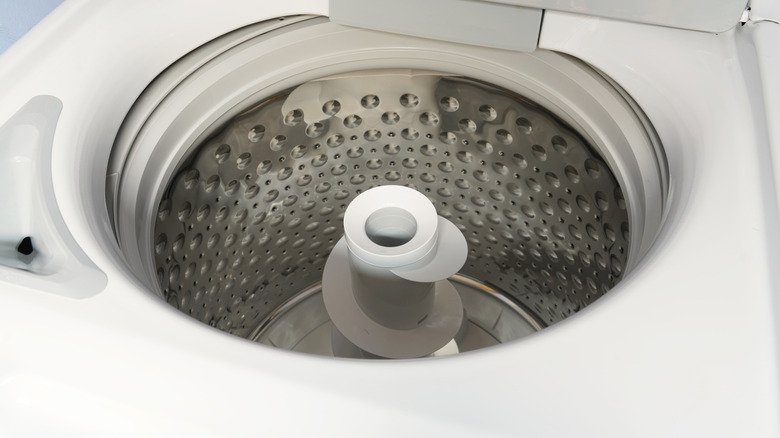
In some washing machines, there is a slot for fabric softener next to the detergent. However, in top loaders with an agitator, there often isn't one. This leads most people to just dump their fabric softener into the main drum of the machine and hope for the best. Yet there is a hack going around on TikTok that insists you should actually put fabric softener into the top of the agitator itself.
Critics of the hack dismiss it as a fake, but this idea is backed up by appliance companies like GE. In fact, adding fabric softener to the dispenser on top of the agitator literally features in this manufacturer's recommendations. While the top of the agitator for some machines might look like a closed cap, in most models, you can twist or pull the top of it right off. Measure out a small amount of softener and pour it inside. This will help to better distribute the fabric soften (as opposed to just pouring it all over your clothes), and release it at the right time during the cycle. There is one caveat though: You must select a rinse option that will properly dispense the fabric softener. In GE washing machines, this might be called "Fabric Softener" or "Deep Rinse." Check the user manual for your washer to determine which rinse cycle you need to select, or look the manual up online.