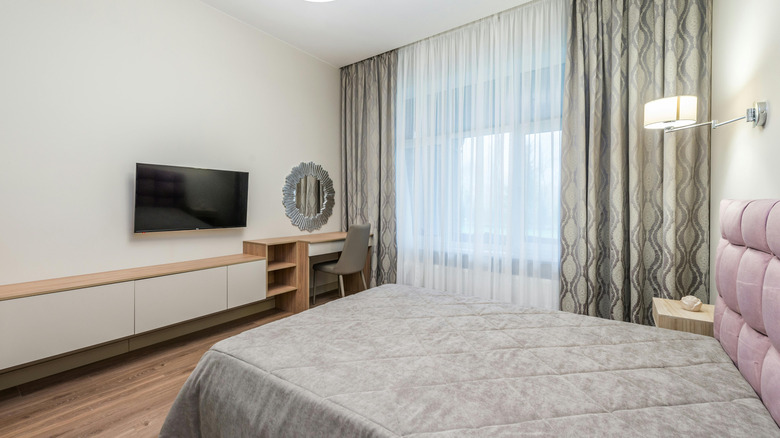
The IKEA DIY For Floating Bedroom Storage That's Functional And Stylish
Bedrooms are our sanctuaries, where we can retreat from the world at the end of the day. As such, they should feel like calming spaces. However, if you lack bedroom storage, it can quickly lead to clutter piling up on the floor, bed, or nightstand — not exactly a soothing sight to behold before going to sleep. If this plight sounds all too familiar, you may want to try this easy IKEA hack that utilizes BESTA frames to DIY a floating storage cabinet. It instantly adds extra storage, reduces visual clutter, and helps make your bedroom more organized than ever. Plus, it doesn't take up any floor space and also adds a stylish element to your space, which you can decorate with any number of accessories like lamps, candles, or vases.
In addition to being a beginner-friendly DIY project, you can't beat the $35 price tag on IKEA's BESTA frames. They come in four different colors, including a faux white oak stain, though you can definitely add your personal stamp with paint, stencils, contact paper, and more. The best part is you can mount as many of them side-by-side on the wall to create a storage cabinet that's as long as you'd like. The key to making them look like one cohesive piece is to add a solid tabletop across all of the individual units.
Whether you want to call the finished product a floating sideboard, dresser, or credenza, here are some tips on how to pull off this chic IKEA BESTA hack that hides tons of storage in plain sight, so you can relax in an organized, clutter-free bedroom.
Hacking IKEA BESTA frames into a floating storage unit
First, measure your space and decide how many BESTA frames you want to incorporate into your floating cabinet. In addition to the frames, you will also need to pick up doors, door hinges, and suspension rails to mount each frame on the wall. For the most inexpensive door option, you can snag the LAPPVIKEN doors for $15 each. For a higher-end look, consider grabbing the BJÖRKÖVIKEN doors, which are $60 a piece and have a trendy fluted design.
After assembling your BESTA frames, install the suspension rails on your wall, and mount each frame in place. Next, attach the hinges and install the doors. Lastly, cut a piece of wood, plywood, or MDF to the length and width of your units (you can also have this cut for free at the hardware store). Place it across the top of the units—you can either glue it down with construction adhesive, attach it with screws, or leave it as a removable top.
To add custom style, paint your wood top to match the frames, stain it to have a beautiful contrasting wood tone, or cover it in contact paper to get the look of a marble countertop. If you opt to paint your cabinet, be sure to use a bonding primer before painting for the best adhesion. Try adding fun patterns like stripes or color blocking, or use a stencil to create a unique design. Create a textural element by gluing rattan sheets to the door fronts. You could also add peel-and stick wallpaper on the doors or inner shelves for a bit of pattern.
