HGTV Stars Share Their Best Tips For Removing Or Updating Ugly Popcorn Ceilings
We may receive a commission on purchases made from links.
While there are plenty of mistakes to avoid when removing popcorn ceilings, there are also plenty of ways to do things right. Your favorite HGTV stars hate this old-fashioned (objectively ugly) textured ceiling look just as much as the next person. Luckily, they are also brimming with solutions and easy-to-follow advice for how to fix things up.
Popcorn ceilings are present in many kinds of homes and situations, so what works for one person might not work for another. Whether you just want to cover it up or remove it completely, there is a tip for that. Plus, if you're leasing and feel like you're stuck looking at the monstrosity every single day, you're in luck because a certain HGTV star has renter-friendly options too. While there are some handy tools that can make popcorn ceiling removal more convenient, the basic equipment required is minimal. If you do choose to use one of the more pro-grade pieces of equipment mentioned below, chances are you can rent a unit, rather than buying one outright. So, even if you aren't the most experienced DIYer, this is a project that you're likely able to tackle, provided your popcorn finish does not contain asbestos.
The Property Brothers show how plaster can cover up popcorn ceilings
If you can't scrape it off, sometimes you can just cover up a popcorn ceiling. The Property Brothers aren't fans of this knobbly finish, so they chose to smooth things out with plaster. "Jonathan Scott plastered over this popcorn ceiling in this 30-year-old house to give it an updated look!" the brothers posted on Facebook when speaking of a recent remodel.
The tools to recreate this at home are easy. A ladder to get closer to the action, a mix like Dap's 10100 Joint Compound, and a tool like this Stainless Steel Flat Finishing Trowel for spreading the mixture. You should plan to wait about 24 hours to let the mixture dry completely, and longer if you live somewhere that's pretty humid. Once dry, you can paint the ceiling to finish the look. However, choose a ceiling-specific paint (often a touch thicker) to cut down on drips. You don't want to accidentally create another textured look!
Mike Holmes says that tarps and disposable coveralls are a must when removing popcorn finish
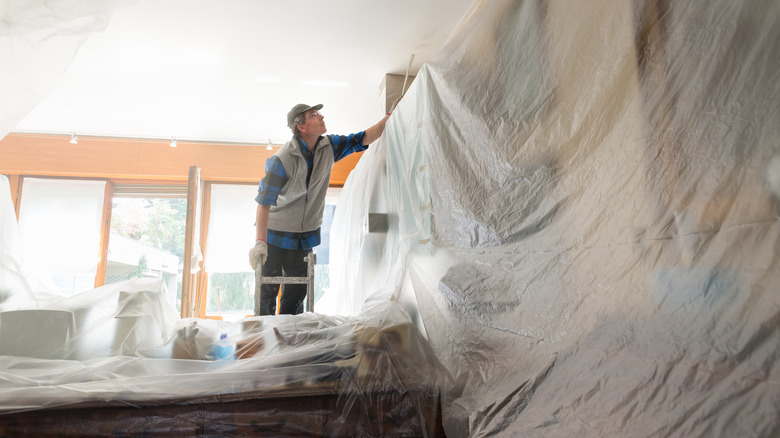
While no one seems to like having popcorn ceilings around, they aren't the easiest to get rid of, either. "Scraping a popcorn ceiling is a huge mess," Mike Holmes wrote for HGTV Canada. To get things ready, use Holmes' popcorn ceiling removal tip and treat the space like you are about to paint it. To start, "move furniture out of the room," he advised. "Anything that can't be moved, cover with a plastic tarp." If you can't get things out of the room, it helps to move all furniture to the center of the room and cover it there, to make working around the edges of the space a bit easier. Once all the scraped-off pieces of ceiling fall onto the plastic tarp, you can pinch the corners together to trap all the waste inside for easier disposal.
Just like painting, you also need the right gear for your body, too. "Wear a respirator and safety glasses at the minimum," Holmes warned. "To keep dust from spreading out into the rest of the home, I find it convenient to have a pair of disposable coveralls that I can toss when the project is complete." You can purchase a suit like Medtec's Disposable Coverall as well as Disposable Shoe Covers to make cleaning up after sanding a breeze.
Michael Holmes, Jr. uses a Planex to speed up the removal process
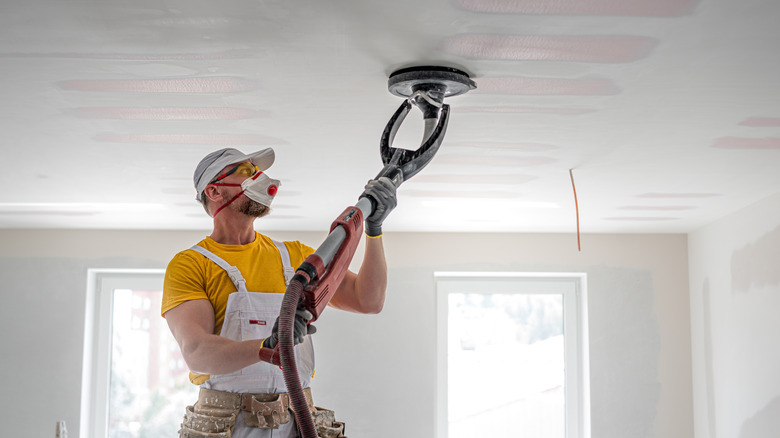
Even within the Holmes family, there is a little bit of disagreement about the best way to handle this situation. "My dad had me working to remove a popcorn ceiling from a home we were working on. Had we done it his way, I'd have been up there for days, spray bottle in hand, scraping the popcorn ceiling off," Holmes Jr. wrote for Make It Right. "Instead, I brought in a tool called a Planex, and told him it was great for sanding down popcorn ceilings while keeping the room virtually dust-free."
A Planex is essentially a drywall sander. If you foresee yourself sanding a lot, a similar tool like the WEN DW5084 Dual-Head Drywall Sander should do the trick. If you don't want to buy one, you can also rent tools like this from Lowe's and The Home Depot. To use, you'll need the typical sanding safety gear, plus some physical strength, as the machine can be heavy and hard to hold up for too long. Hold it flush to the ceiling to get the closest finish. Start in the middle of the room, as the round end of the machine can't get into corners, anyway. To finish off the corners, consider using the scraping method preferred by the senior Holmes. As Holmes Jr. is quick to point out "either method works" and DIYers should feel comfortable pursuing the combination that works best for them.
Ben Napier always uses a spray bottle to dampen things before removal
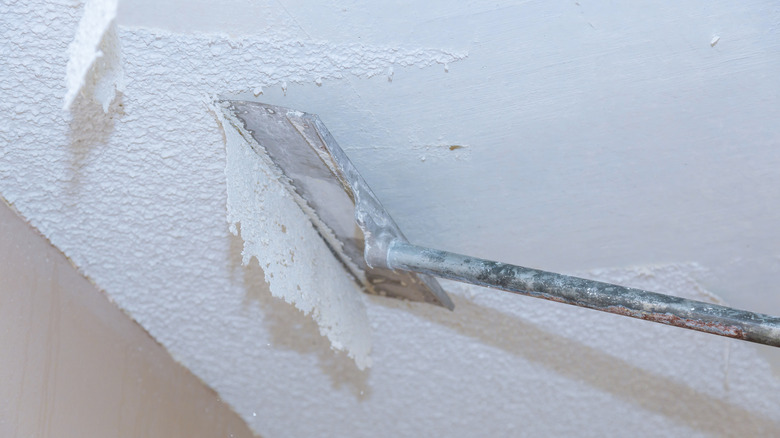
While popcorn ceilings are typically a less-than-loved styling option in the modern design community, "Home Town" star Ben Napier takes things a bit further. "I hate all popcorn! Popcorn ceilings, popcorn, kettle corn," he joked in a Facebook video about the removal process. "But boy, I loved playing the outlaw today." The clip goes on to show what sets his removal technique apart from the rest: A spray bottle.
Napier jokes that he's a Wild West outlaw and shoots his adversary, the popcorn ceiling, with plenty of warm water. Then he takes it down with a scraper after letting it soak in for about 15 minutes. If the material is nice and wet, it's easier to scrape off. This way, you aren't creating heaps of dust that flies everywhere, but instead you will have manageable clumps of ceiling to clean up. That said, just like Napier does in the clip, you should still wear protective goggles to avoid eye injuries. While Ben uses a small sprayer, we'd recommend a larger pump pressurized version like this Chapin Lawn and Garden Sprayer to make the job go faster.
Jeremiah Brent hints that renters can use fabric to cover the texture
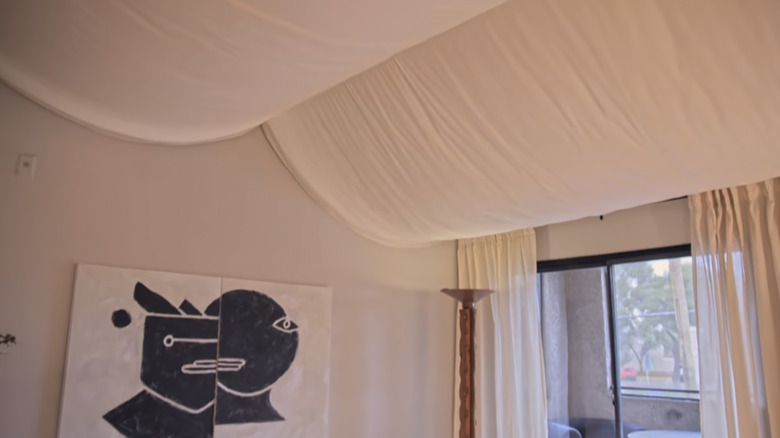
If you are renting a home, you might feel stuck with your popcorn ceiling because you can't make any major changes to the property. However, Jeremiah Brent comes up with a great temporary solution. In Season 9, Episode 8 of "Queer Eye," Brent helps out an apartment dweller by creating a false ceiling with fabric. "This is the best tip for every person who ever has an apartment," co-host Karamo Brown said during the big reveal on Netflix. "This gives a lot of drama," Brent said. "It covers that vaulted popcorn ceiling which wasn't doing anybody favors."
While the episode doesn't show how Brent installed the fabric, as it tends to focus more on personal growth, viewers are shown the tented fabric that billows down on each side of a central point. To recreate, use something like this ultra-long Byondeth Adjustable Curtain Rod or a plank of wood cut and mounted to fit the space. Then, secure the fabric in the center and to the top of the wall on either side. You can use stitching to slide the tension rod through a loop in the fabric to hold it in place. Or, a tool like YeaHome's Upholstery Heavy Duty Staple Gun works well if you're using wood. If anything, remember to use fabric that is a touch larger in measurement than the ceiling, so it billows. Cotton is a great choice and it is easy to clean when the need arises or an option like AK Trading Co's. Muslin Fabric is designed for draping.
Jenn Todryk uses a paint rig to remove popcorn texture
Another HGTV star, Jenn Todryk, says that renovating popcorn ceilings is well worth the time and money. "Unfortunately, popcorn ceilings are one of those things that just age your home the minute you walk into it. It is the sad truth," she told D Magazine. You might be tempted to just paint over the ceiling, yet she warns that this only helps a little bit. You really need to just get rid of it altogether. "It's actually not hard to take off. I've done it many times now myself. It's just really messy," she continued.
To clean things up, "You can rent a water sprayer — you literally spray warm water on it, and it makes it wet, and then you scrape it off, but it gets everywhere," Todryk shared. This is similar to the technique that the Napiers use. However, to take things up a notch, she recommends using a sprayer like Vonforn's Paint Spray Gun instead of just a spray bottle. This way, you can cover large amounts of the ceiling at once in a more controlled way and things go quicker than they might with a smaller canister. After waiting about 15 minutes for the water to soak in, you can use a large trowel to start scraping. As with other methods, be sure to lay down something like Cartman's Multi-Purpose Green Tarp to catch debris as you scrape. Then, consider painting the ceiling for a more polished final look.
Laurie March thinks it's a job for the professionals
If you plan to remove a popcorn ceiling on your own, remember that in the era when many of these popped up (if you will), there was a different understanding of the safety of building materials. Because of this, you might run into asbestos. "This is not a small job. This is one of the places where I'd really suggest you bring in a professional," HGTV Remodels' House Counselor Laurie March said, per YouTube. "Here's why: popcorn ceilings are also known as acoustic ceilings. It's a spray application that builders have often used to hide all the errors that can be in your ceiling."
She explains that the material was used to make things look a little bit more perfect, but comes with a hidden downside. "If your home was built before 1979, or your ceiling was applied before then, chances are good it has asbestos in it," she warned. Asbestos fibers are strong and heat-resistant which is why they were used so much, but now we know that breathing it in can cause serious health problems like lung disease and cancer. So, it's best to let professionals with the right safety gear take care of things. Anything before 1979 is an instant call-in, but for things built after that, consider using an Asbestos Home Test Kit that you can send in to a lab for peace of mind before you get started on the demo.
The Property Brothers have also used drywall to conceal stubborn popcorn texture
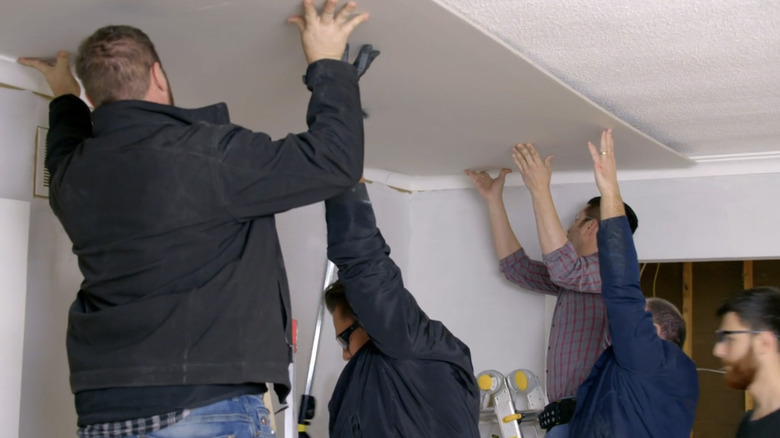
Sometimes, a popcorn ceiling just won't come off. And if you can't get rid of it, but hate looking at it, there is a third option: Covering it up. The Property Brothers did just this during Season 3, Episode 17 of their hit show "Forever Home." The construction crew just couldn't get the texture off without the ceiling, so Jonathan came up with the genius hack. He decided to just cover the ceiling with drywall instead. It's a quick fix, but still took a little bit of finesse. However, the end result looks fantastic. "We don't want to lose a bunch of ceiling height," Jonathan said during the big reveal, per Realtor.com. "But the method we're going with is applying one-quarter inch drywall. It doesn't take a lot of time to install, but you instantly get that smooth ceiling."
To get the same look at home, all you need to do is screw a second layer of drywall over your ceiling. The caveat that Jonathan reveals in the episode, however, is that the new layer needs to be thin enough that you can screw it into the existing ceiling joists. For a more polished look, you can learn how to mud and paint drywall or call a pro to give you a seamless end result. After it dries, apply a high-quality paint to create a smooth finish that will make you forget all about the popcorn ceiling underneath.