Keep Tool Rust At Bay With A Simple DIY Solution
We may receive a commission on purchases made from links.
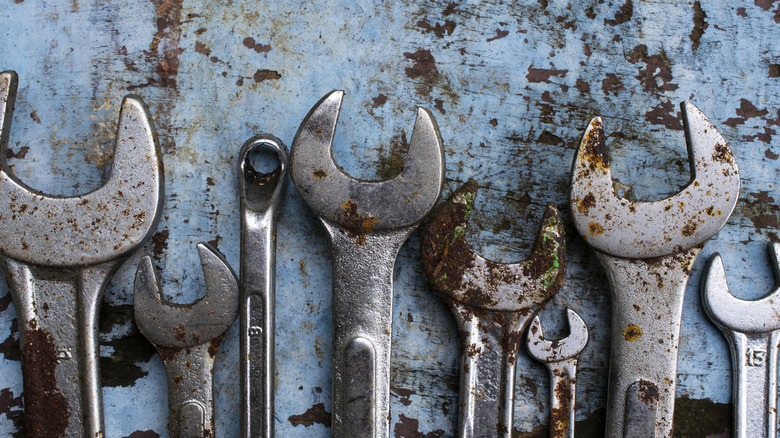
Rust is undeniably the bane of any tool owner's existence. It not only tarnishes and weakens the tools that every homeowner should have, but it also affects the way you work and your finished product. Rust can even jeopardize your tool's longevity, which can cost you time and money in the long run. But this headache is avoidable if you use a few genius tricks to prevent metal from rusting. The most basic tip is to consistently keep your tools well-oiled. This creates a protective barrier that prevents air and water from reacting with the metal surface, stopping it from corroding. The good news is that you can make your own rag-in-a-can oiler that allows you to quickly and efficiently lubricate your tools to keep them rust-free.
This straightforward and cost-effective DIY project will create your own self-contained oiling station with minimal effort, so you can incorporate rust prevention into your routine without skipping a beat. If you do this well and are able to upkeep your tools, you might not even need to know the secret ingredient you can use to clean up rust. Consistently oiling tools after each use can feel like a hassle and eats into valuable time that could be spent on your projects. But this simple DIY solves this problem. Plus, you can store your rag-in-a-can oiler alongside your tools for easy access.
How to make your own rag-in-a-can oiler
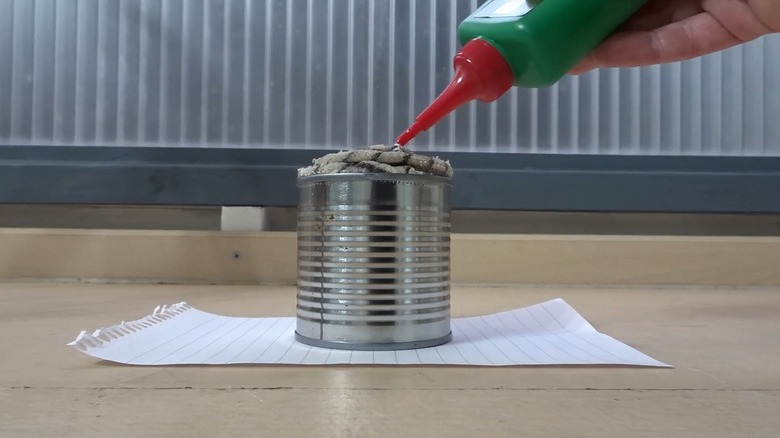
To make your rag-in-a-can oiler, you need a clean metal can, a large rag, and tool oil, like 3-In-One's Multi-Purpose Oil. You can repurpose an old shirt or sock for the rag, and an empty vegetable or bean tin for the can. The first step is to clean the can to prevent debris from transferring to your tools. Then, coat the interior with your oil. Make sure that the bottom and the sides of the can are adequately covered.
Fold your rag and roll it into a log to create a layered pad that fits snugly inside the can. The rag should be tightly packed in and protrude roughly half an inch out the top of the tin. Use a flathead screwdriver to drive the rag further into the can. Once it's in place, slowly pour your oil on top of the cloth. You want the rag to be damp but not dripping. Then, press the rag down lightly to ensure even distribution and leave it to sit for a day before using.
Now, when you're finished using a tool, simply rub it over the oil-soaked rag before storing it. But make sure that the tools are clean and dry before using the oiler. Add more oil as needed to maintain the lubricant's effectiveness and replace it with a new one if it becomes dirty. With consistent use, this DIY solution can save you time and keep your tools in excellent condition.